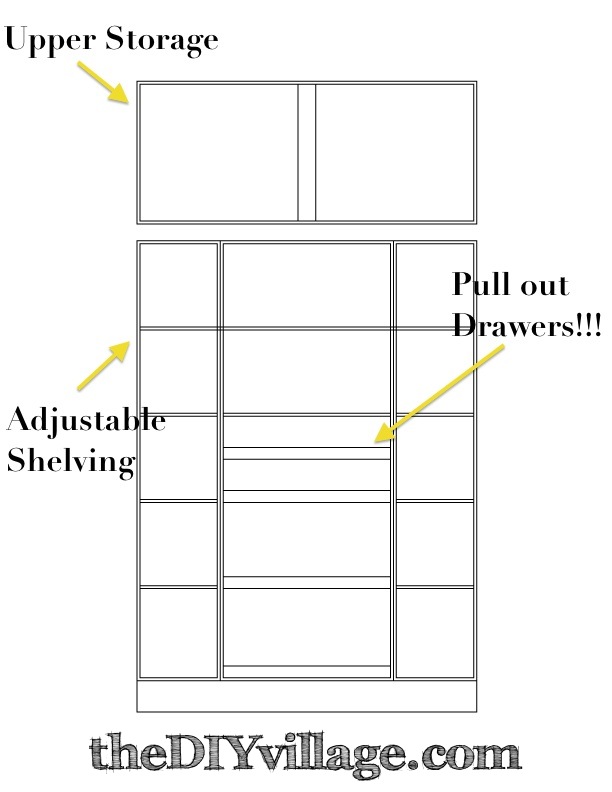
When I last left you all we had to go back to the drawing board with our kitchen pantry design. I couldn’t bring myself to do another drawing, so Matt whipped us up a quick kitchen pantry in Adobe Illustrator.
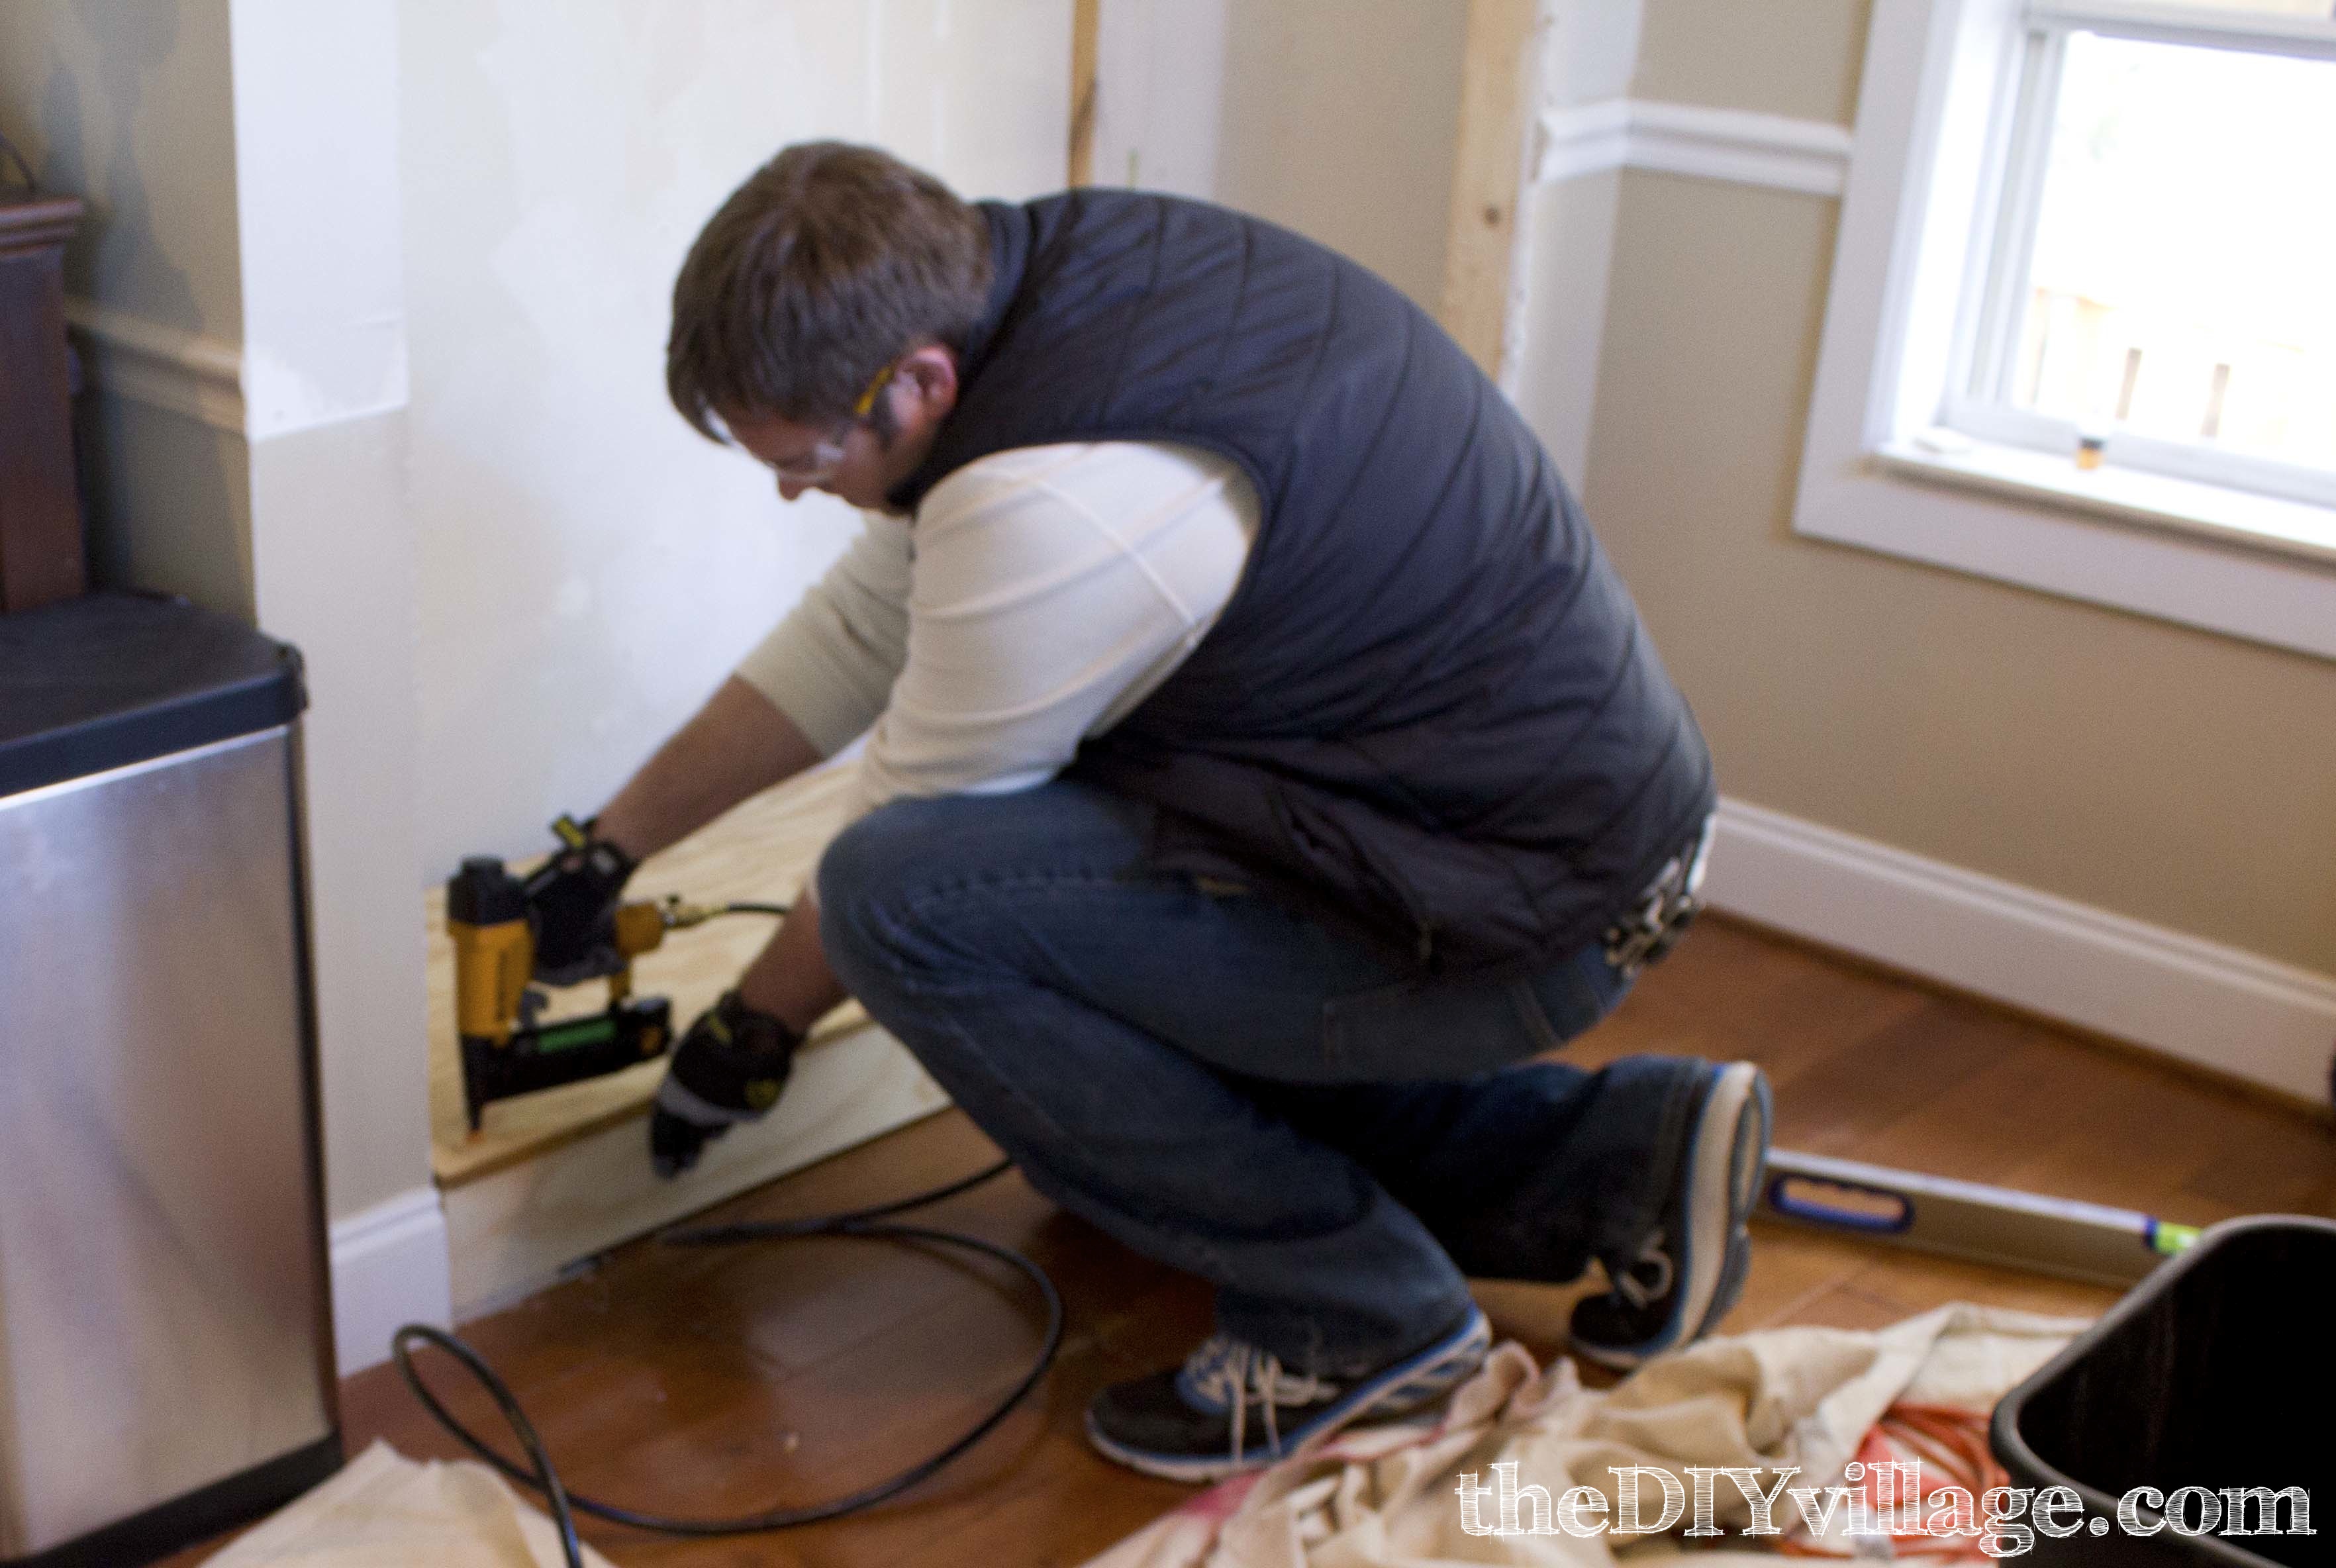
We got right to it and started building our kitchen pantry using our Kreg Jig Jr.. (Don’t forget to check out where Matt tells you how to use a kreg jig jr)
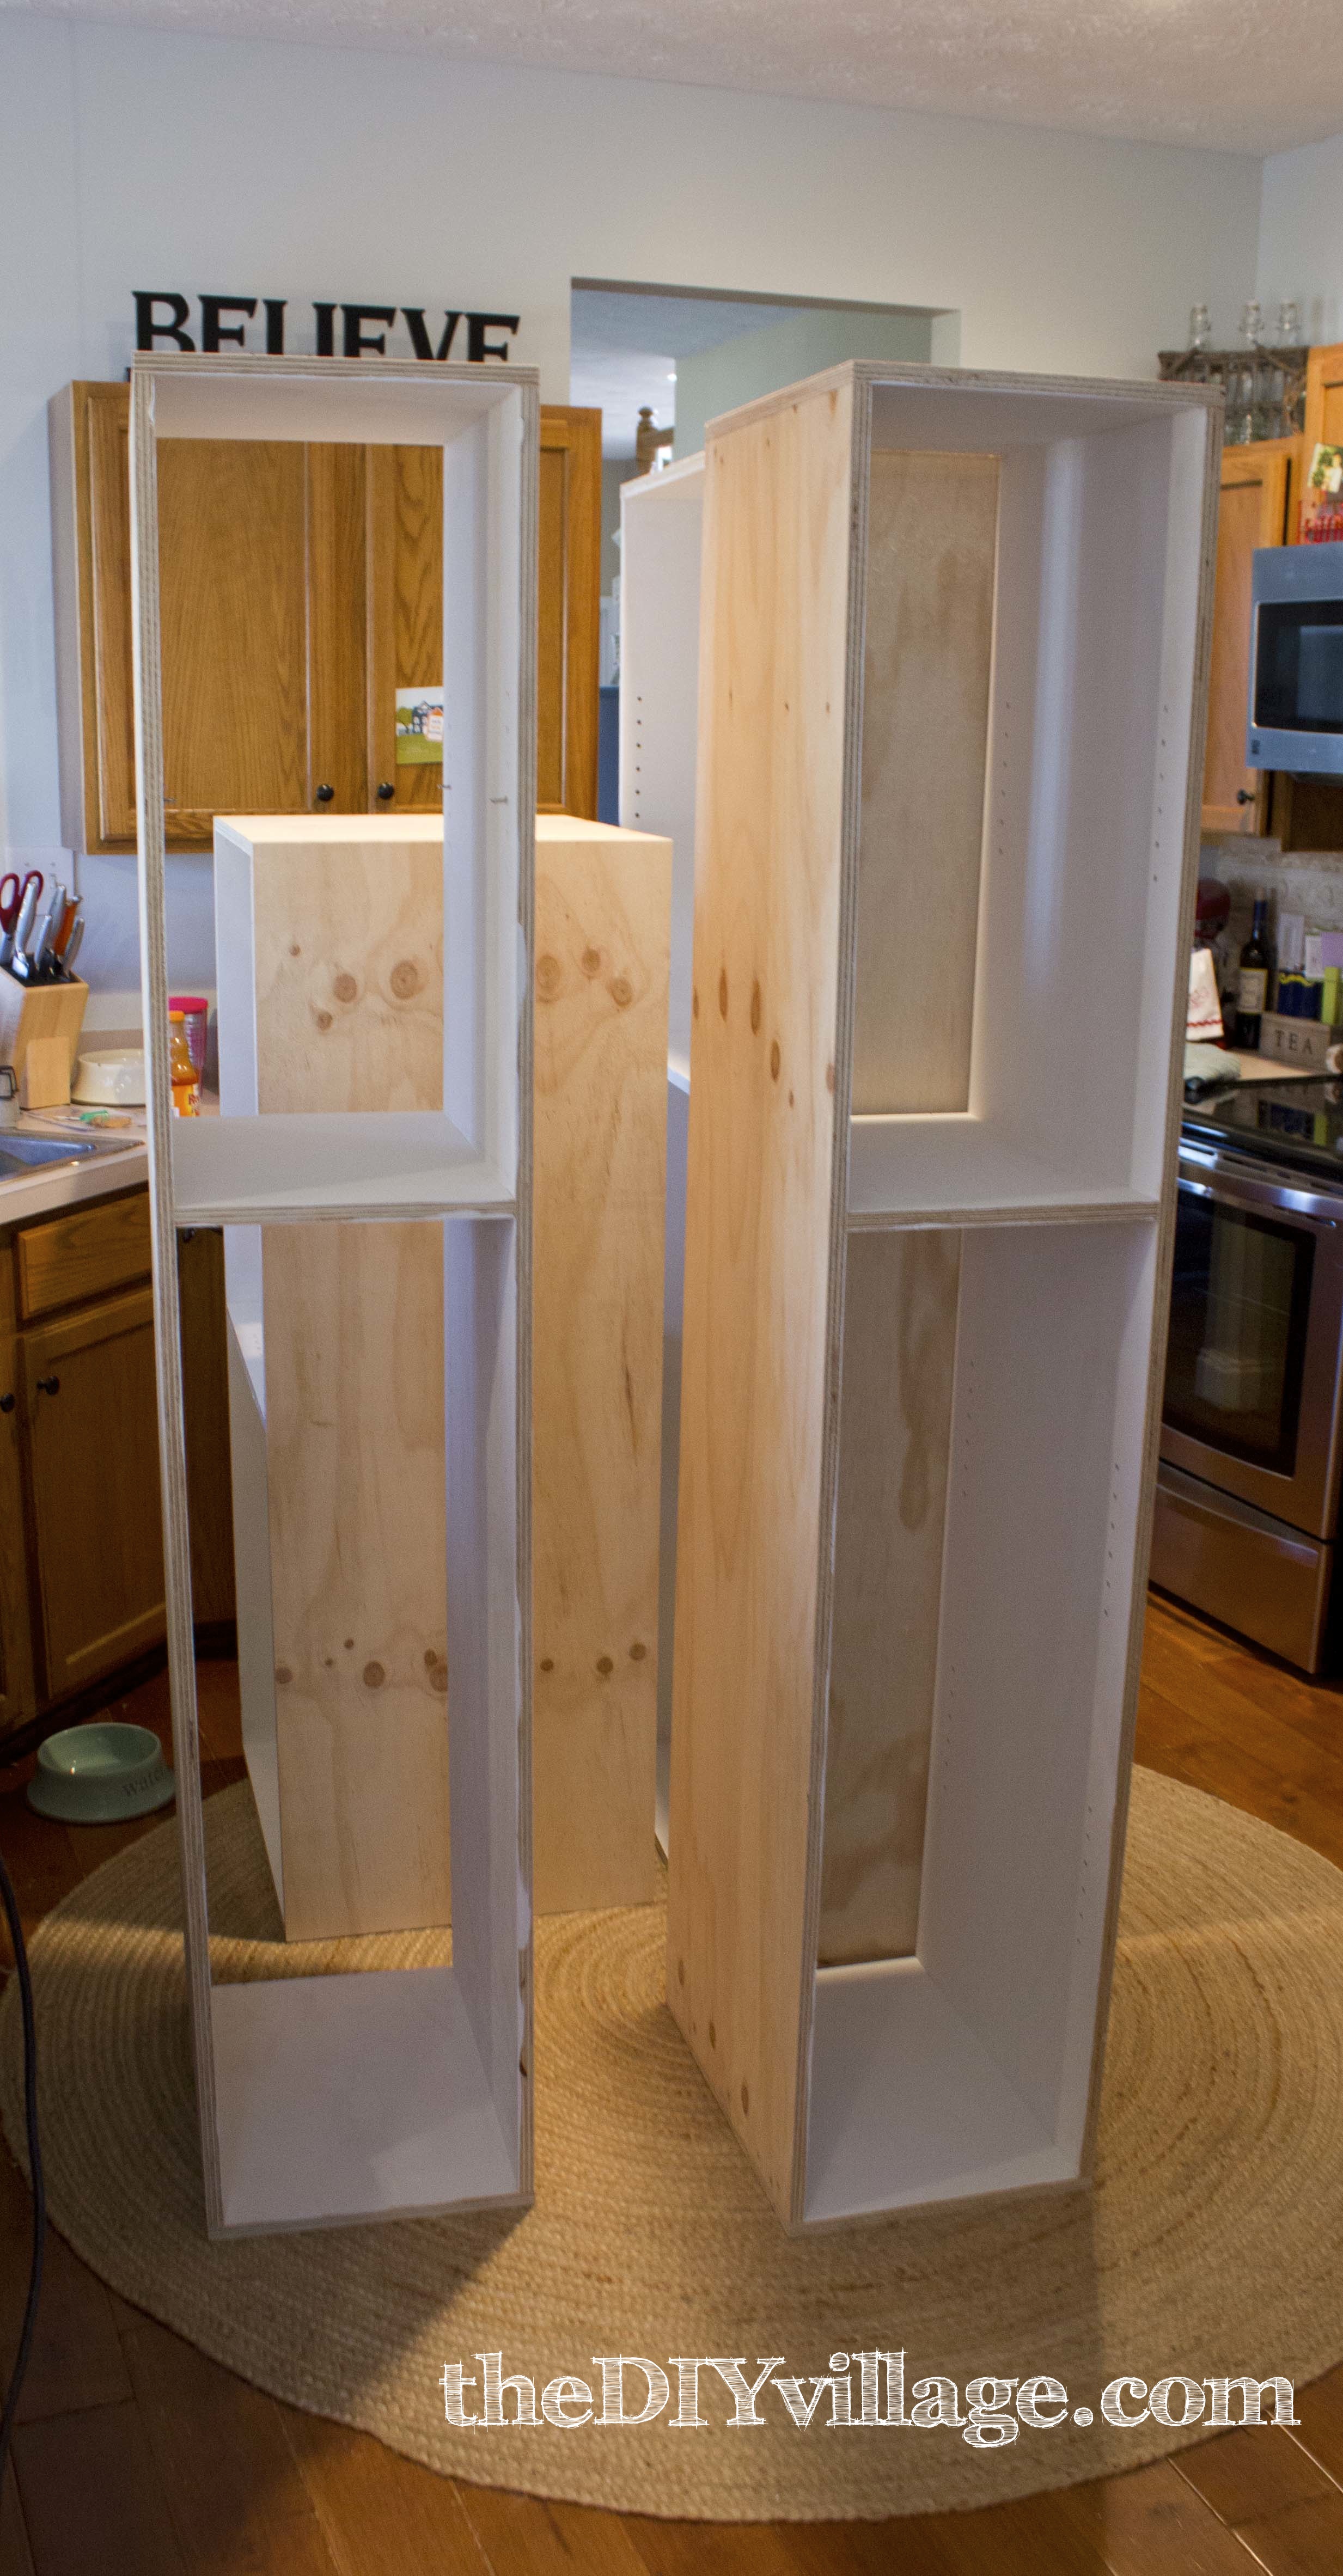
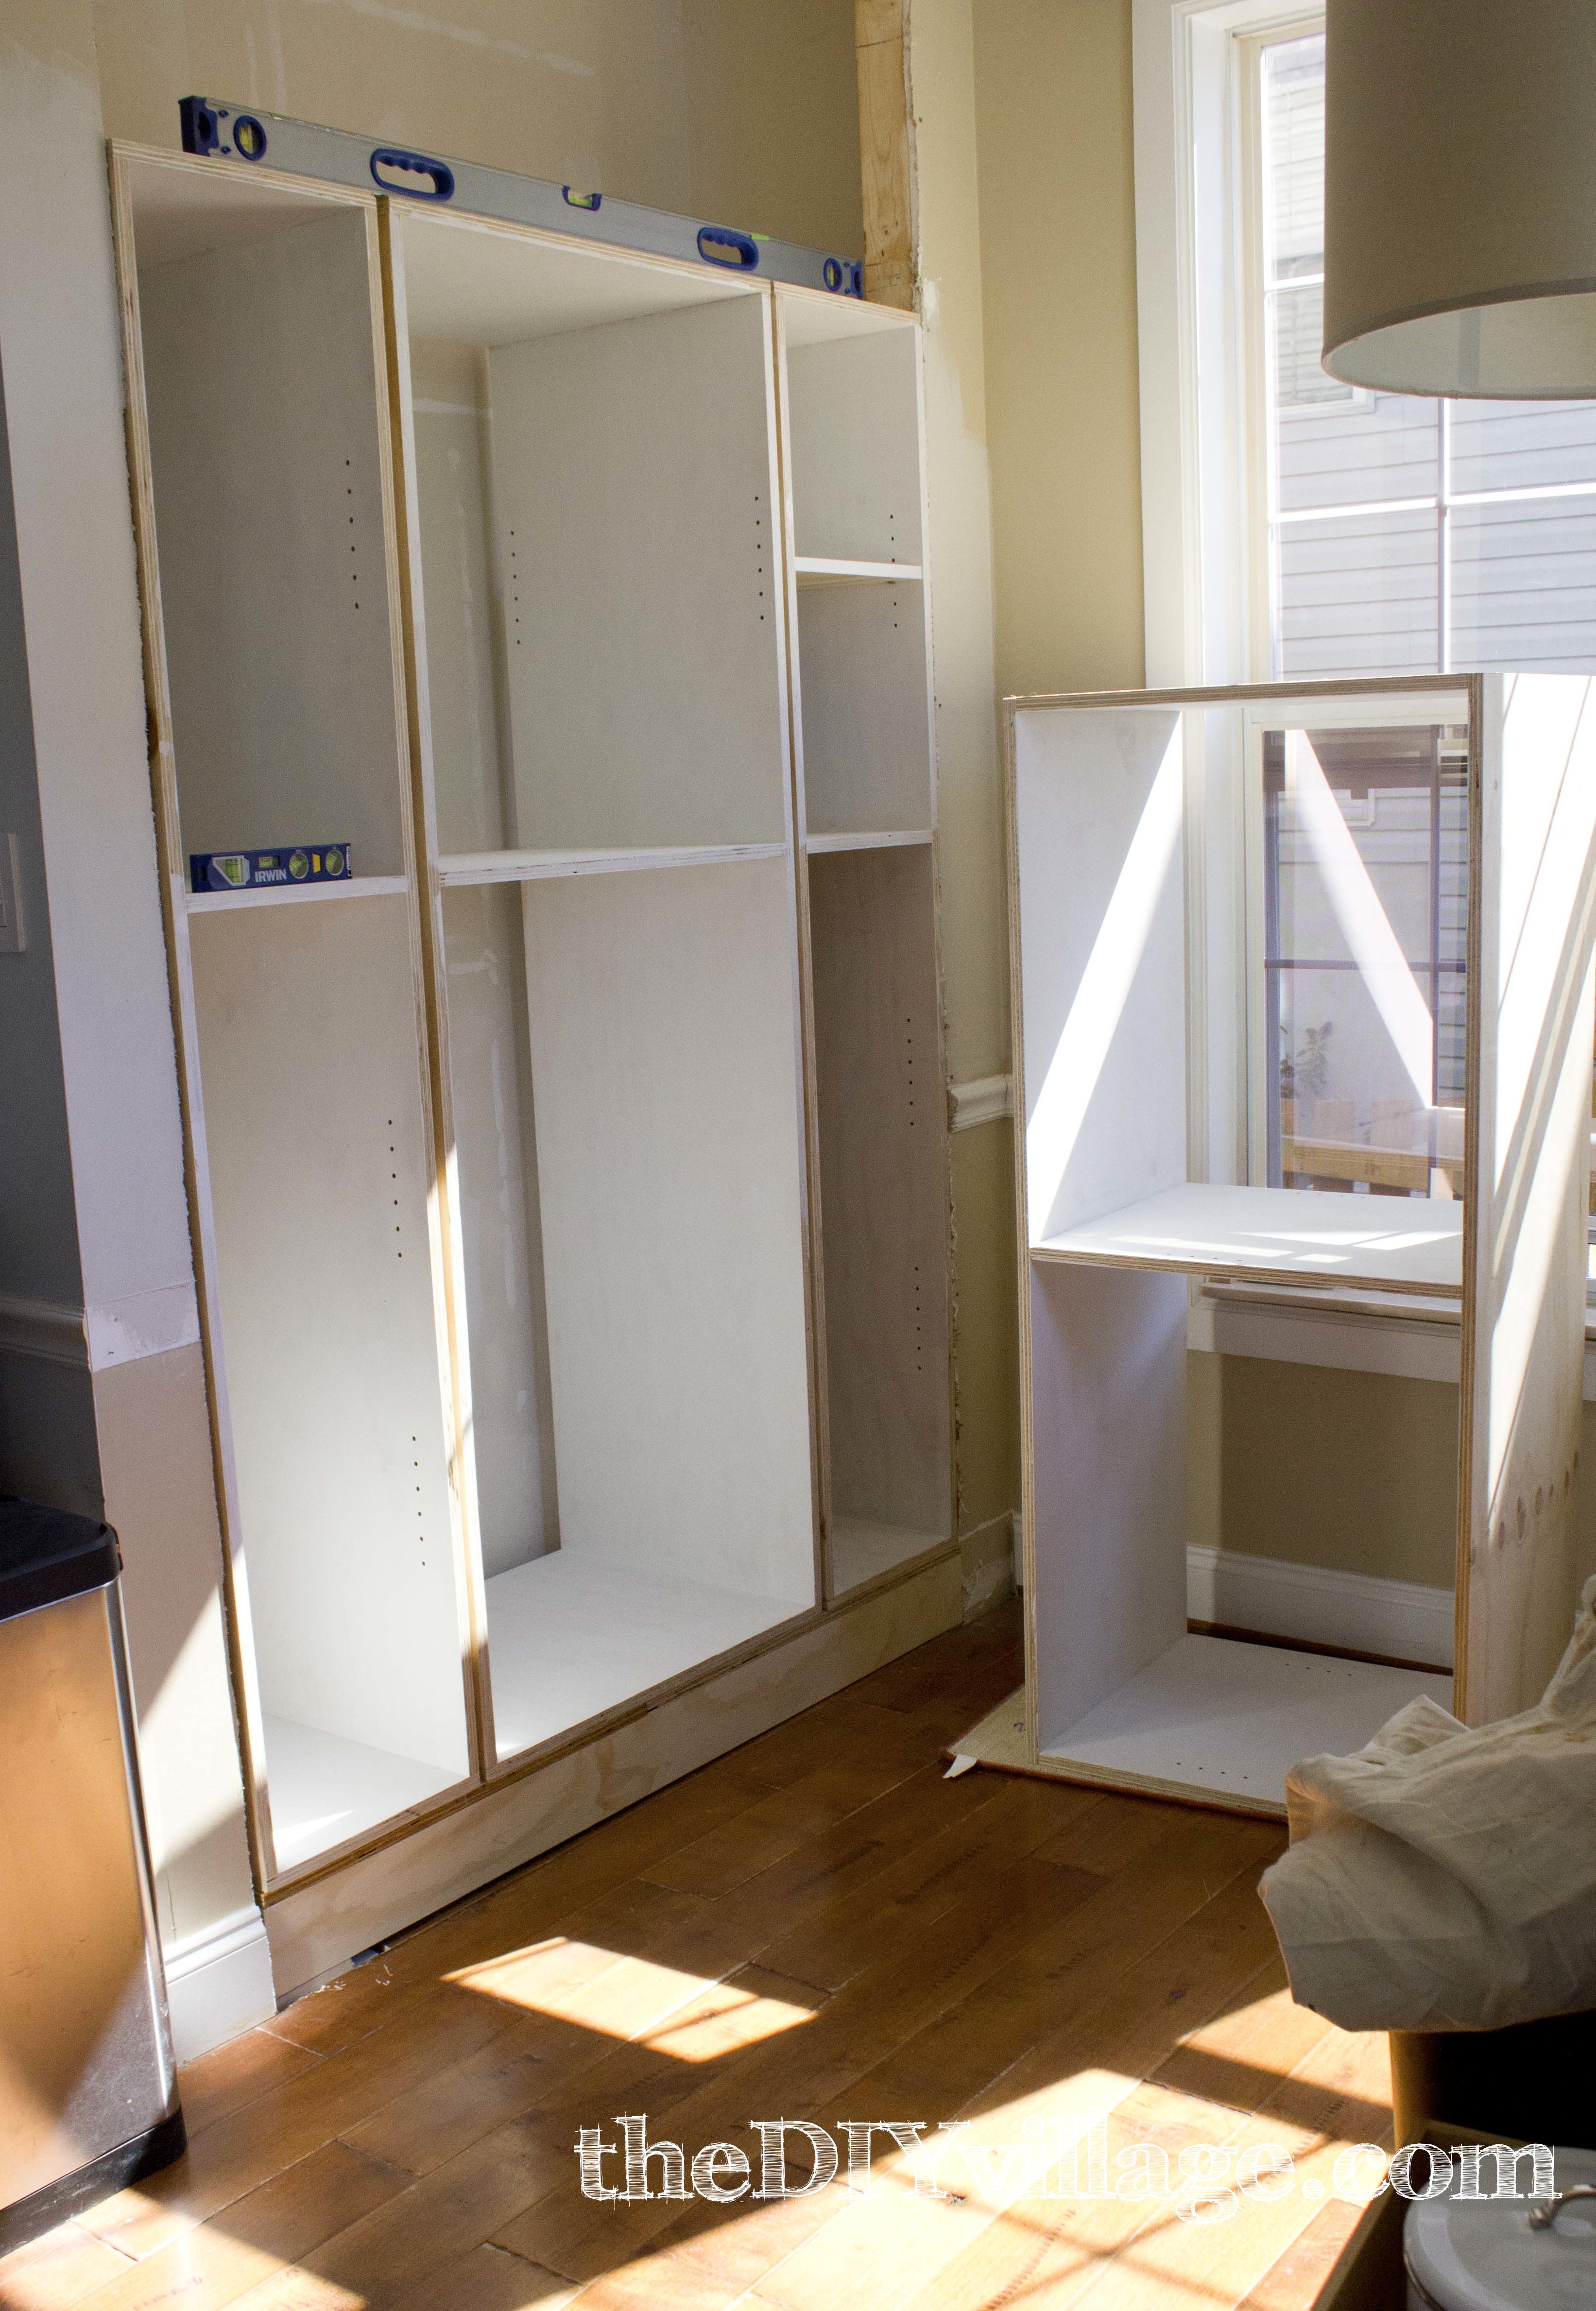
With the pantry cabinets built, Matt wanted to do a dry fit to check the space.
And I wanted to do a dry fit to make sure all my most important items would fit … like my margarita machine!
A girl has to have her priorities after all.
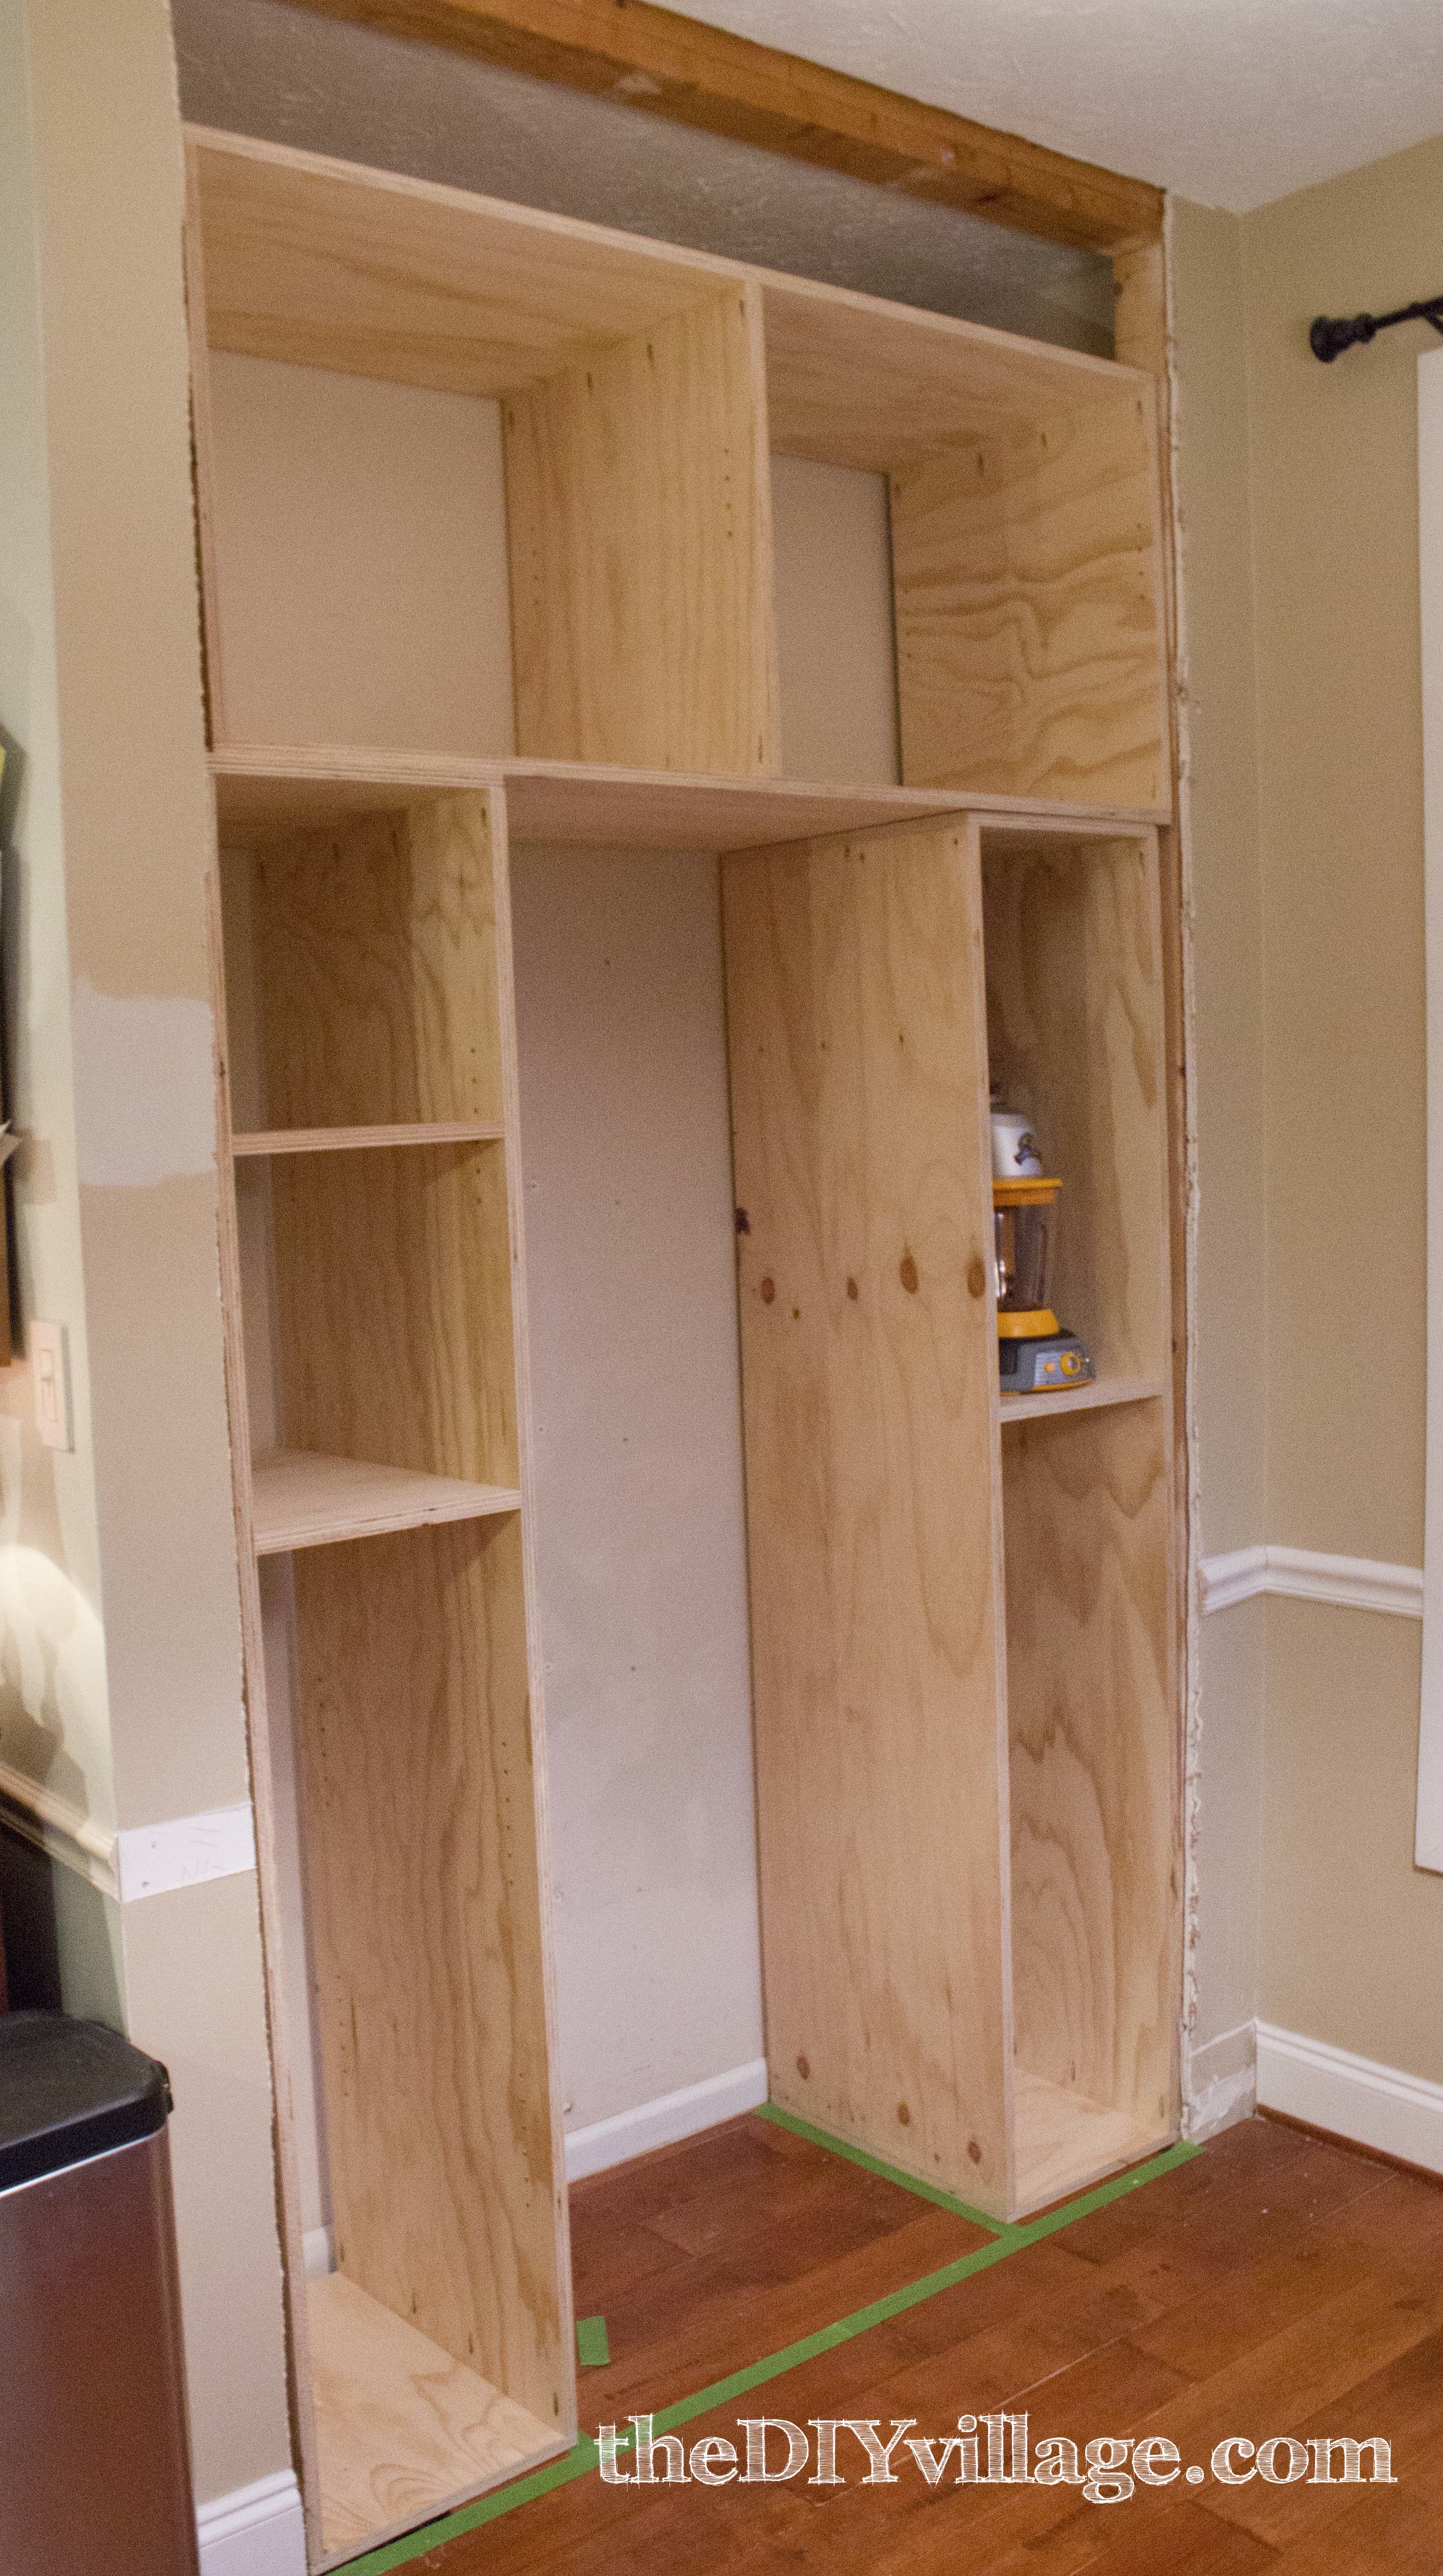
Next, Matt moved onto building a platform to raise the cabinets up off of the floor.
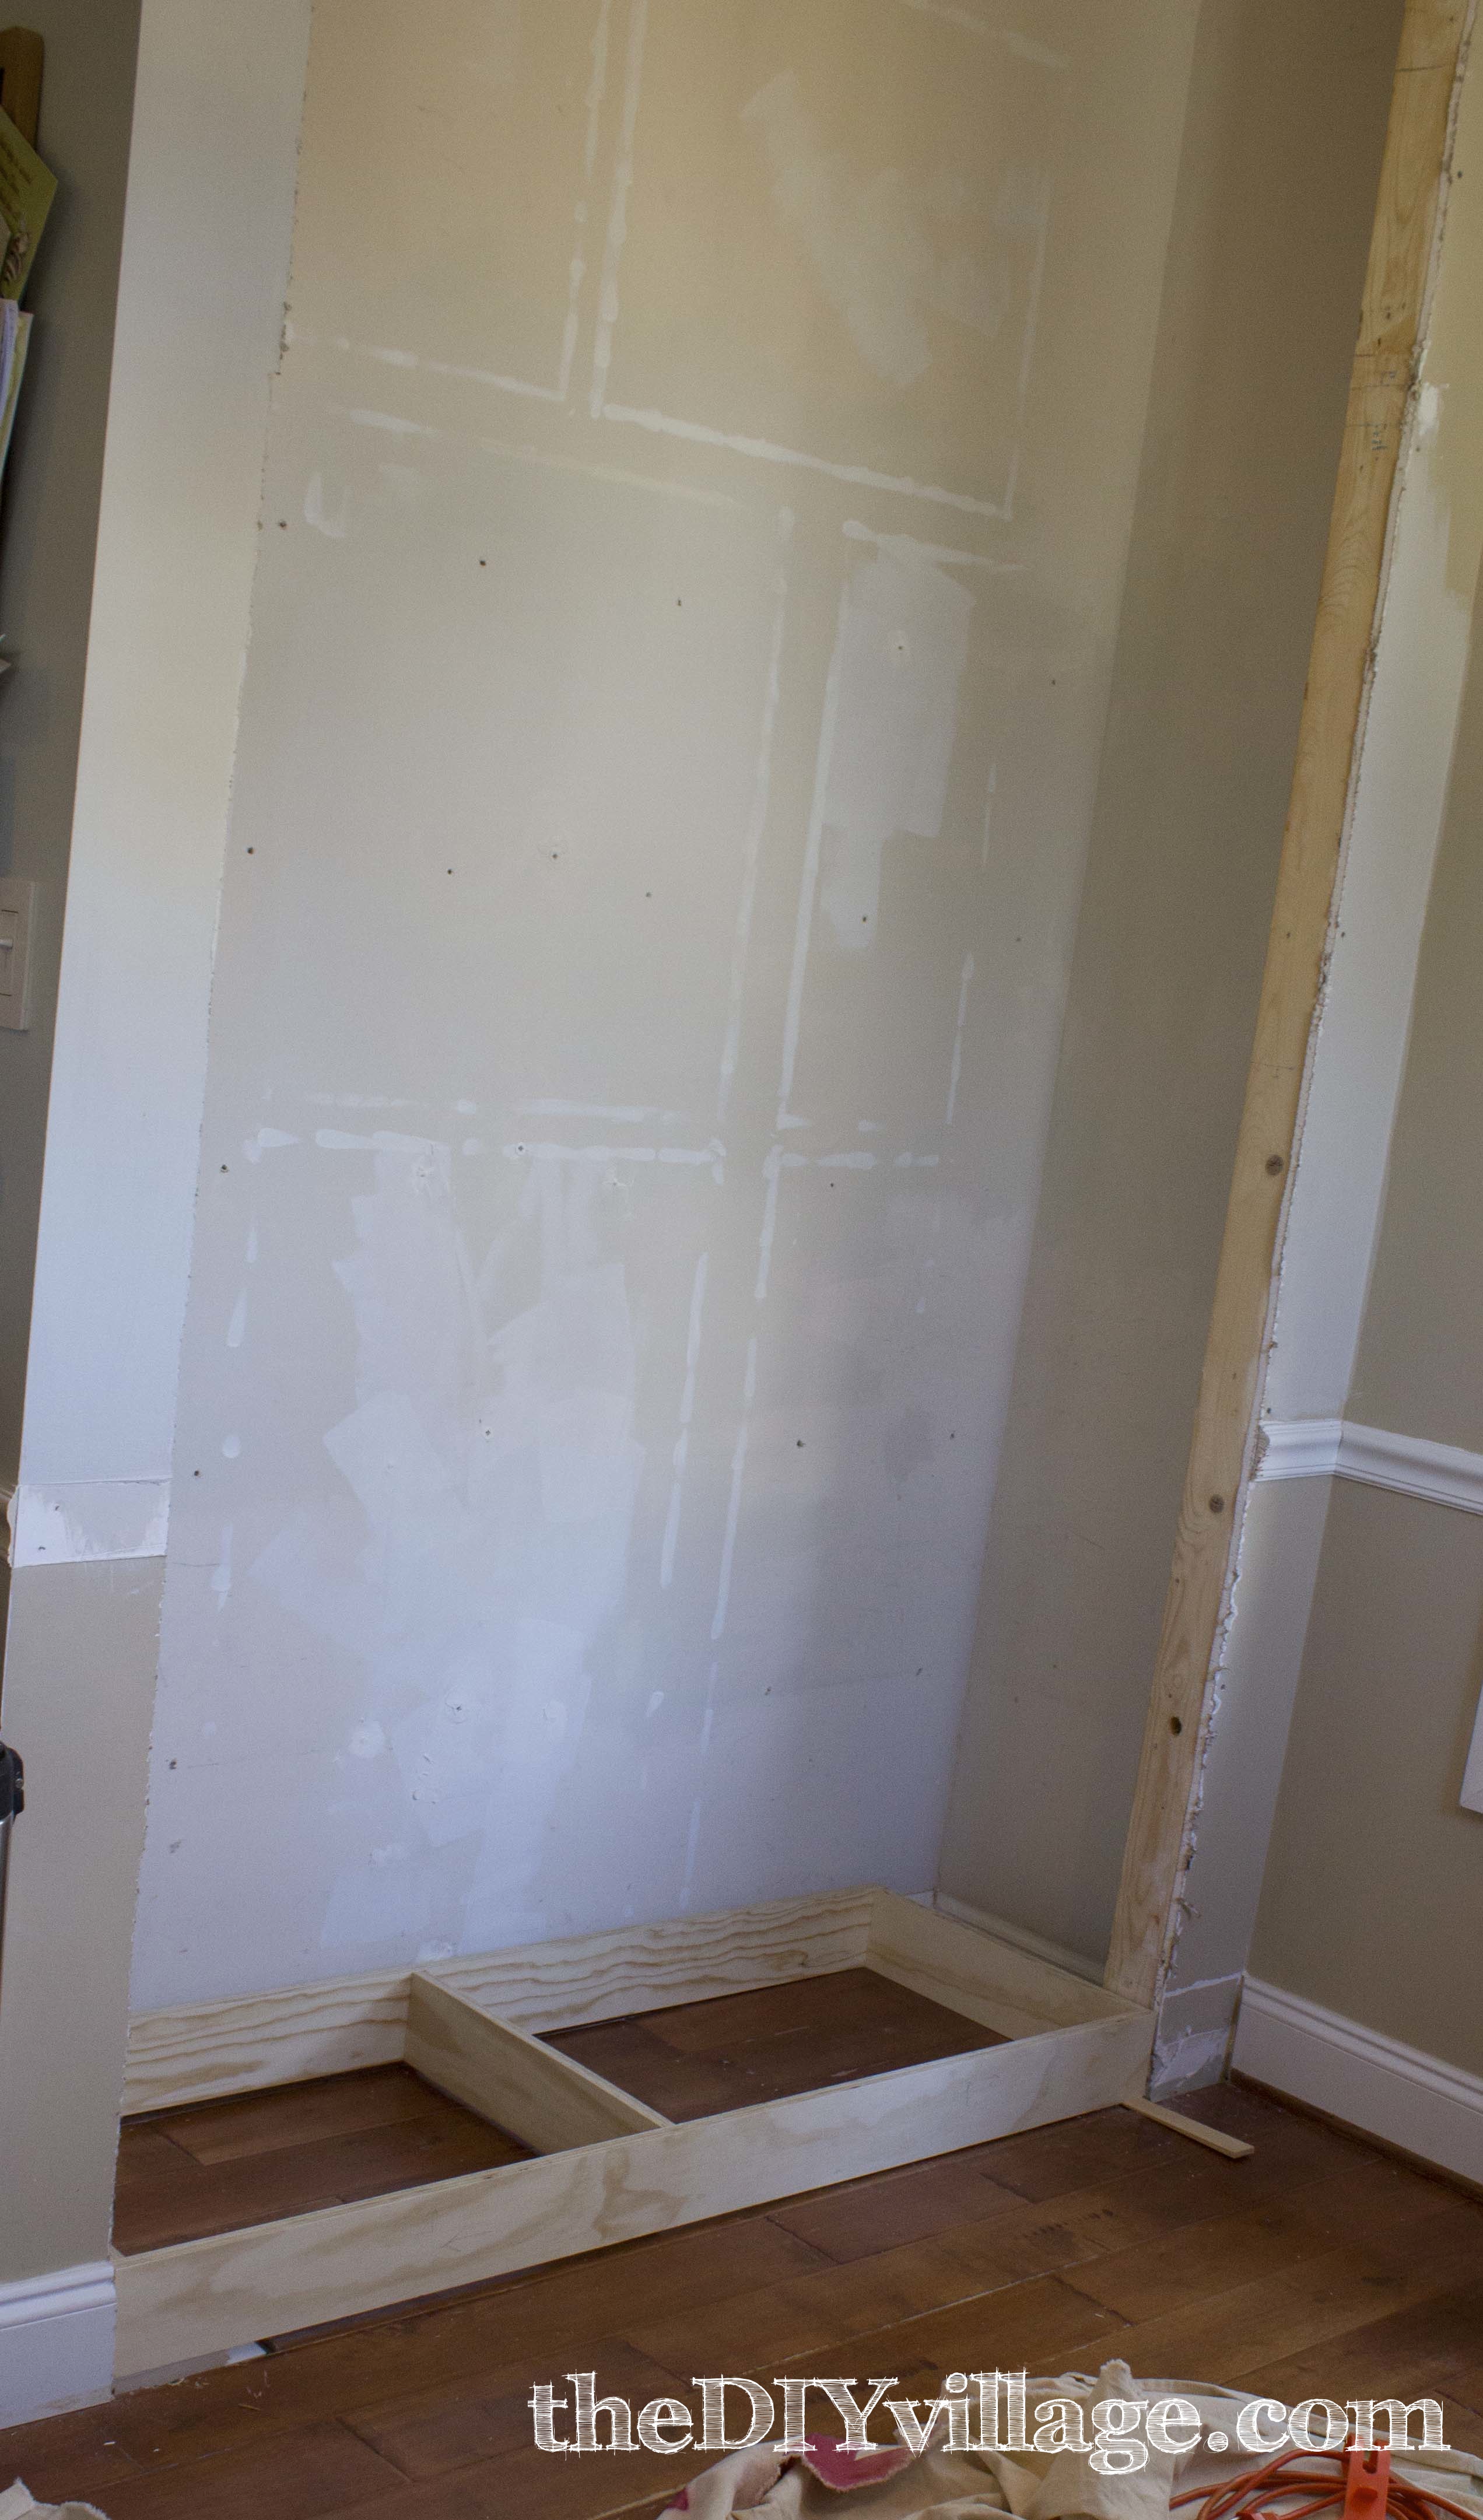
I really wanted the kitchen pantry to have a custom built in look. Matt had a plan of how to make that happen and started building the platform frame.
After the platform was built we did another dry fit and checked for level.
Then it was my time to shine!
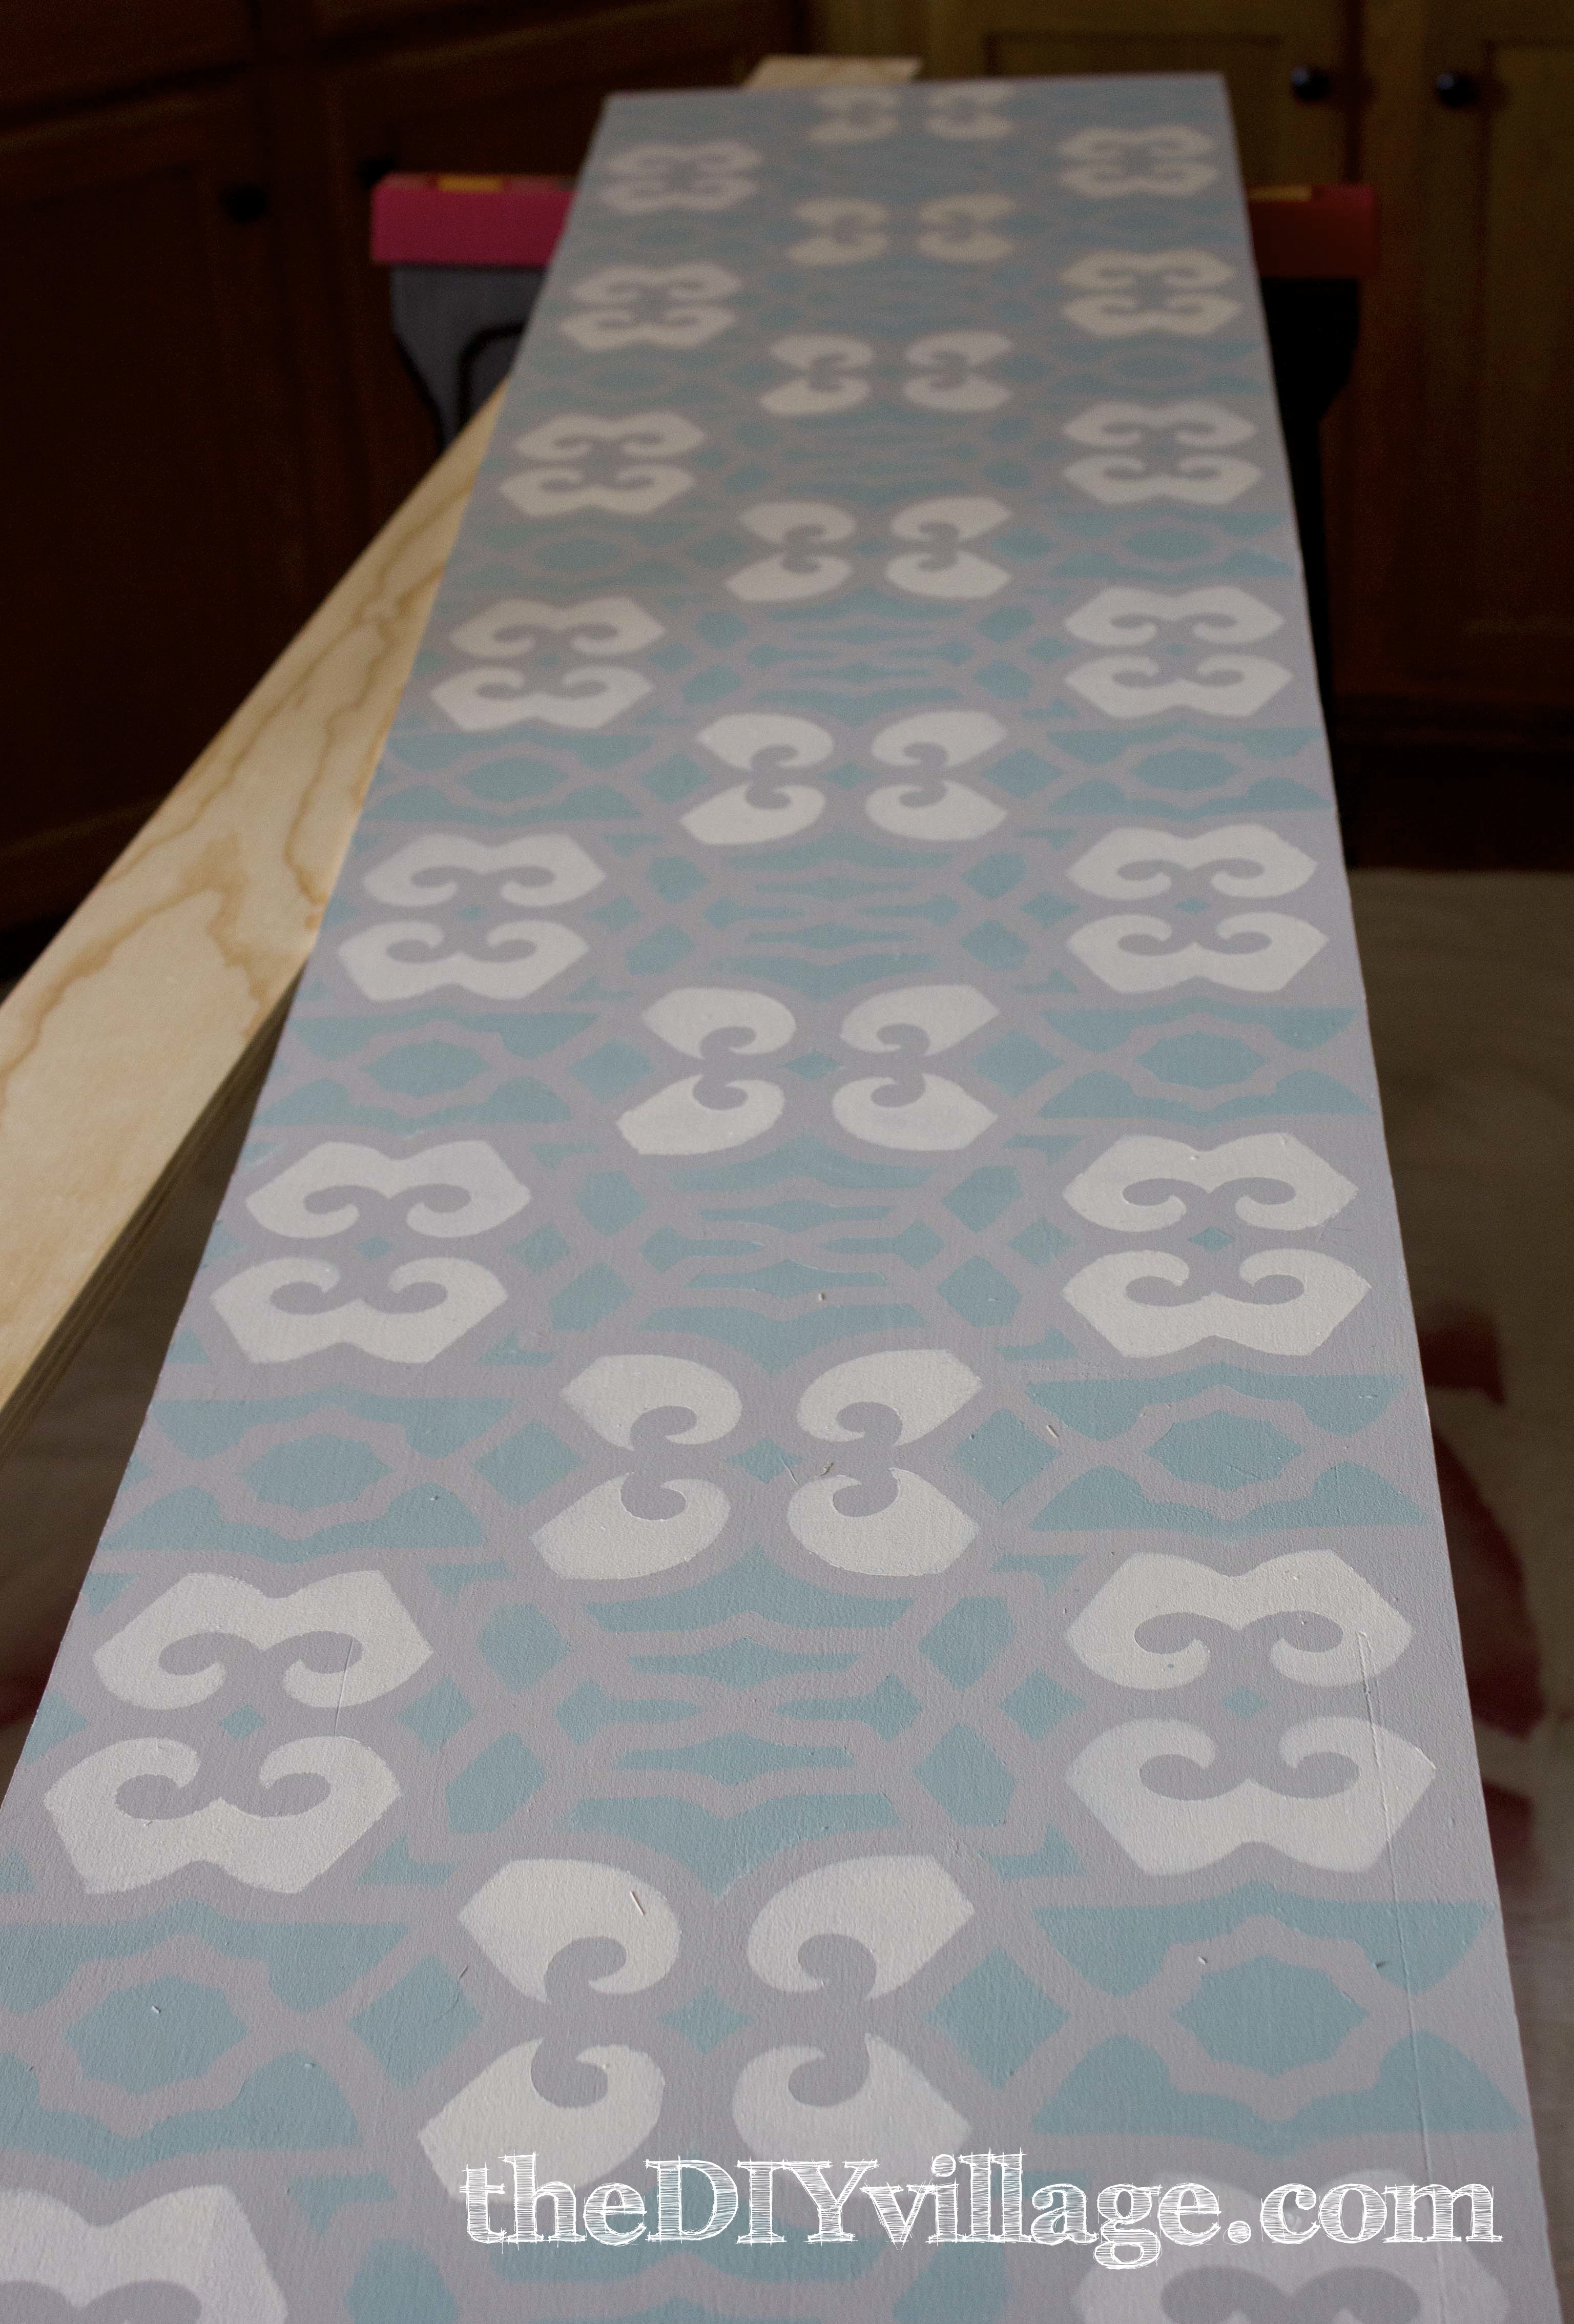
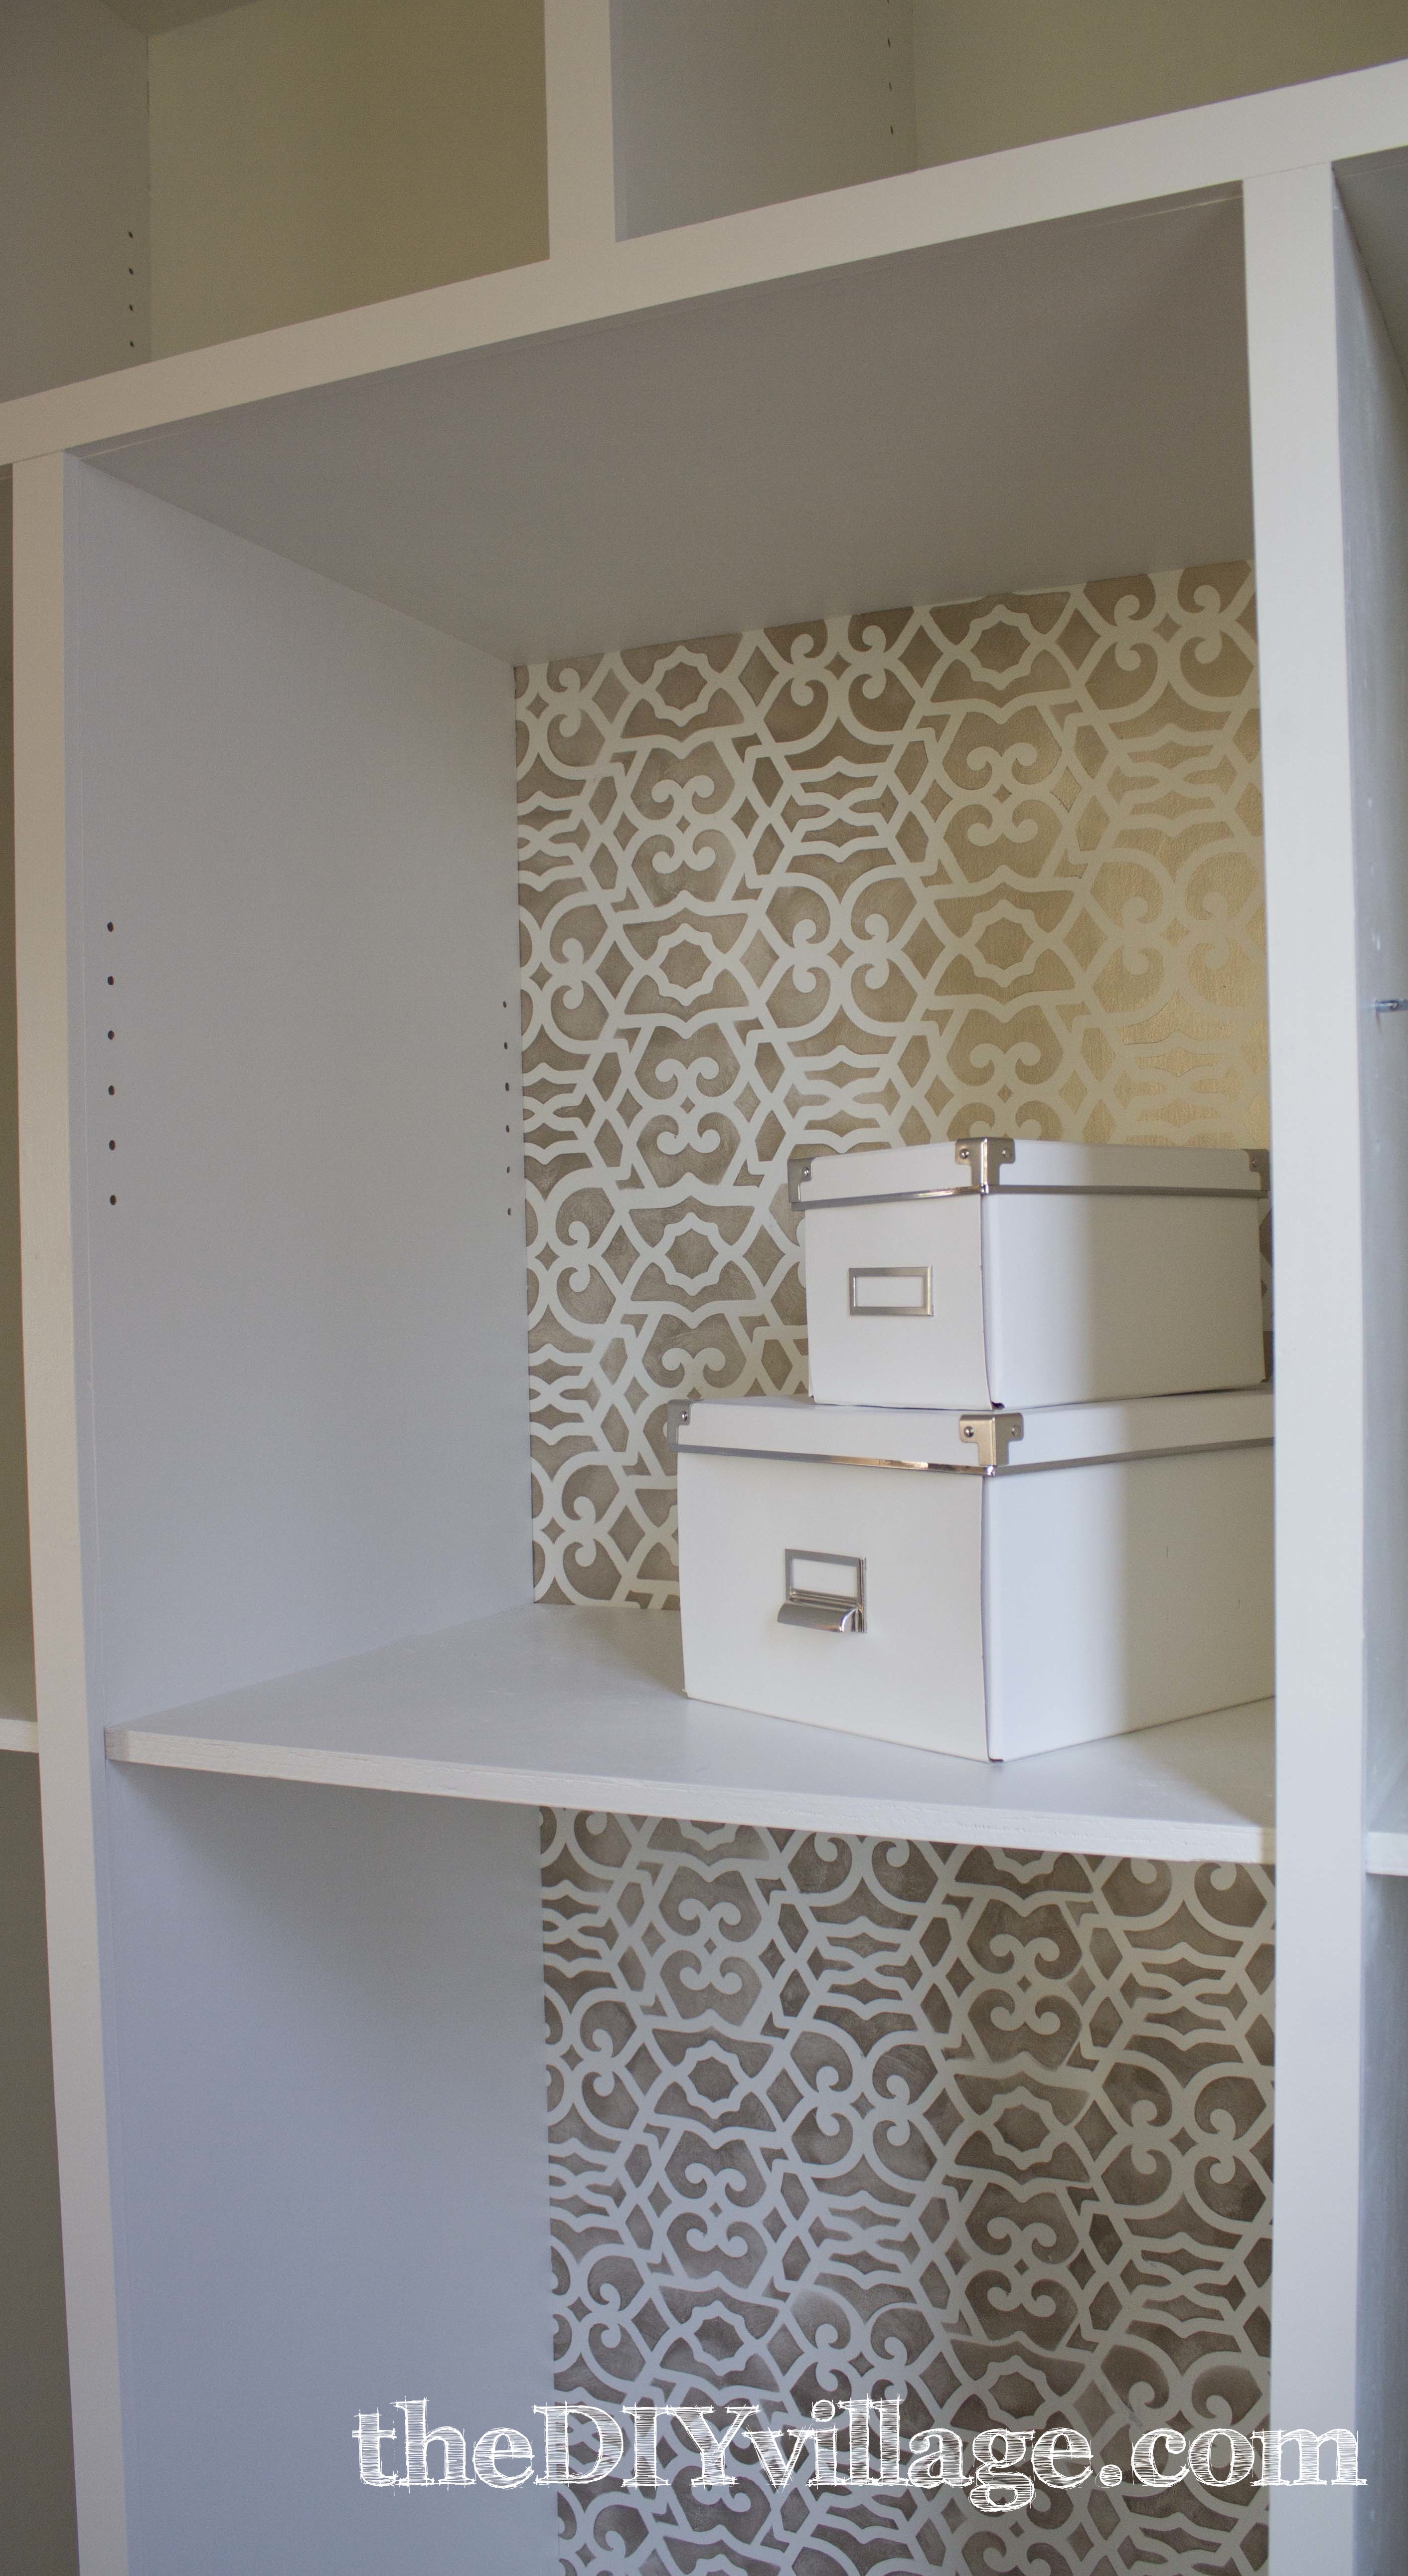
Time for me to do my special stencil treatment to the back of the kitchen pantry built in’s.
I decided the Chez Sheik furniture stencil and the 1 1/2″ stencil brush were perfect for my project.
They were also sending me the Smoked Oyster Stencil Creme but, it was on back order.
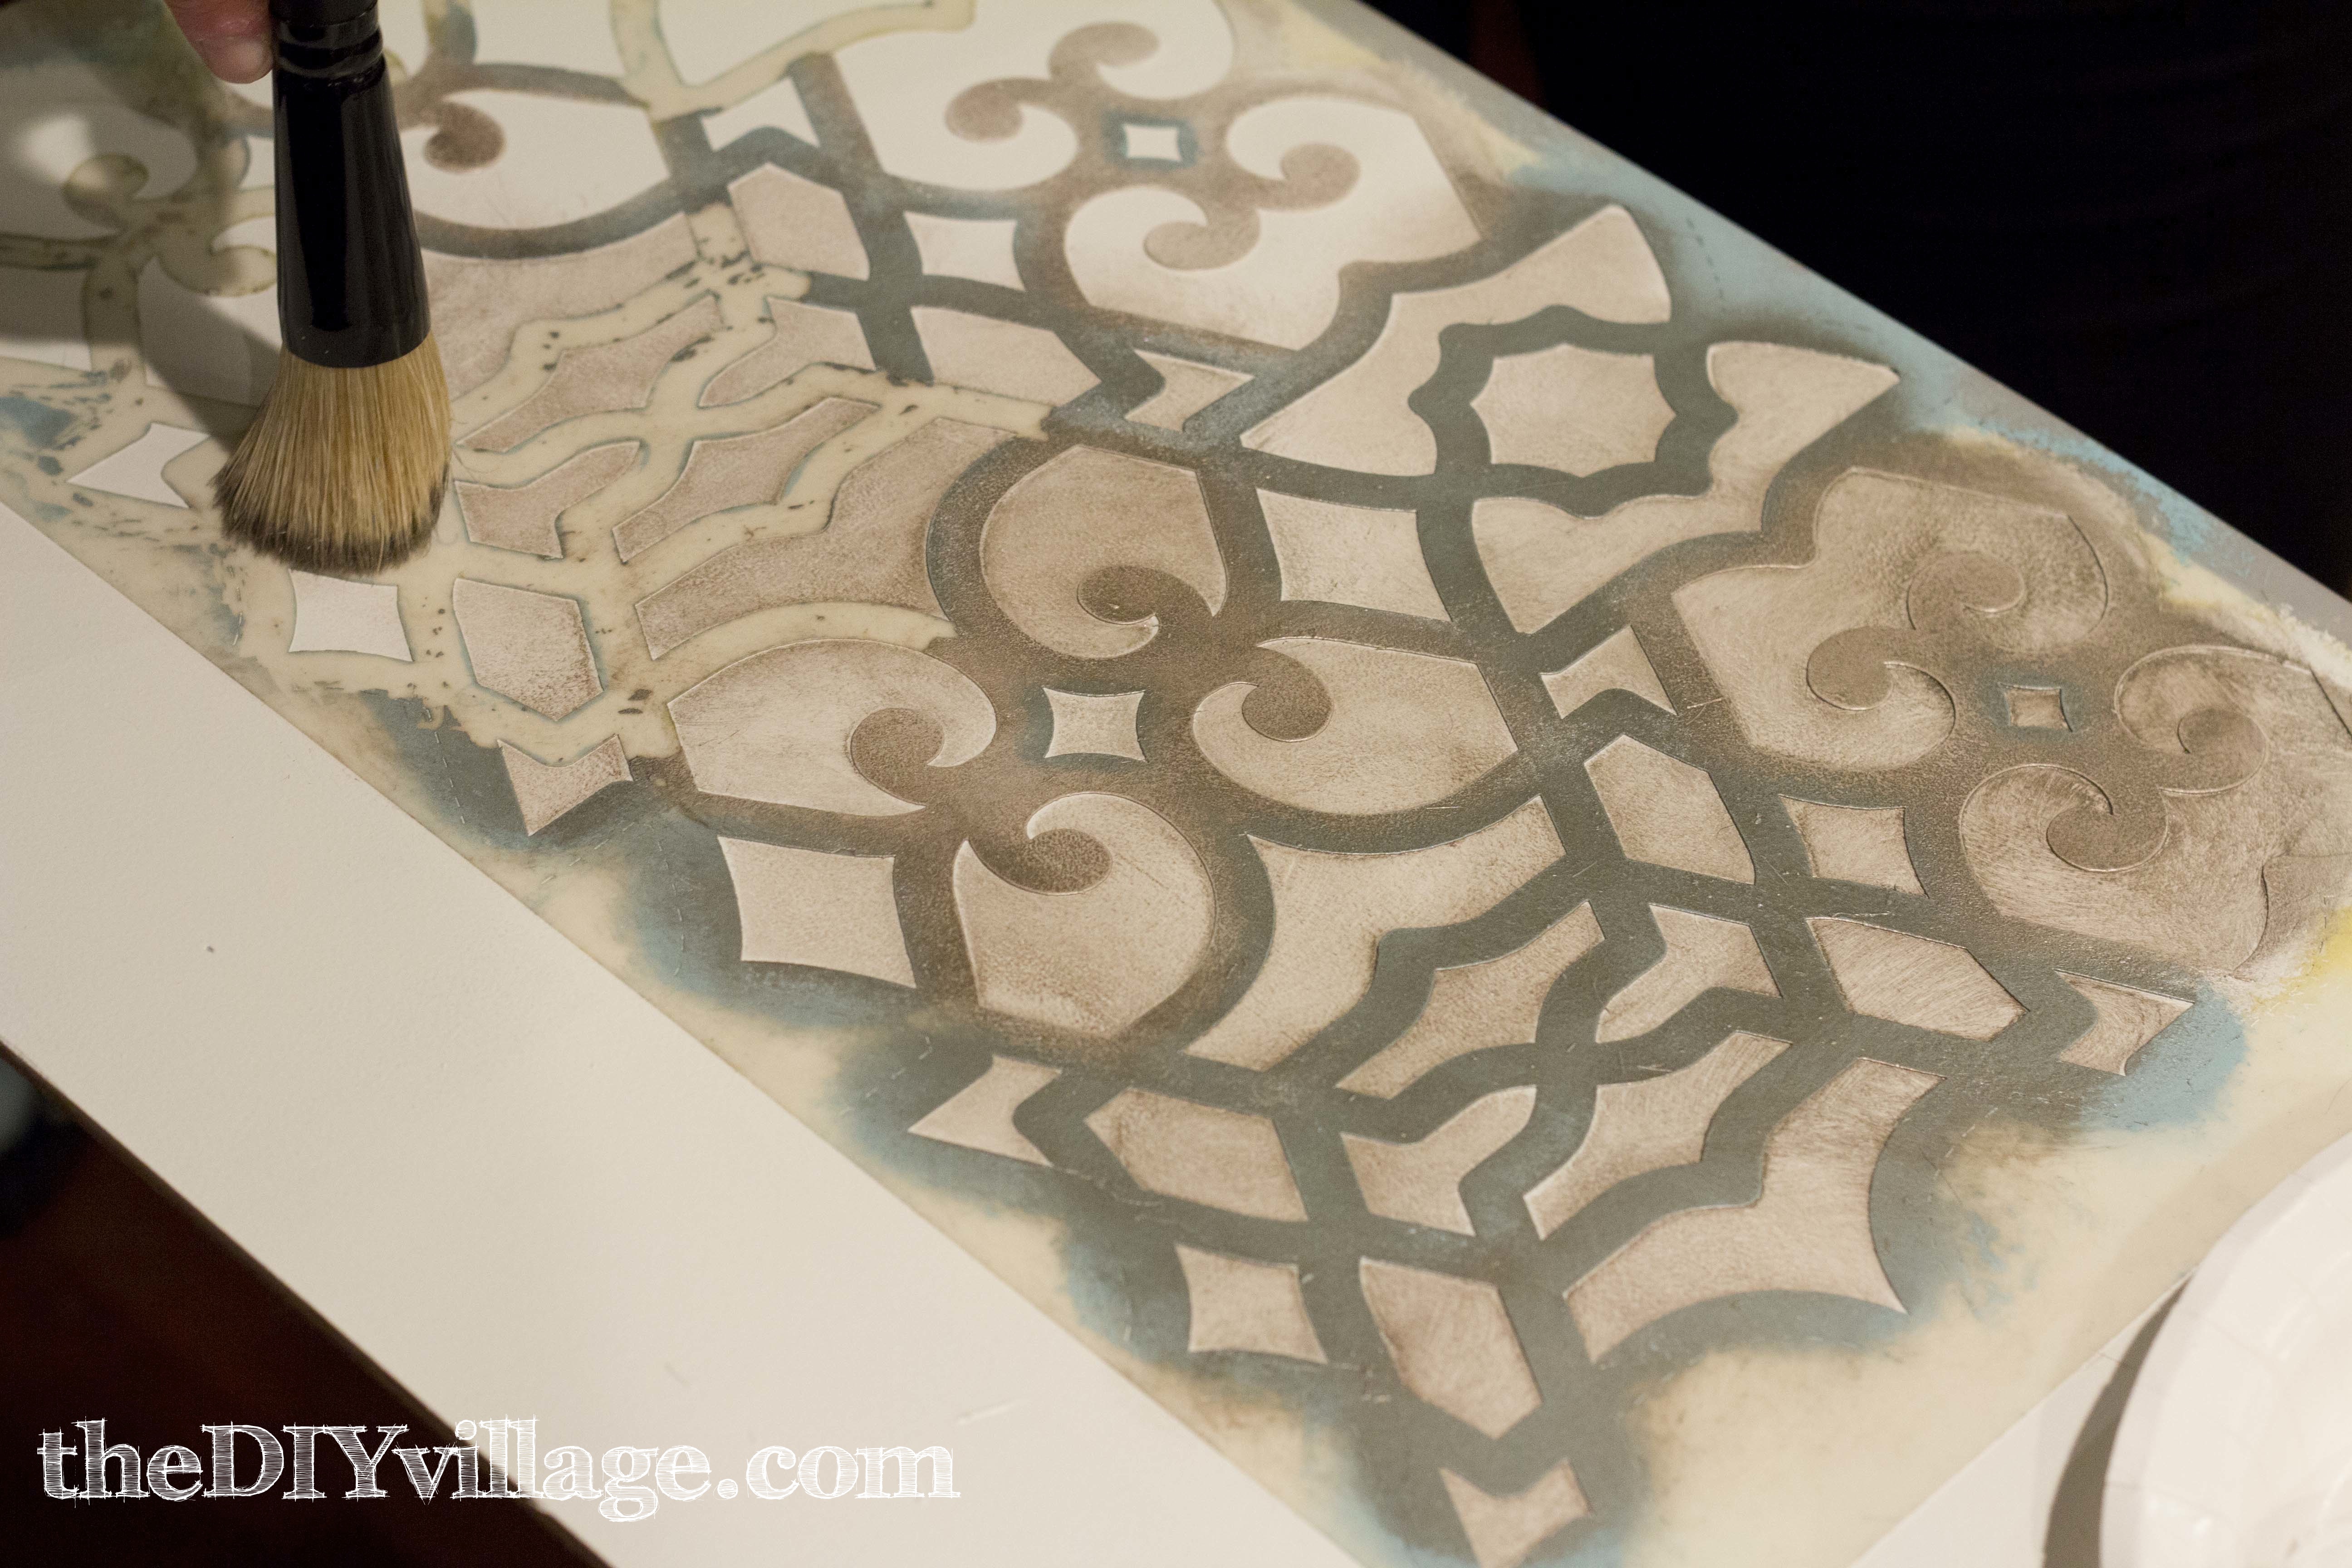
And of course, I got impatient and thought I could just go ahead and stencil on my own.
So I did.
And it ended up looking like a Hawaiian shirt …
This is not at all what I had envisioned and I was totally stumped, so I consulted my friend and local DIY blogger Virginia of LiveLoveDIY because I knew she had experience with stenciling furniture.
She suggested a tone on tone, so I (Matt) immediately painted all of the panels white … again!
Thankfully, the next day my smoked oyster stencil creme showed up … and I started over.
Oh man, why did I not wait for this creme to show up to begin with?
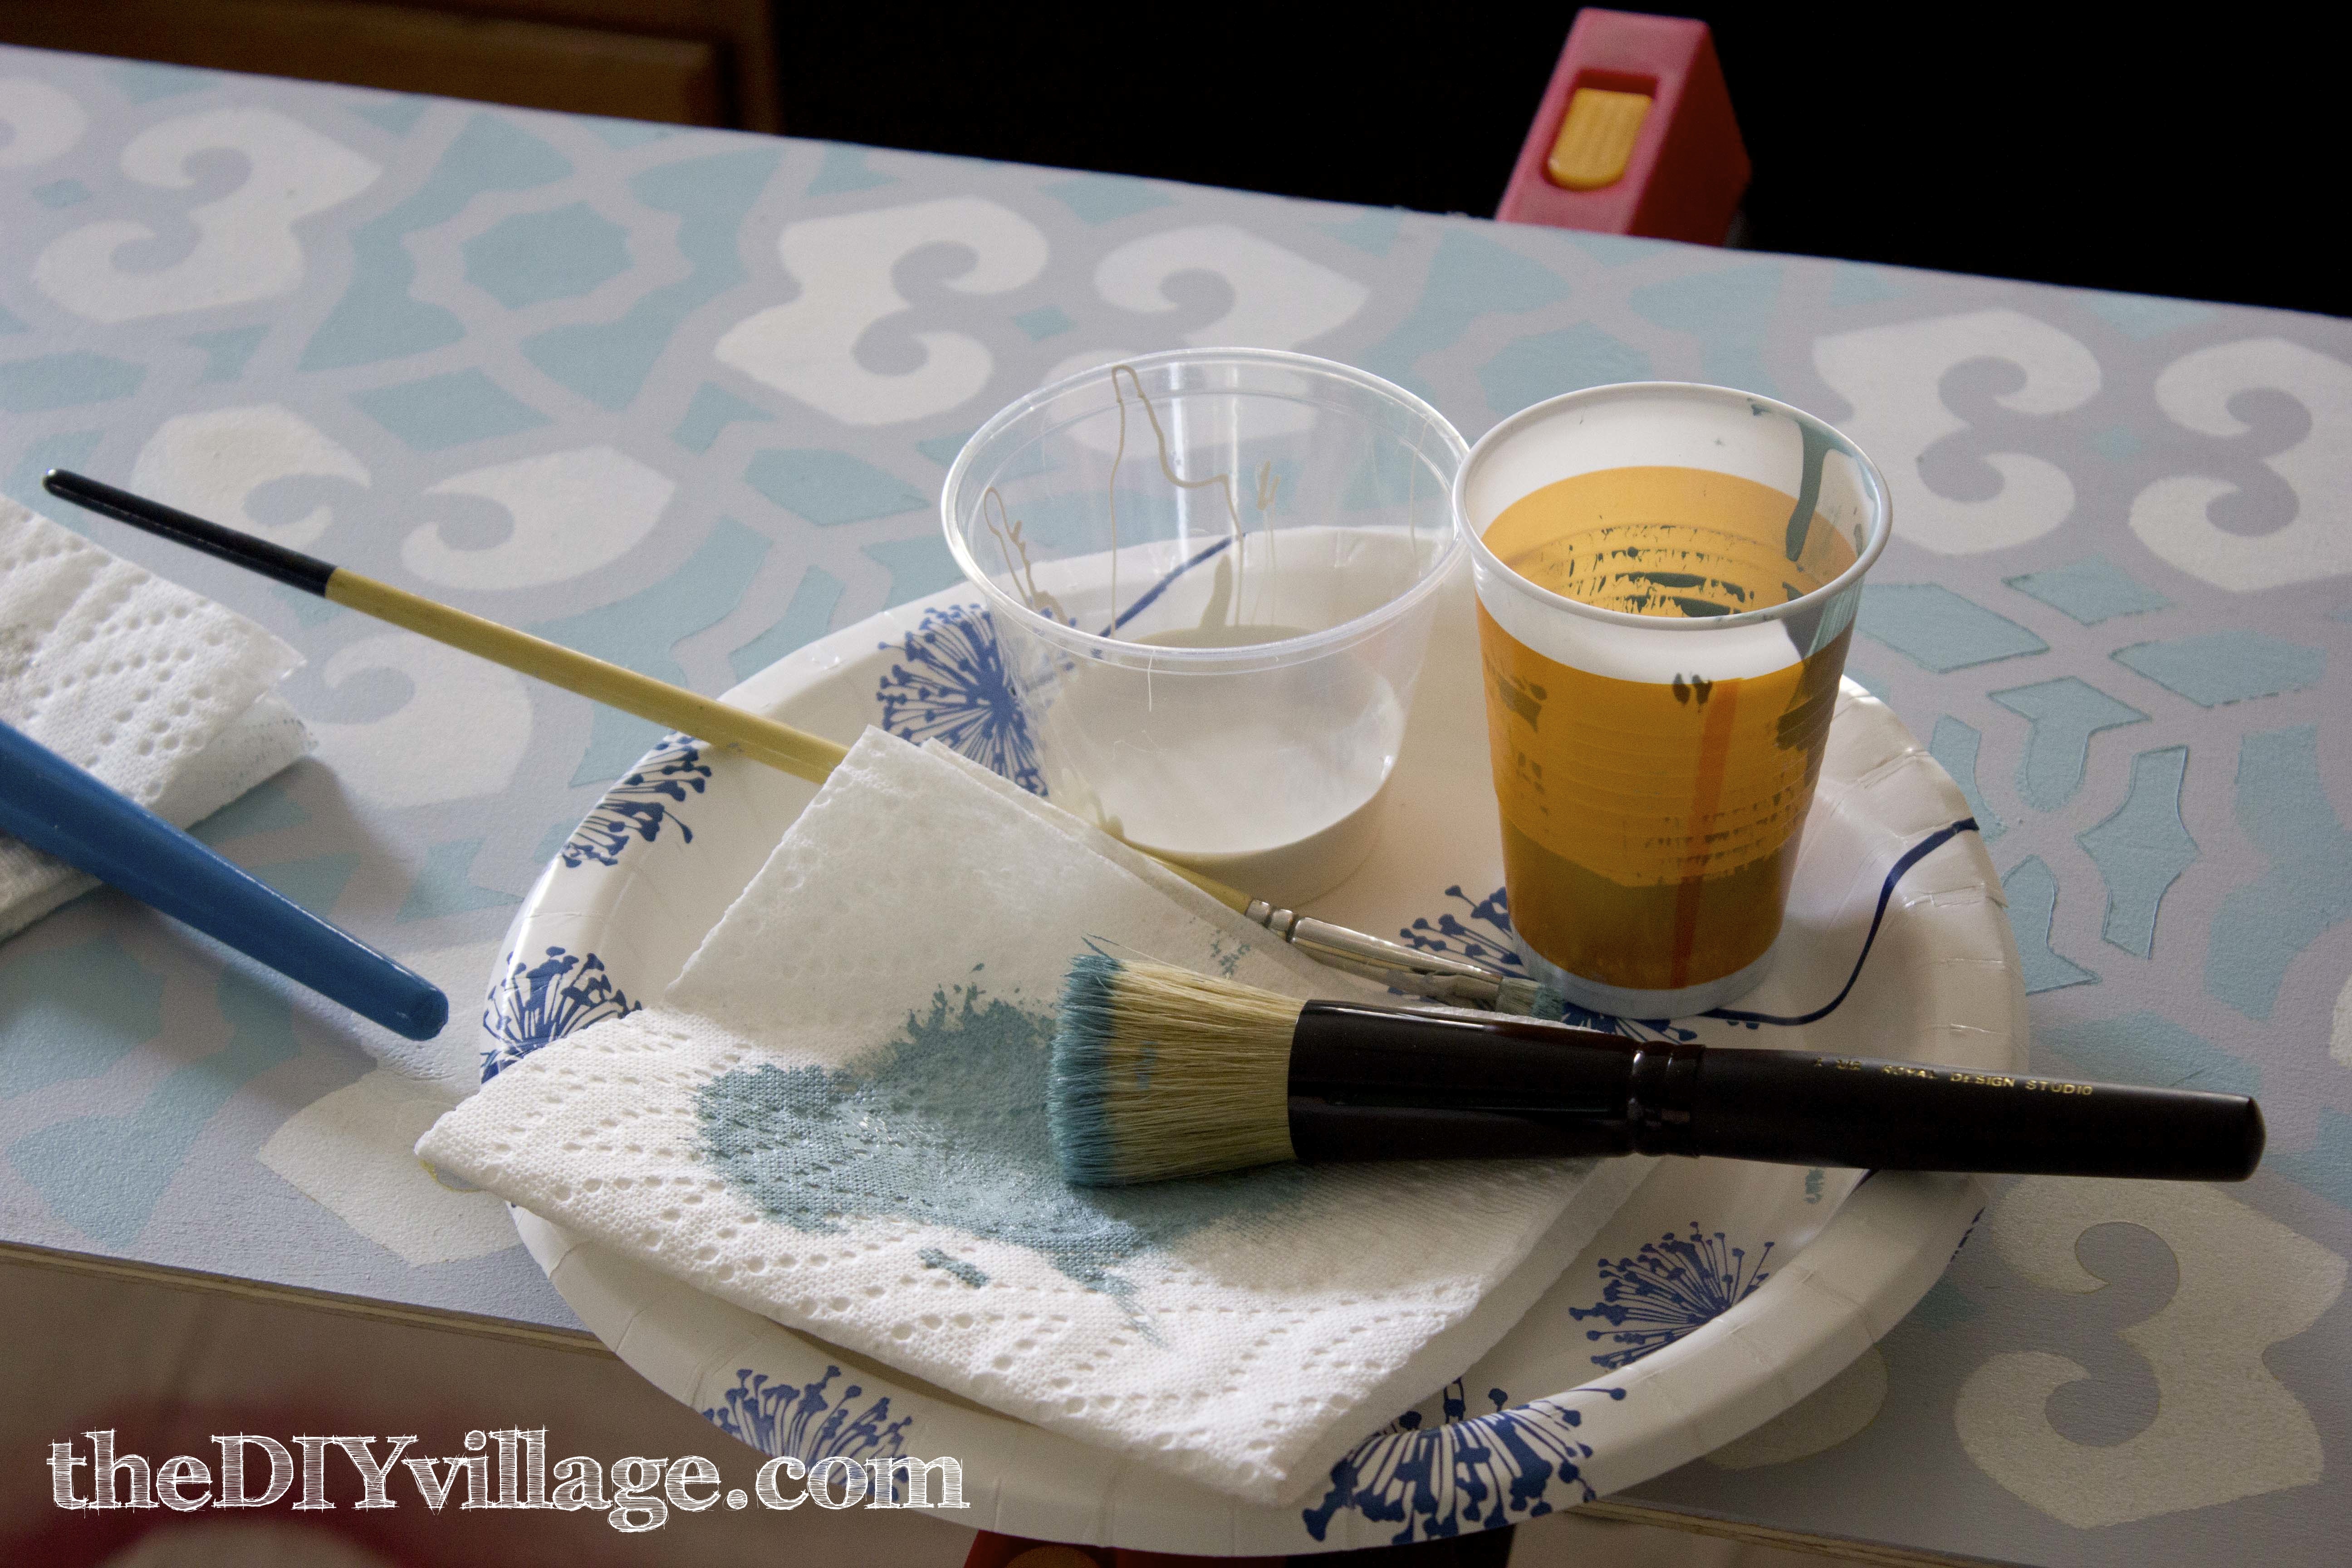
The stencil is super easy to use with any type of paint but is beyond stellar when used with the proper stencil brush and stencil creme.
Even with the mess I made of the stencil it was easy to clean because of how thick it was!
Thank goodness!
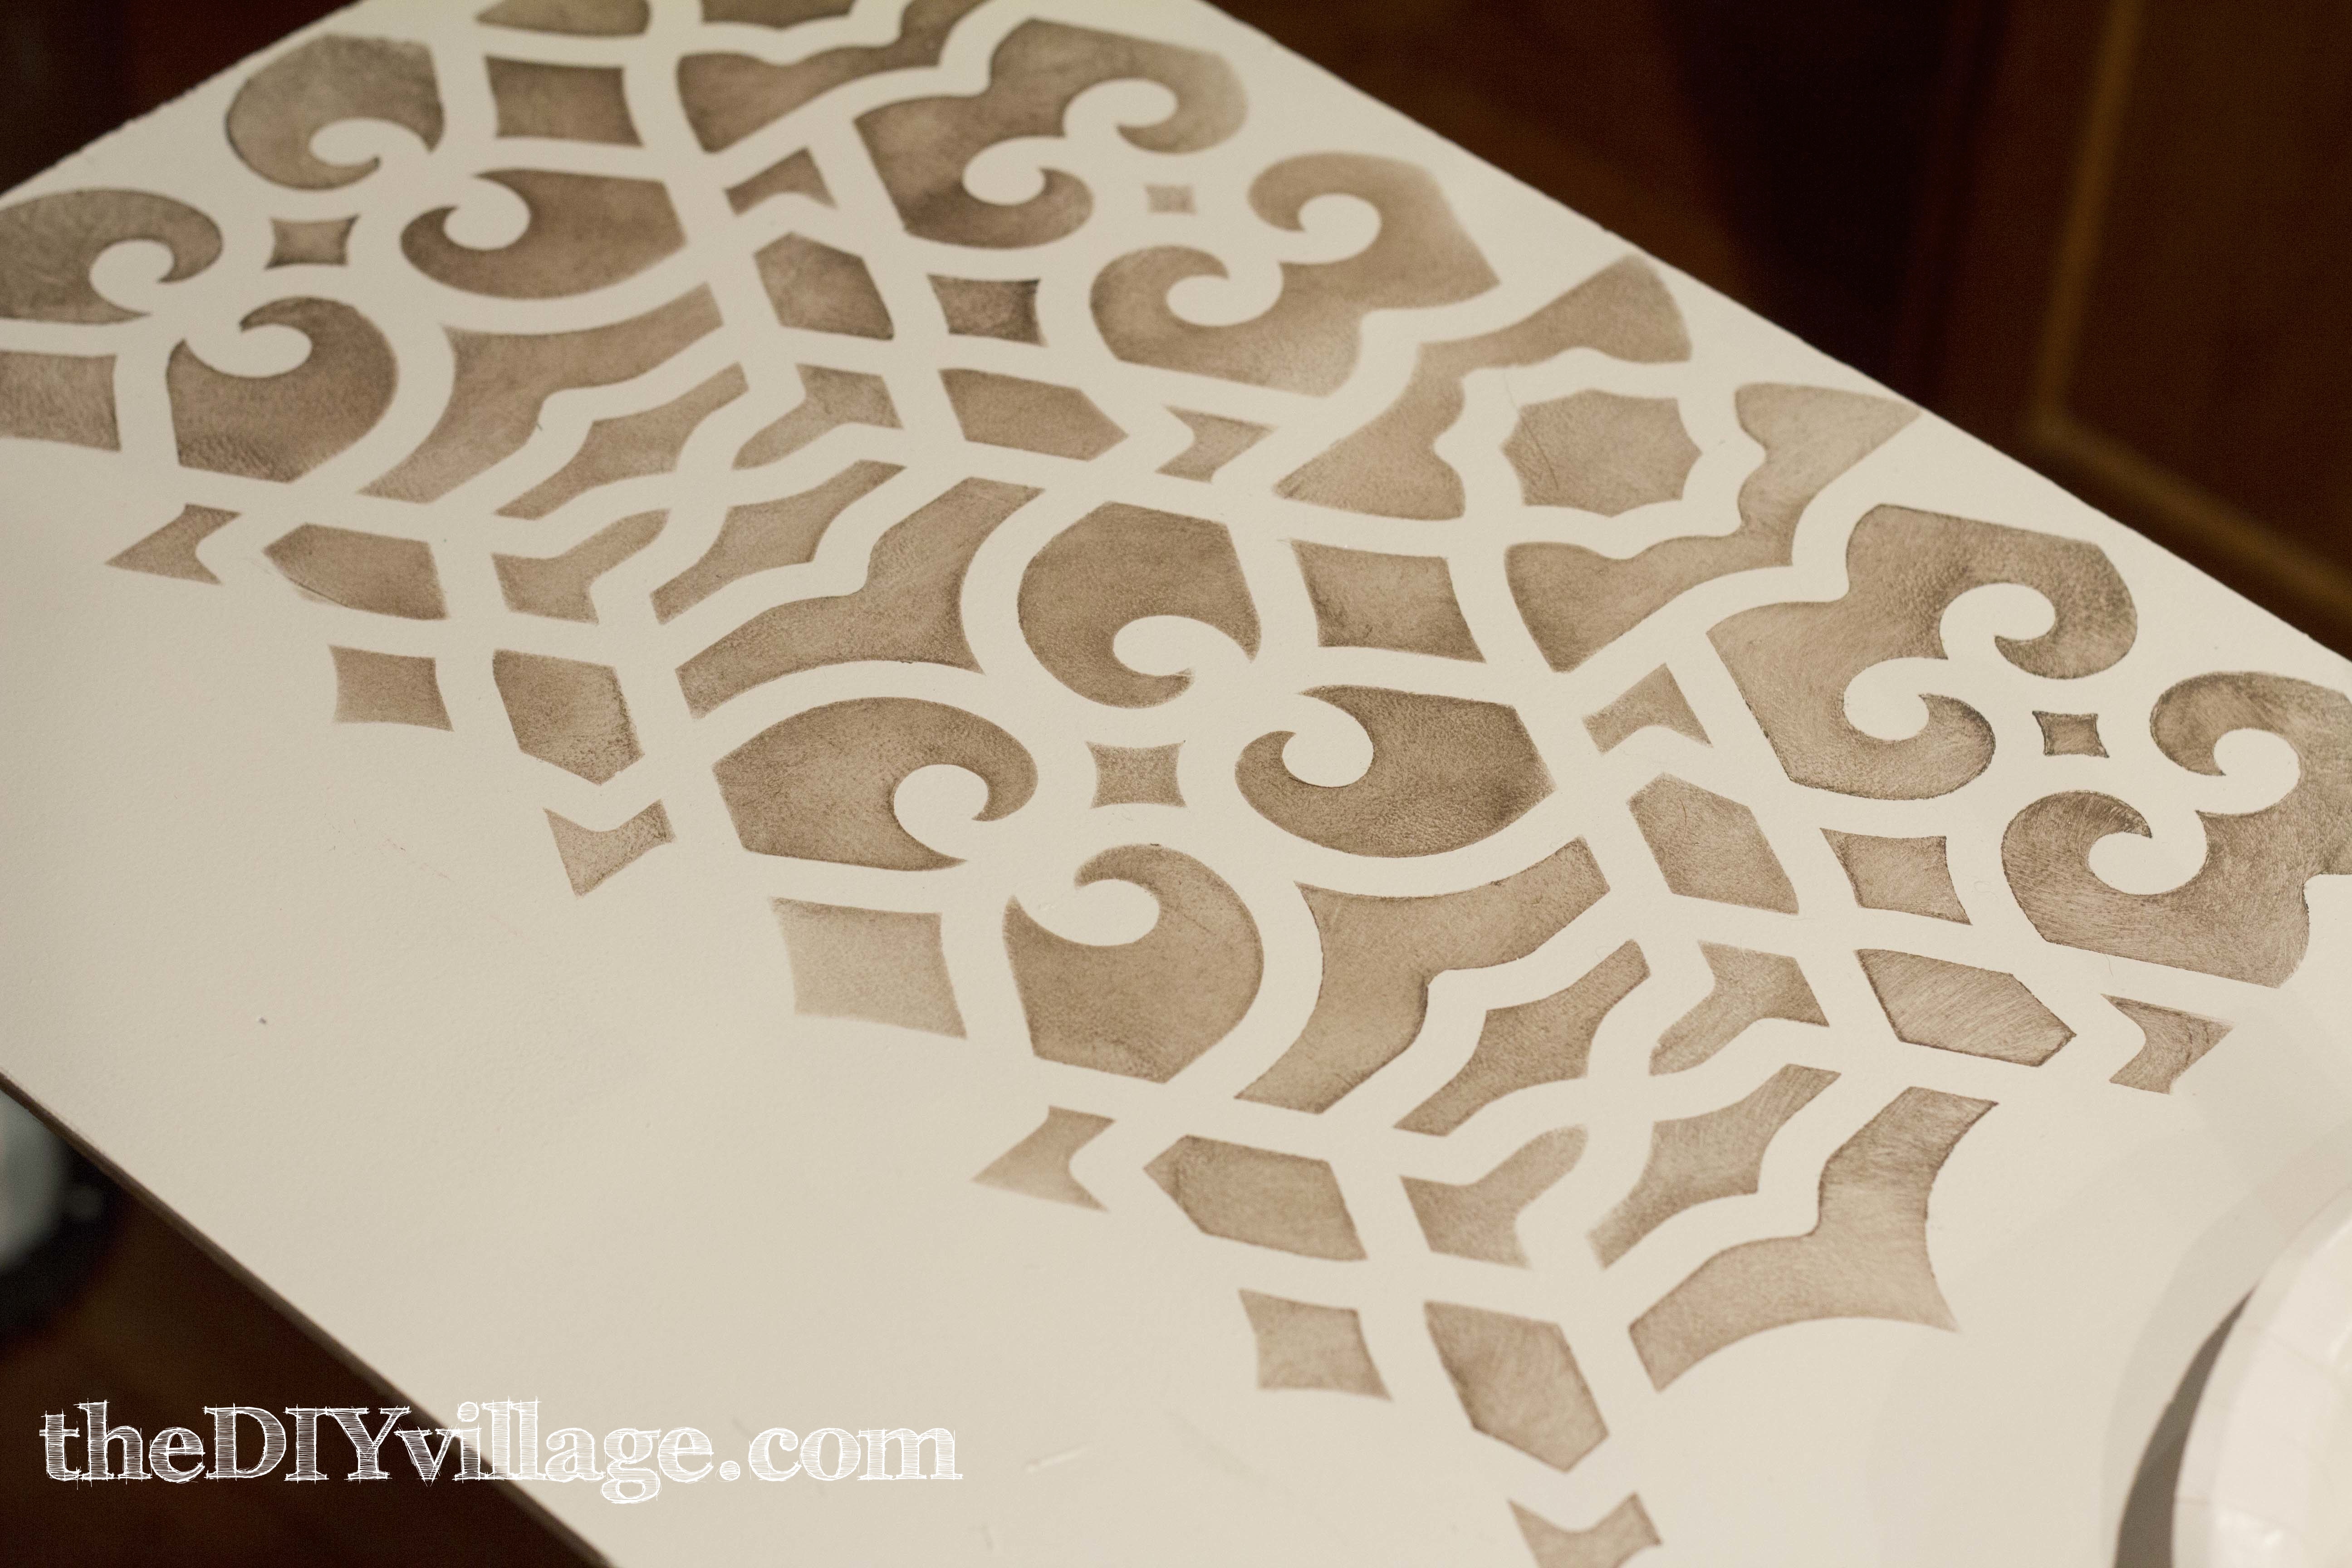 The color went on smooth as buttah!
And took less than half the time that it took to do the original stencils with other paint.
Before I knew, it the panels were ready to be attached to the backs of the kitchen pantries!
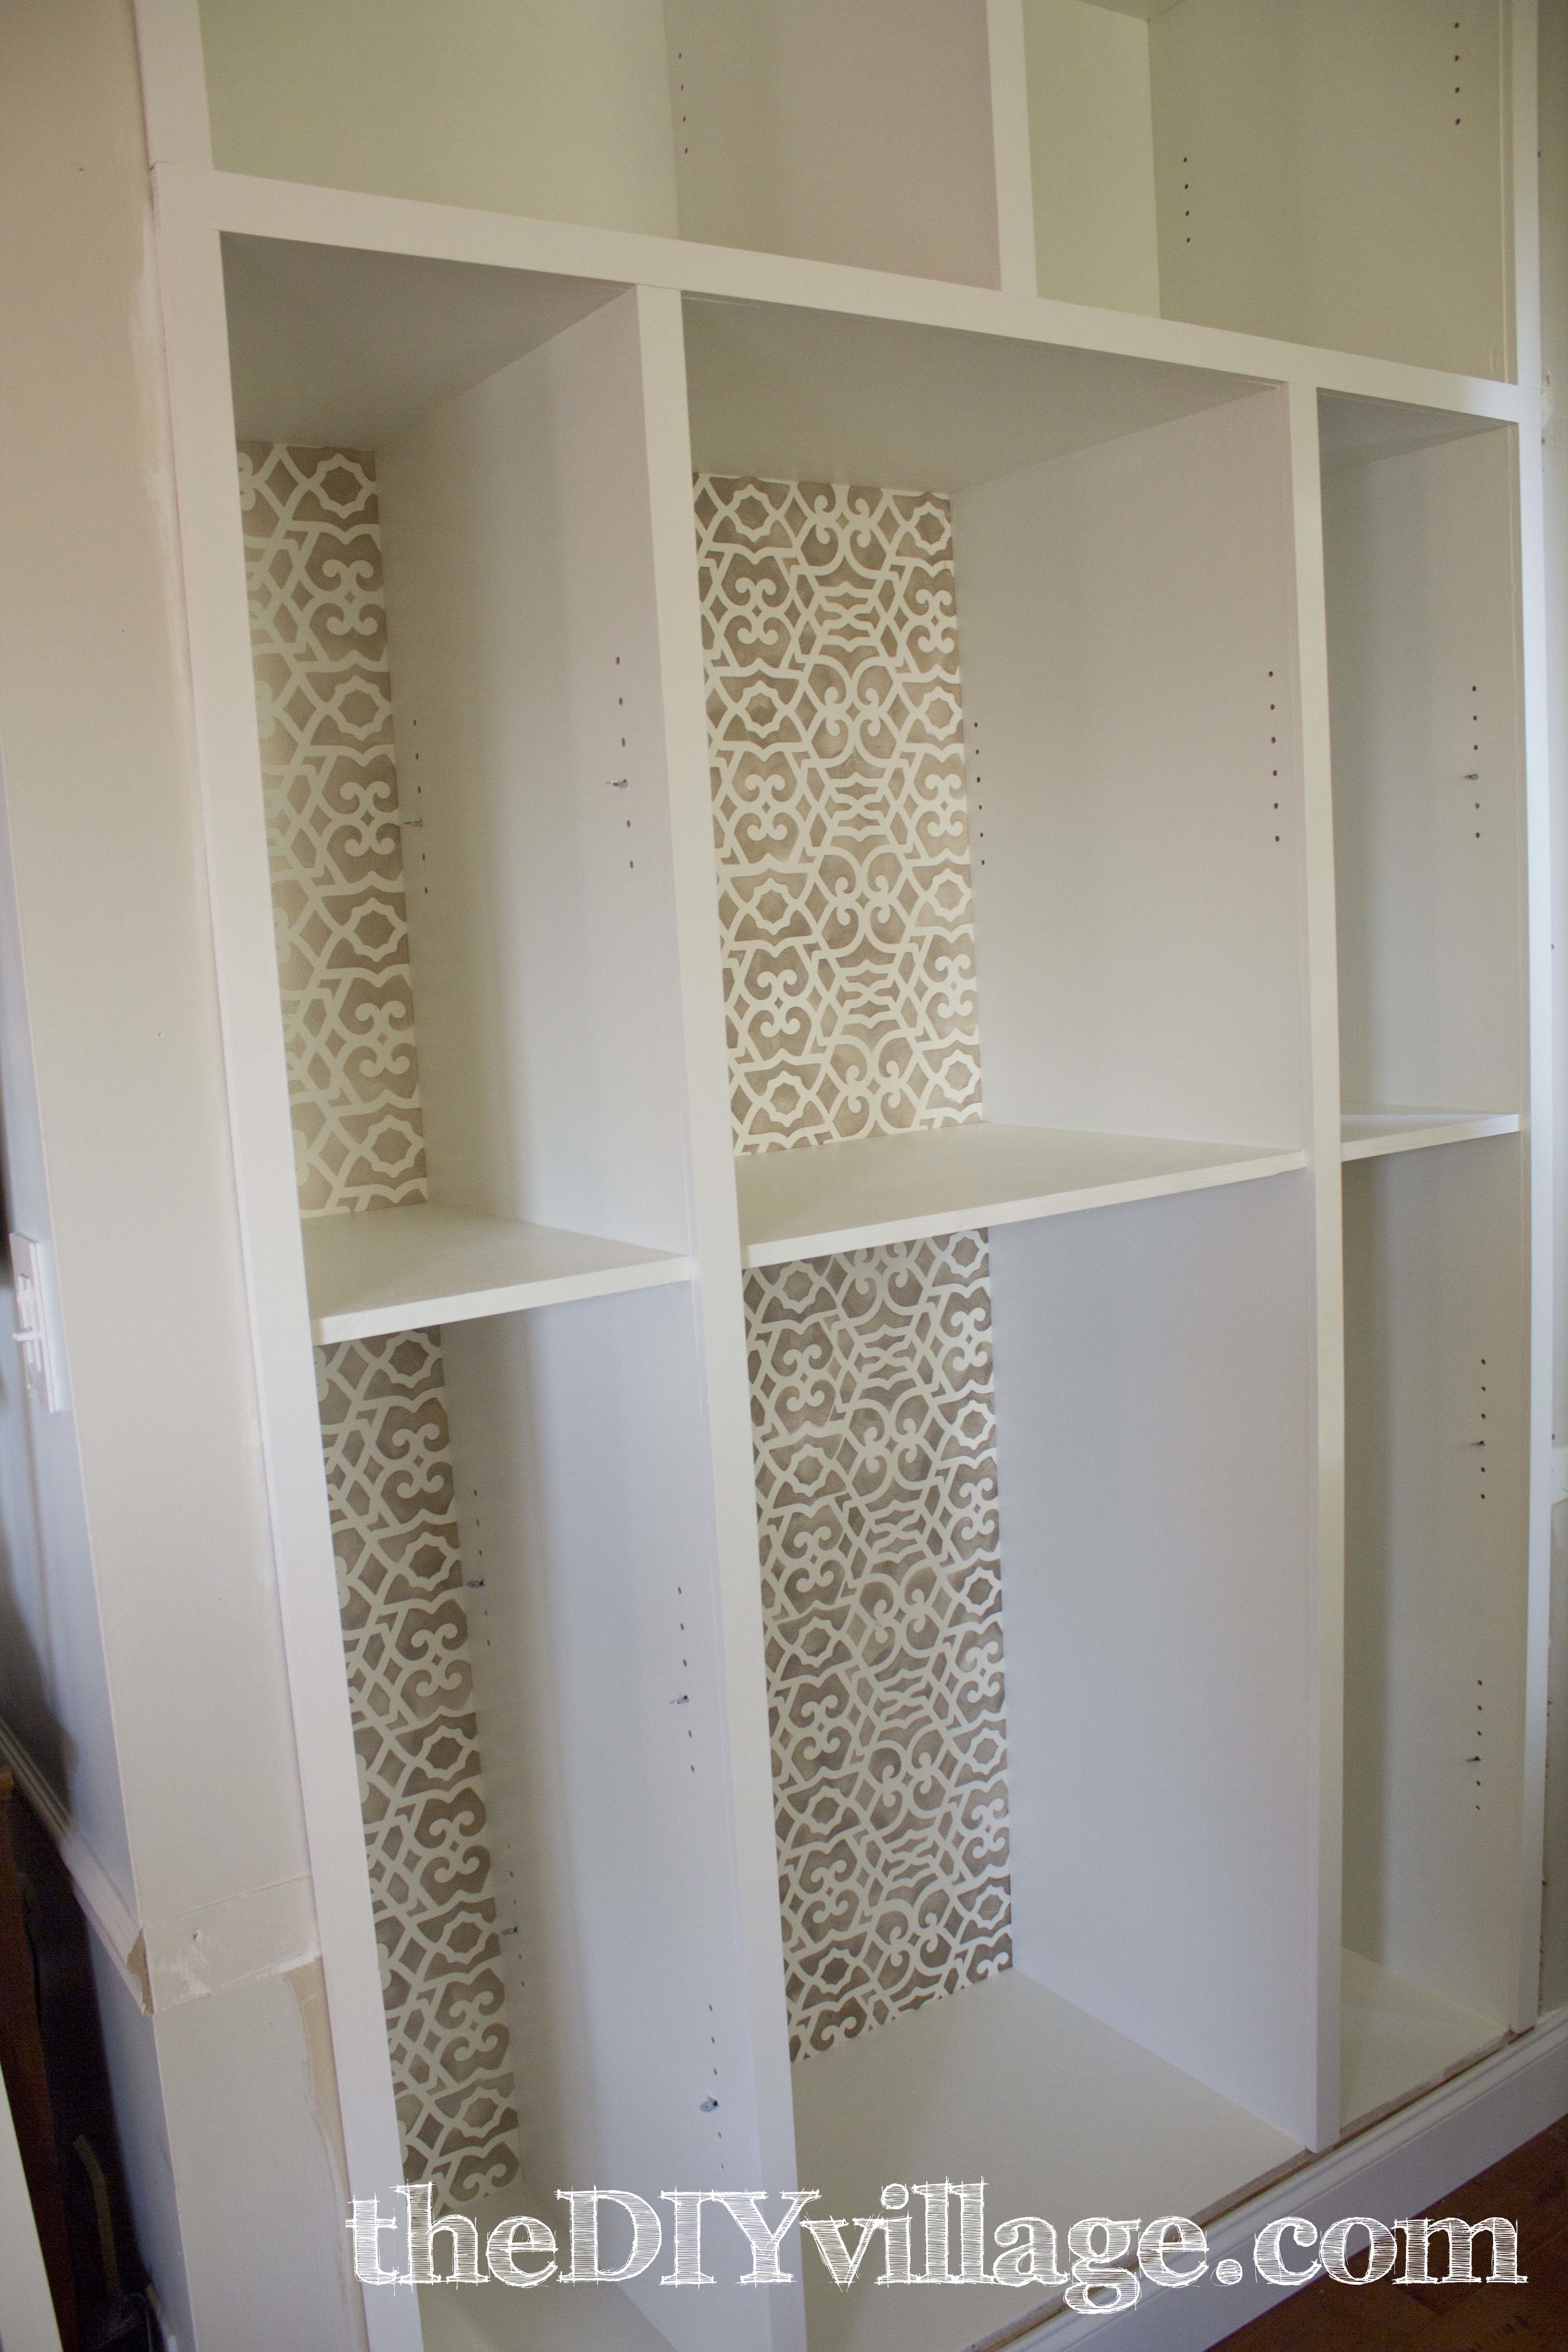
After the panels were on we were able to add trims!
The kitchen pantry is really starting to come together.
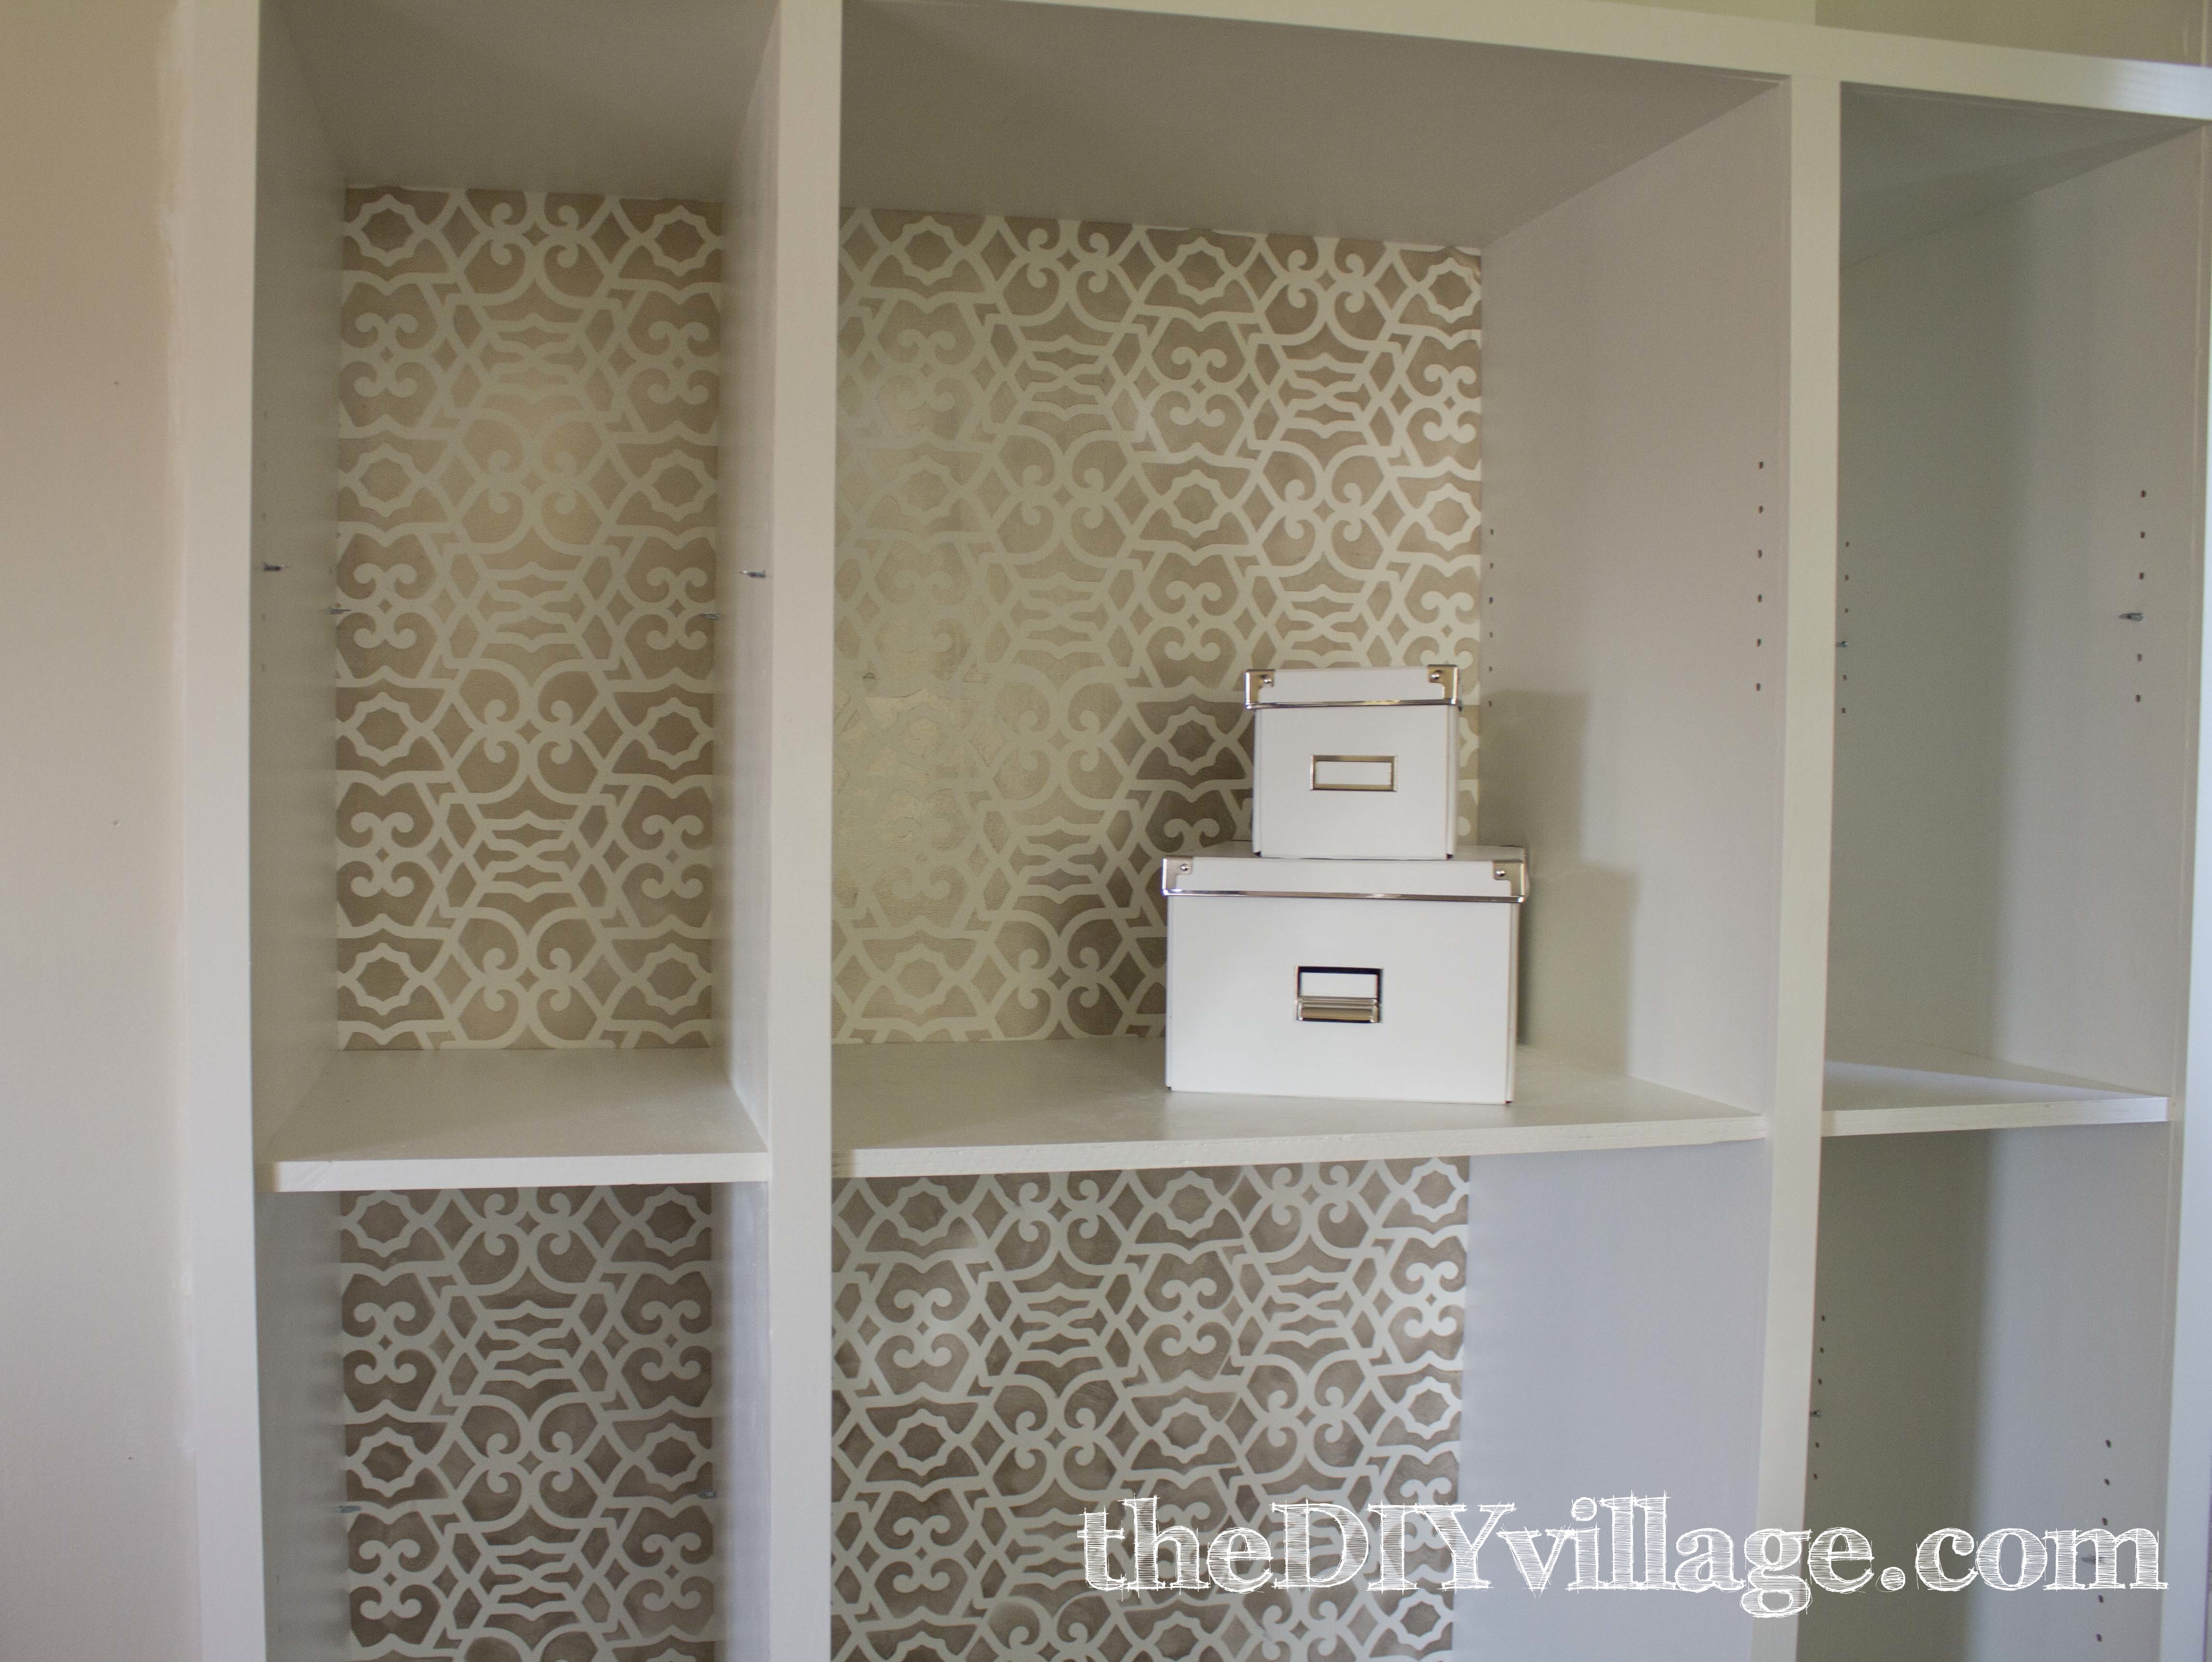
I love the sheen of the Smoked Oyster Creme, it’s got a subtle glisten!
The stencil has added the perfect touch and we are that much closer to being done with the kitchen pantry! What do you think of the kitchen pantry so far just a few more steps to go and we are DONE? Stay tuned!
To see more updates on the kitchen pantry follow us on Instagram or Facebook.
It looks great! Truely, a one of a kind, built-in piece. Eexcellent work.
The stencil and the color are perfection Jacque-I love it. You’ve got me eying my pantry now wanting to stencil the back wall!! Love seeing the update, can’t wait to see it all finished!
That is gorgeous. I love the color and the pattern of the stencil. I am always in awe when I see jobs like this. Way to go!
I love how it turned out! More “wow” and less “luau!” 😀
That second attempt is gorgeous, so glad you ended up with something you love. To bad you had to do it twice, that is bummer. Been there…will probably be there many more times, lol. Can’t wait to see your finished pantry!
that pantry is looking AMAZING! I’m taking careful notes 😉
It’s BEAUTIFUL! Can’t wait until I’m “allowed” to be near paint fumes again!
It’s really coming together. Love the look of the stenciling at the back- too bad it took a second take. If DIY was easy, everyone would do it! Can’t wait to see it all put together.
I love the stencil design! Great job and I can’t wait to see it finished! I pinned it for inspiration and would love if you would link this up at my linky party Thursday at http://www.juliakendrick.com!
I LOVE this!!! Now I want to build my own pantry too! Love love love the stenciling and that color/sheen is gorgeous! Can’t wait to see the whole thing finished!
That looks awesome so far! Can’t wait to see the completed pantry! The smoked oyster shimmers just right, nice choice!
Turned out great guys! I’m loving that stencil!
You guys! That is looking so SWEET! It’s going to rock when you get it all done!!!
Love how the stencil colors turned out!! What great storage :o)
Who ever thought I would have pantry envy?! That stencil work turned out beautifully!!
Looking good!!!! Love the way the stenciling turned out!
Ahhhhh! Love that color…stencil– the whole shaaabang! Nice work girl!
I love it! Mine is stained wood inside and very dark. I never thought of decorating the inside. The stencil looks great.
Wow! What an amazing project! What you have done looks fantastic. I love the stencil you picked and the colors.
I would for you to share this at my link party.
Take care,
KC
Oh, I love how the stencil turned out–so pretty!
Love the final result! I’ve never heard of stencil cream… I’m heading over to check it out.
I found you today at That DIY Party’s Linky. I hope you can stop by my blog and leave a comment, too!
~ Megin
That is AWESOME! You two did a beautiful job (as always)! I have yet to try building and I’m so thankful for the Kreg tips too! 😉 Thanks for sharing!
Really nice pantry! We are beginning to plan an update on our pantry. Now that your family has been living with this build for a bit, any regrets? Upgrades you wished you included? Just looking for any insight you might share. I will be doing it next month. Thanks for sharing