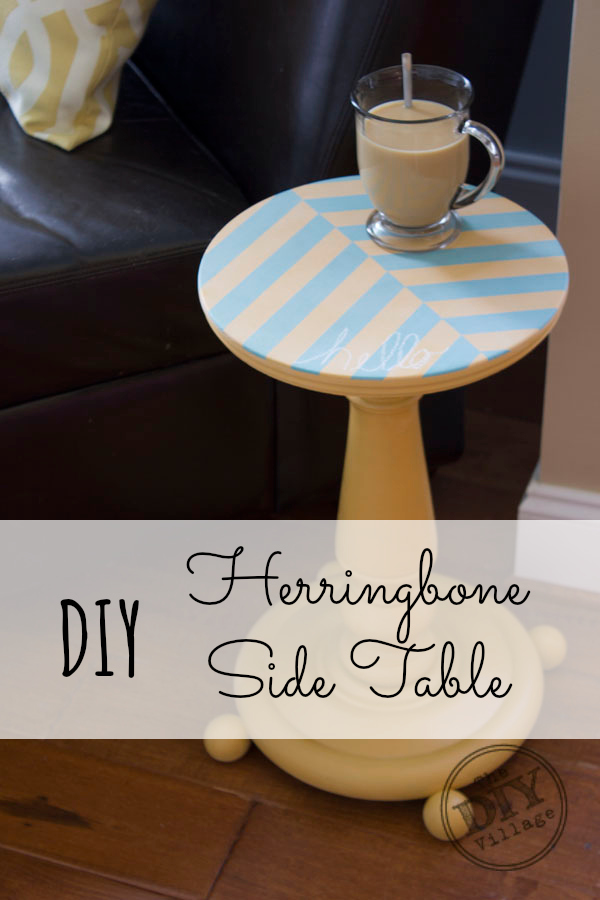
I’ve had this cute little side table, well it’s probably really a plant stand but that’s another story, for a few years now it has sat by a chair in our living room. I love this little table, it belonged to my grandmother. Only problem with this little table is that it is almost the same color as our floors and blends in … and gets over looked. 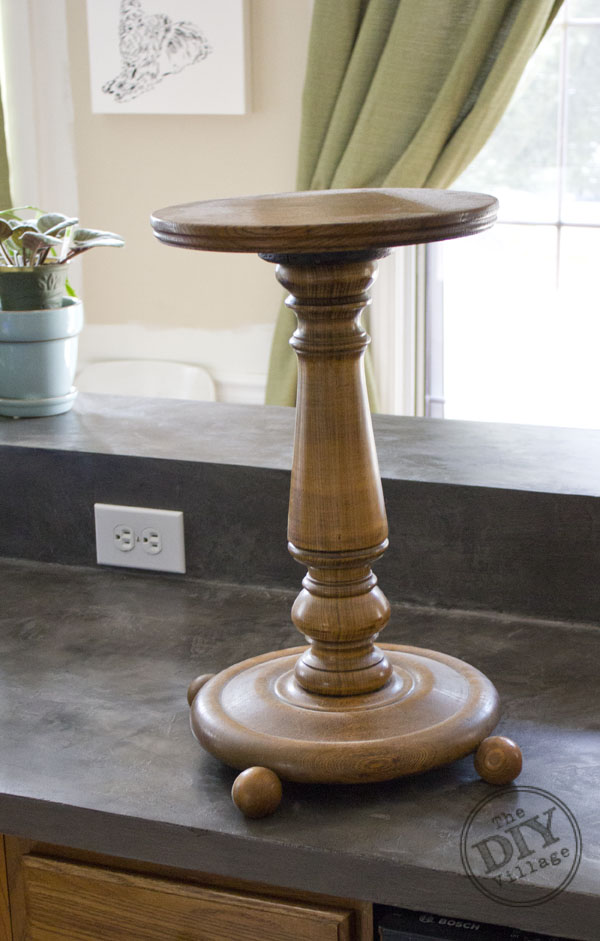 I have thought long and hard about what to do with this little cutie and finally decided it needed paint. Now I know what you are thinking, but the beautiful wood??? … well truth is I love the wood grain on this table but like I said it blends into the floor too much and gets lost!
 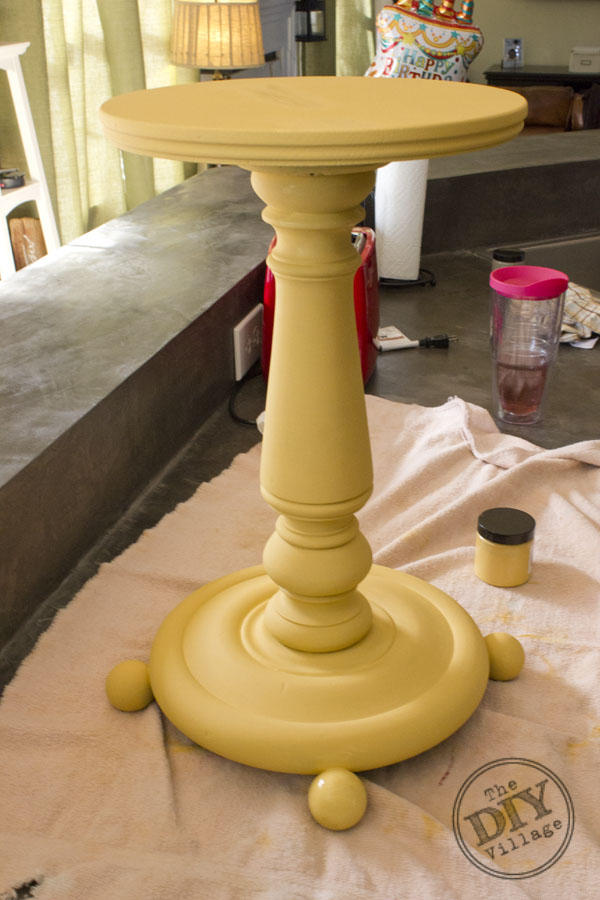 I finally picked a fun bright yellow color that will make the table POP and will fit perfectly with our newly re-decorated living room. After the paint is dry it’s time to get on to the best part … creating a diy herringbone pattern!
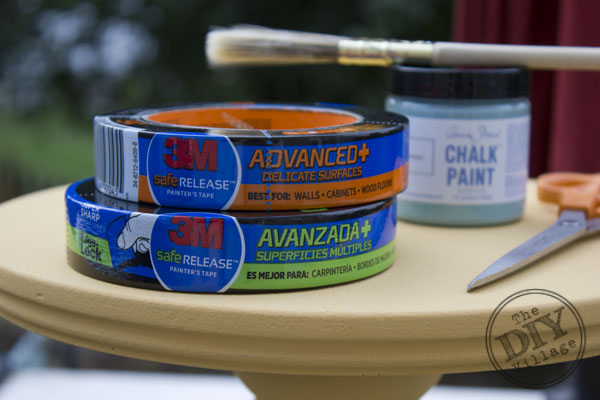 Here is what you will need!
– 3M™ Safe-Release™ Painter’s Tape
– Contrasting Paint Color
– Paint Brush
– Polycrylic
3M™ Safe-Release™ Painter’s Tape offers a few different tapes, but since I was using Chalk Paint I wanted to make sure that the amount of adhesion would not pull any paint off so I chose the advanced tape for delicate surfaces!
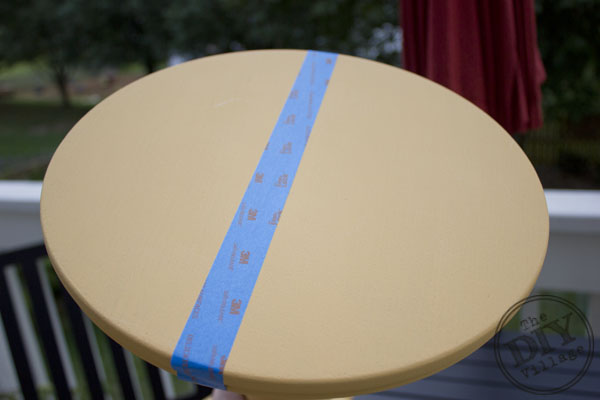 Start by finding the center of the table and place a line of tape to one side across the entire table.
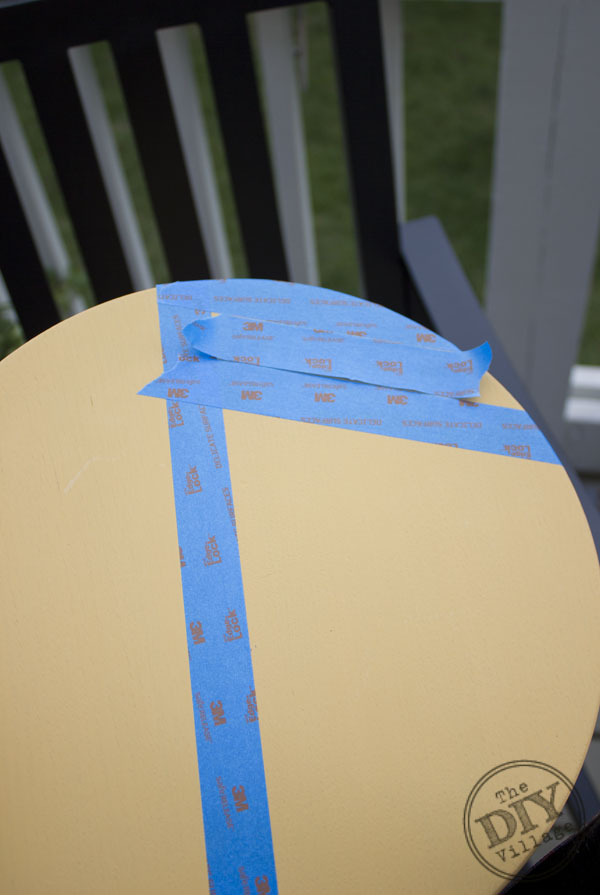 Decide what angle you would like the herringbone to be at and place your top strip of tape. Place a scrap piece of tape as a spacer. This will also allow you to keep your angle going correctly.
 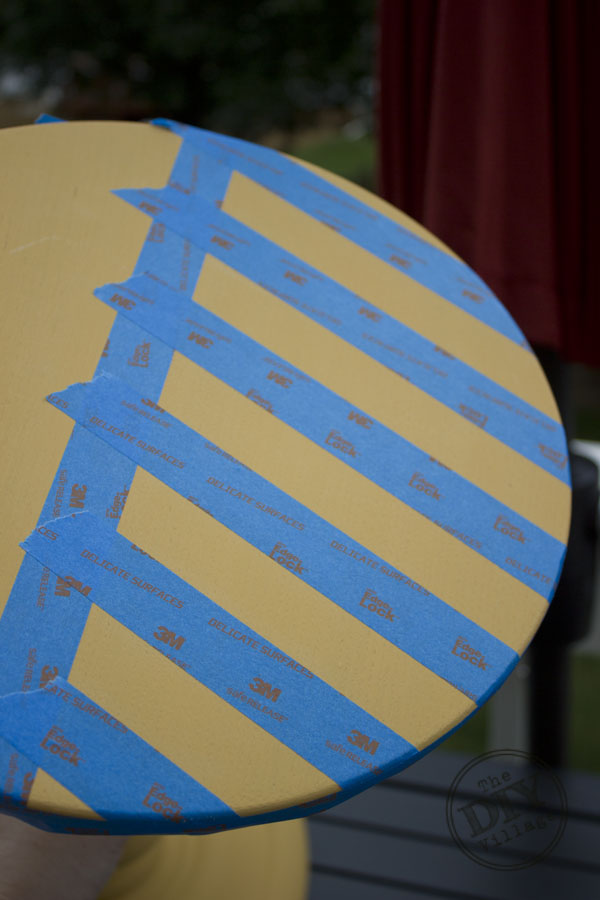 Continue placing tape down the table until one side is complete. Press the edges of the tape down for the best results.
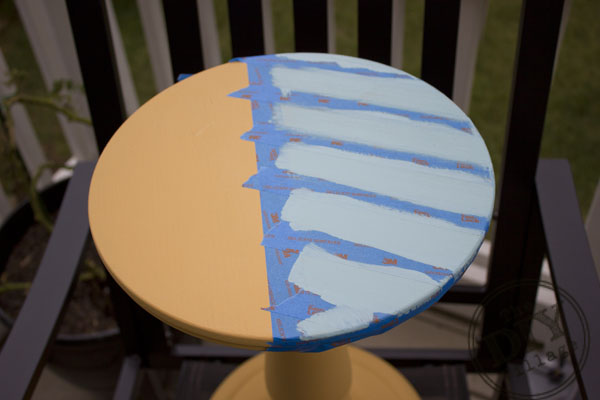 Apply the paint (it took me two coats to get the best coverage).
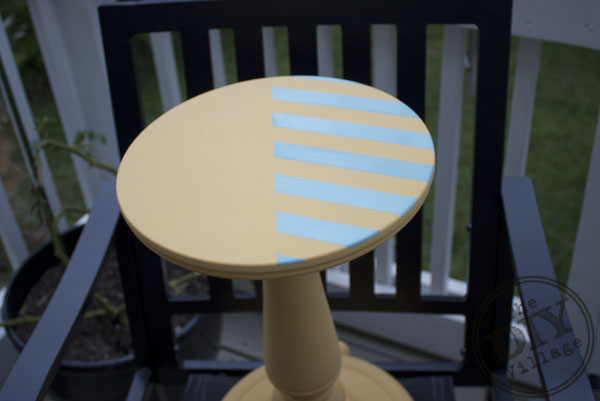 Remove the tape and allow the paint to completely dry.
 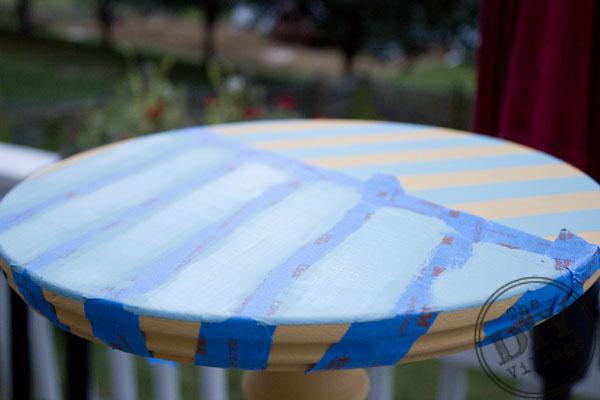 Once the paint is dry, tape off the other side of the table. If you are unsure about the angle you will be mirroring, you can turn your tape till you have corner to corner coverage over the already painted side of the table. Paint between your strips and remove the tape.
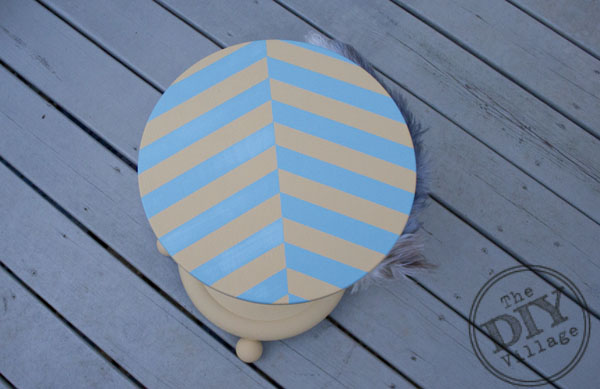 Give the paint ample time to set up and then apply a coat of polycrylic. If you are feeling froggy you can wax the piece instead!
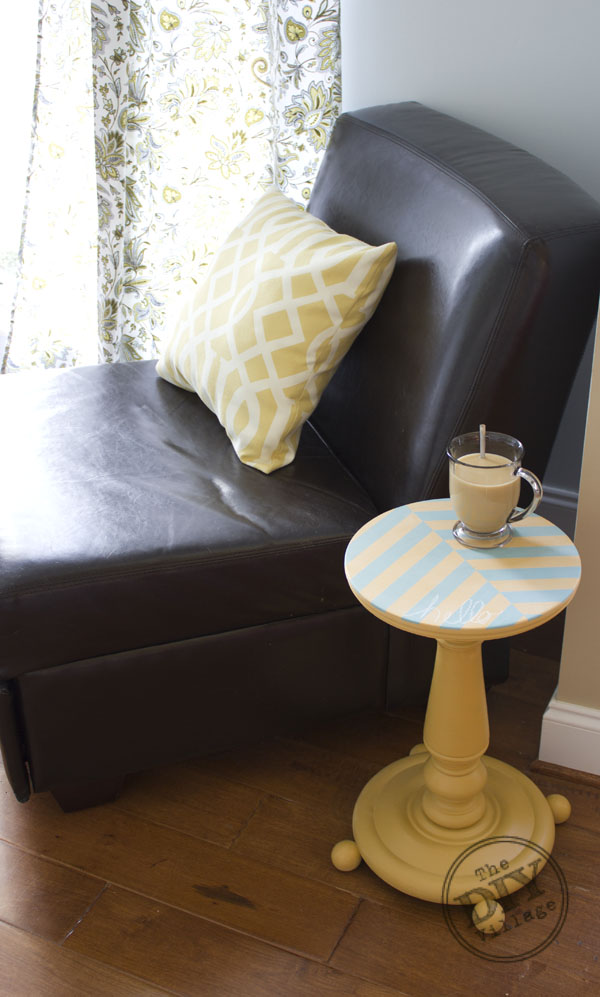 I’m happy to announce this cutie table no longer blends into the corner and now pops with life!
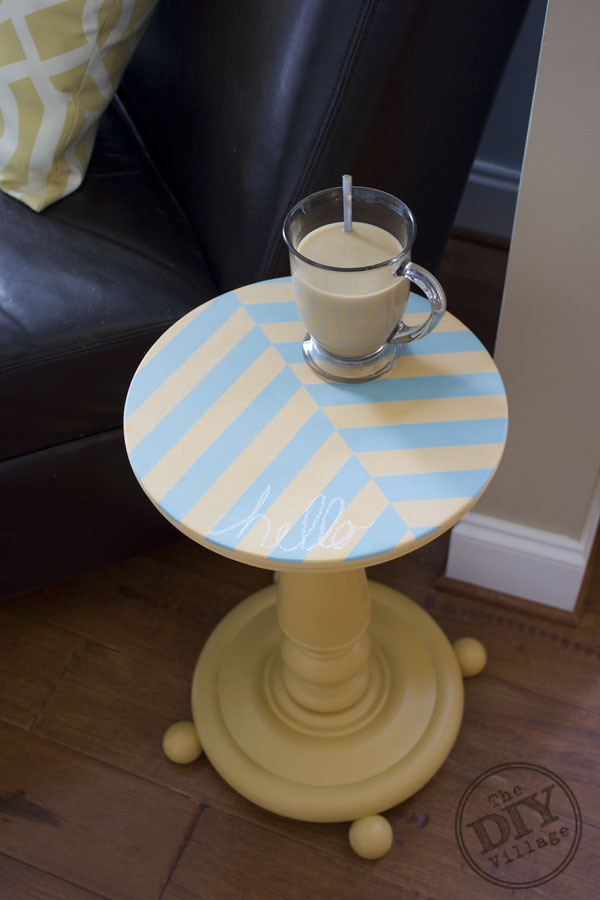
This post is a collaboration with 3M™ Safe-Release™ Painter’s Tape. To keep up-to-date on projects, products and sampling visit 3MDIY.com. While I have been compensated for the creation of this project, as always opinions are entirely my own.
Love this table!!! Definitely going to be pinning!
Adorable! Love the mix of colors and the ‘hello!’ Pinned!
That turned out fantastic! I love it.
Too Cool! And all with just tape? This is such a cute little table, Jacque!
So adorable, Jacque! I love the color and the fun herringbone pattern!
Ooh it’s so super cute, I love it! Great job on that table!
love the yellow and teal! so pretty!!
I love the alternating pattern on this little beauty ~ so unique. I’m planning to do some painting of a living room wall in a pattern and this is exactly the product I’ve been looking for. pinnning
Seriously? I can’t believe you just eyeballed this with the tape! It really is a perfect herringbone pattern and I totally thought you just used a big stencil. Love it!
Beautiful!!! And…off topic…I had to tell you that every time I see the word bump in a facebook group I think of you :). You’ve been on my mind alot lately, needless to say 🙂
I love this transformation! I had no idea that there was tape for delicate surfaces. Running to store to pick some up now!
Love this Jacque! 🙂
This table is so adorable! I absolutely love the herringbone!
Great idea! I have a plywood table that I paints some years ago. It could use a herringbone update 🙂 Sue via All Things Thrifted