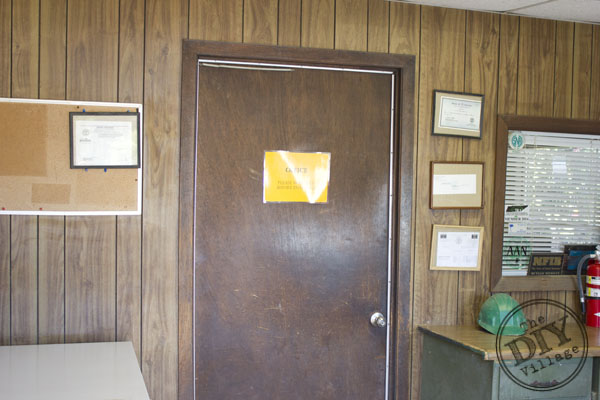
 The outside of my (day job) office is pretty sad. In fact I think that might be an understatement. I am almost positive it has not seen any kind of updated since 1985 and at that I think I am probably stretching and giving the whole look the benefit of the doubt. One thing that drives me nuts about this space is that we have a lot of licenses we have to display so that they are visible to all but none of the frames match. It seems like every time someone closes my office door one of the framed licenses jumps off of the wall as if to say it has had enough with this space too! I’ve tried re-hanging them and changed out frames but it’s still a hot mess! Nails never stay in the paneling and then the frames are all floppy and eventually you end up with this beautiful look I have here!
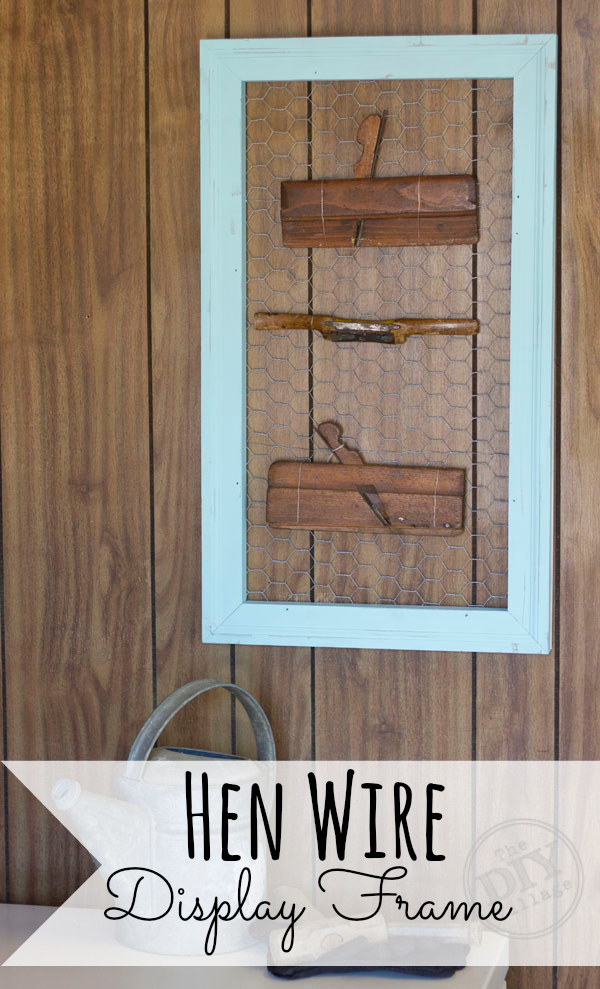
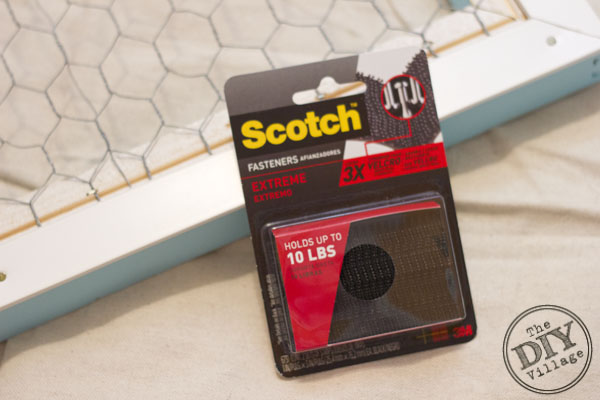
 After some thought I decided to clean this area up and I figured one way to keep the frames from hitting the floor would be to use Scotch Fasteners Extreme. They hold up to 10lbs and I knew they would withstand the day to day roughness the guys would place them through. I took down the old bulletin board that no one was using and decided thought it would be fun to create an antique tool display to try and make the outside of the office look even better!
So now I will tell you how to create your own hen wire display frame
Materials Needed:
Brick Molding
Wood Glue
Nail Gun with staples and finish nails
Hen Wire
Lattice Trim
Wire Snips
Tape Measure
Nails
Hammer
Paint
Floral Wire
Antique Tools
Scotch Fasteners Extreme
Torpedo Level
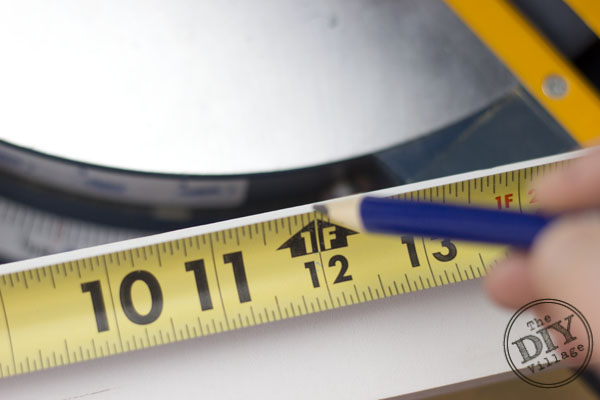 Decide the desired size of the frame. Measure the outside length and mark with a pencil
 Set your miter saw up for our first 45 degree cut (outside cut).
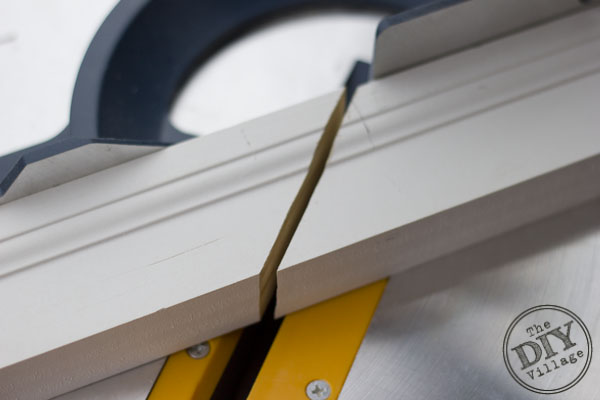 Line the saw blade up with the pencil mark and cut. Adjust the saw to the opposite 45 degree (inside cut).
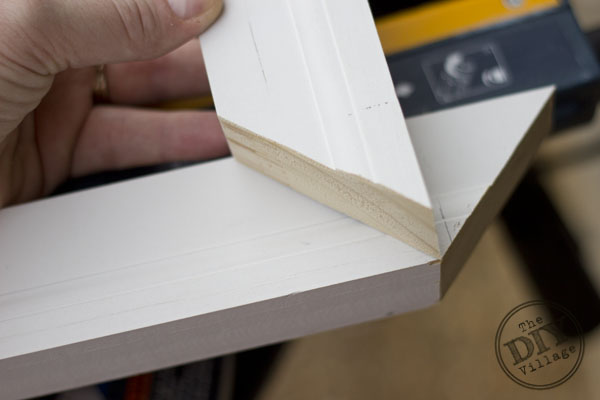 Turn the board so that the outside edge is flush against the fence of the saw. Make the cut.
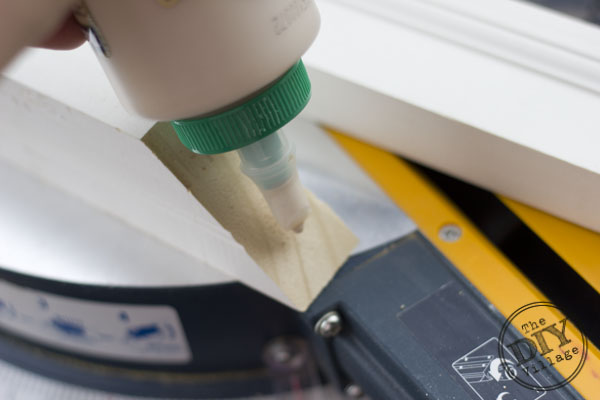 Apply wood glue to the raw cuts.
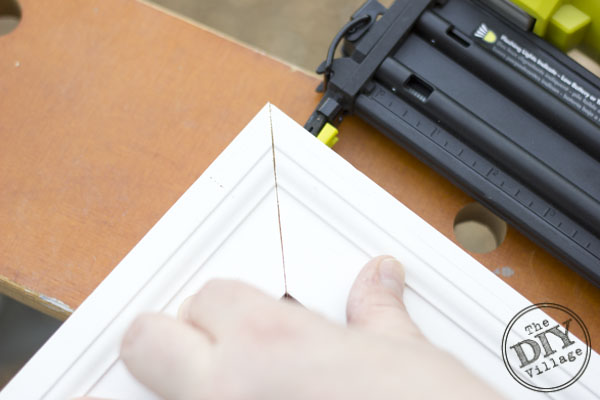 Join your raw edges together and nail. Continue with the rest of your cuts until the frame shape is complete
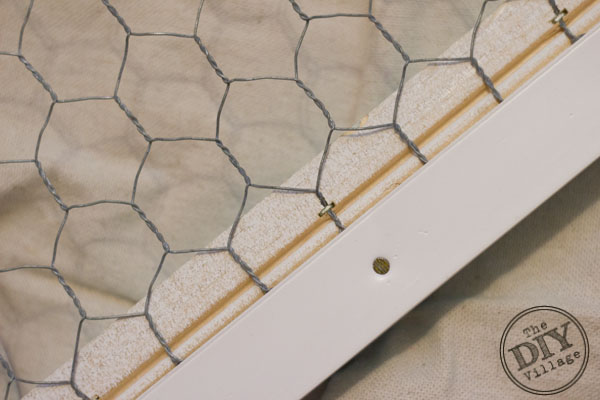 Cut the hen wire to length using wire snips. Attach to the back of the frame using nail gun with staples.
 Cut your lattice trim using the same steps above to cover the raw edges of the hen wire. Attach using lathe nails
 Clean the trim and door well and let dry. Get your Scotch Fasteners Extreme ready!
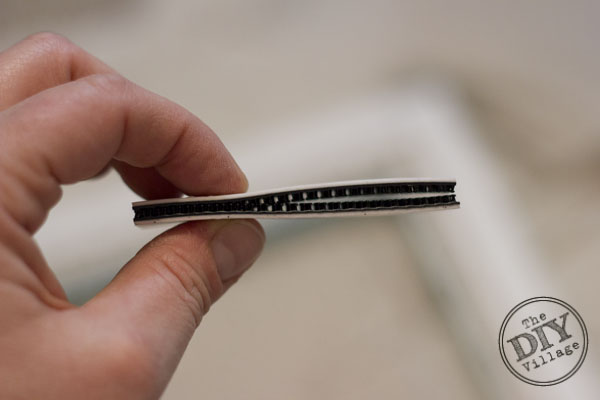 Align and connect two pieces of the Scotch Fasteners, listening for the snapping sound.
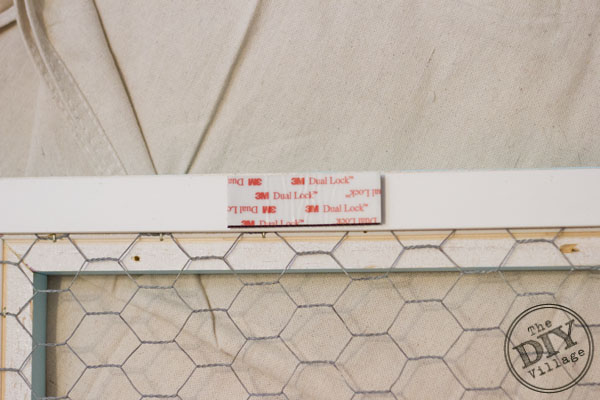 Decide the location of your Scotch Fasteners on the lattice, remove liner from one side and apply fastener to item – pressing firmly assuring a good contact.
 Lay whatever you want to display out to get an idea of how it will look. Remember that the total weight of your project is not to exceed 10 lbs as per manufacturers instructions. Cut floral wire long enough to wrap around the object and be twisted closed. Wrap the wire around the object and weave through hen wire and twist wires closed on backside of the objects.
Remove liner from outside fastener. Place a torpedo level on top of the frame. Find level and press firmly onto the frame at all of your Scotch Fastener location points. Press firmly for good adhesive contact.
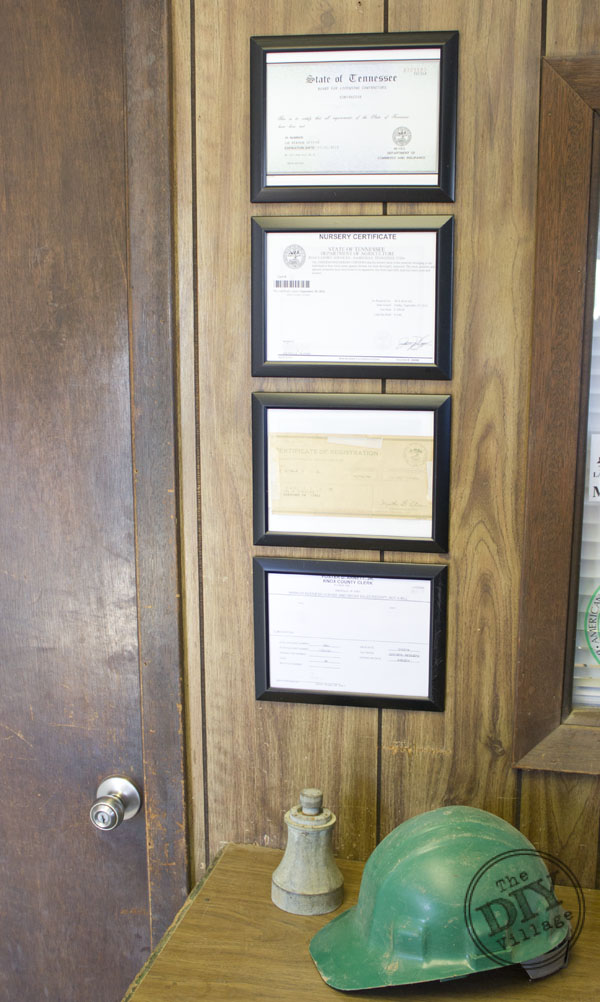 I picked up matching frames at the dollar store and used the same steps to hang the framed licenses as I did the display frame!
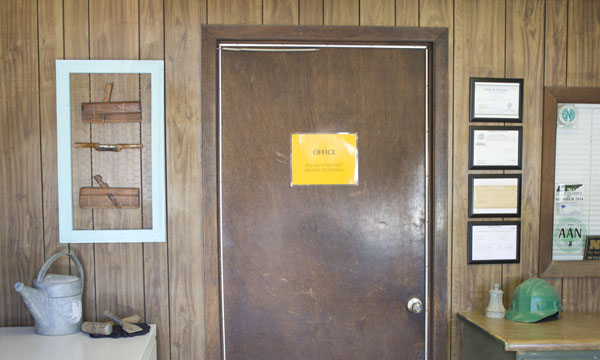 The decorative objects can be changed as many times as you desire as the Scotch Fasteners are good up to 1000 closures. What do you think? Not bad for the office of a construction office, right? I wish it were prettier but lets be honest I know the guys would have it filthy with dirt before long anyway and it is after all a construction office. Our licenses are firmly on the wall and the wire display frame is a favorite of everyone. I consider this a total W I N!
**Disclaimer – I have been provided compensation for this post, but as always all opinions and words are my own. No one has told me what to say! **
I love that hen wire frame and those fasteners are pretty cool. Great way to spruce up a functional need in your office!
Thanks girl! It was a fun project to work on!