
Jacque and I are always looking for new additions to our “Christmas Collection” She happened upon a post written by Katie from Bower Power that had a re-creation of a Pottery Barn Santa print.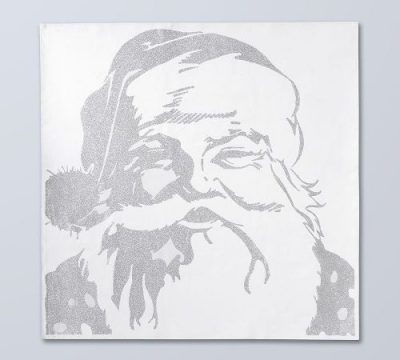 We loved what Katie had been able to create and decided that we’d try to come up with an alternative way to recreate our own Pottery Barn Inspired Santa Artwork.
As I’ve done in past posts, using adobe illustrator, I was able to draw the original image into a line drawing, then using my vinyl cutter, I cut a stencil of the line drawing.
We acquired some old decking boards that I thought would be a perfect back drop for my Santa artwork. I primed the boards with a multi-purpose primer, waited the required amount of dry time and applied the vinyl cutout to the boards using transfer tape.

When painting, it’s important to not get the brush to saturated. Excess paint can seep under the stencil causing the image to lose it’s shape. It’s best to get a small amount of paint on the brush, dab off the excess, then apply the paint in a “stipple” type technique.

Remove the vinyl stencil to reveal your reproduction!
Santa is looking pretty good.

I felt like there was enough room to add some text to the decking boards. I searched for a font that fit nicely, (St. Nicholas) and made a “Merry Christmas” text stencil. Follow the same steps to add the text to the artwork and you are left with your finished product.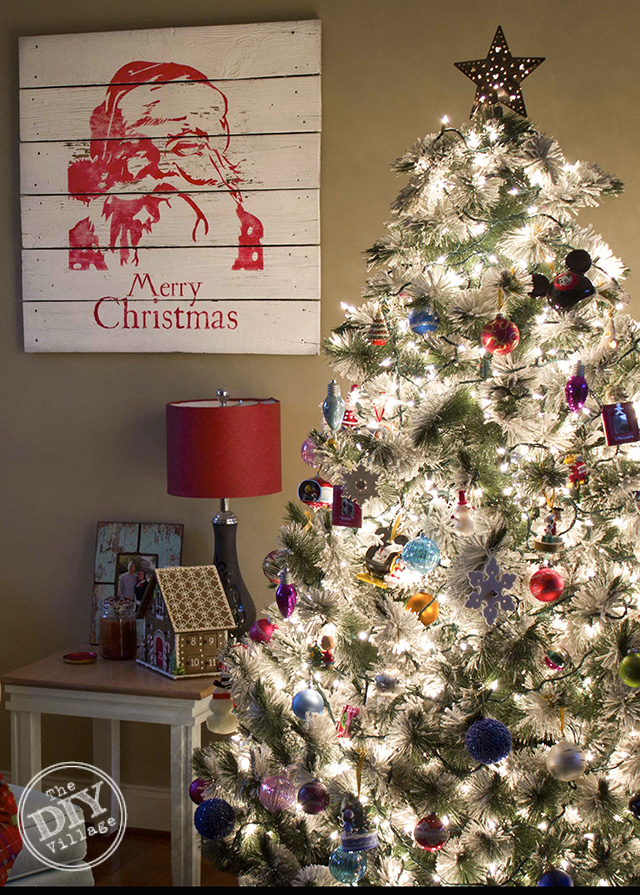
Pottery Barn inspired Santa Artwork

I chose to use old decking boards that we had saved, but this could easily be re-created on canvas or any other kind of wood.
Feel free to email us with any questions you may have about the process or the final product!
Merry Christmas!
**(We REALLY would love to share the Santa artwork drawing file, but as The DIY Village doesn’t want to infringe on any copyright laws, we are currently unable to do so)**
Thanks for understanding!
That is just crazy awesome! Love this
I love this! laurie
GREAT JOB!!! Love this idea! Found you guys on Knock Off Decor.
🙂 Cait
MyHouseMyCanvas.com
Oh my… I love this beauty! Now, I just need a die-cutting machine large enough to make one! 😉
Love it! I did one on canvas like this last year… from Katie’s blog as well. I love the look of yours on the wood a little better I have to say – it looks great distressed!
Kathryn, thank you for taking the time to stop in and let us know what you think of our Santa! We’re headed over to see your Santa right now!
This is absolutely fabulous!
Thanks Karen! He really helps put me in the Christmas spirit!
I’m stopping by from Debbie Doo’s! I love your take on the Santa artwork! Now I just need to ask Santa for a stencil cutting machine.
Tricia, We’re glad to hear that you found us through Debbie Doo’s! Debbie is one of our absolute favorites! You definitely should look into a vinyl cutter, it’s one of the best investments we’ve ever made!
Beautifully done! Looks like a million bucks..
Haydee, Thanks for letting us know you like it!
Wow, what an amazing job you did! It looks great next to your tree and I love the generous size!
Thanks Pam! Now if we could just make the Holiday Season a little longer…All the decor makes the house so cozy!
He is so awesome! Thanks again for sharing.
Wow!!!! That’s incredible. You did a great job. Here from Debbie’s.
Maria, we appreciate you saying so! He’s definitely one of our favorites!
Your PB inspired artwork turned out just fabulously!!! I love it, I’ve seen it on their website but I like yours better!
Hugs, Cindy
Cindy, that’s quite a compliment! Thank you for stopping by!
Would love to create one of these!!
I love this Santa! You did an awesome job on him… ever think of selling the vinyl image?
Susan
This is one of THE coolest things I’ve seen and hope to be able to make something like it next year!
Thanks for saying so Beth! Please make sure to let us know when you make one, we’d love to see it!
I love your Santa! I made my own version after being inspired by KB’s also and just stuck with the classic silver on a white canvas. Great idea making a stencil!
http://www.mysocalledhome.com/2012/12/santa-in-house.html
Hilary, thanks for stopping by! I’m heading over right now to check out your Santa!
I know you cannot give the file but is there somewhere it can be purchased?
Hey Jody,
Unfortunately, there’s not anyplace where we can sell the editable image. We just don’t want to risk violating any copyright laws.
You Santa is so fun and jolly! We’ll be featuring him over at Someday Crafts tomorrow 🙂
What vinyl cutter do you use? I make signs and hand cut my own stencils….SO much work. Not sure which cutter to get. So many to choose from. I love this project! Any tips would be great 🙂
Hey Tanya, we use a Roland GX-24 for anything large or long. It’s a bit more of an investment, but we use it all the time! It can cut up to 24″ wide and up as far as I know, as long as the vinyl roll is loaded straight, it can cut lengthwise indefinitely. If you’re a Windows user, it comes with a program called Roland CutStudio that will allow you to do all sorts of things. If you’re a Mac user like us, you would need to have adobe illustrator. On all of our smaller items, we use a Silhouette Cameo. It’s super versatile, really affordable, and there are TONS of tutorials on how to use them. It’s software is Windows and Mac compatible. And if you did need to use the Cameo on a larger project, you definitely could, you might just have piece together stencils rather than cutting them all out of one piece of vinyl. Hope that answers the basics! If you have any other questions, don’t hesitate to ask! We’d love to help!
Cute!!!!! What a smart little project! Thanks for sharing!
Love your Santa,
What vinyl did you use to do the etching on the wineglass ?