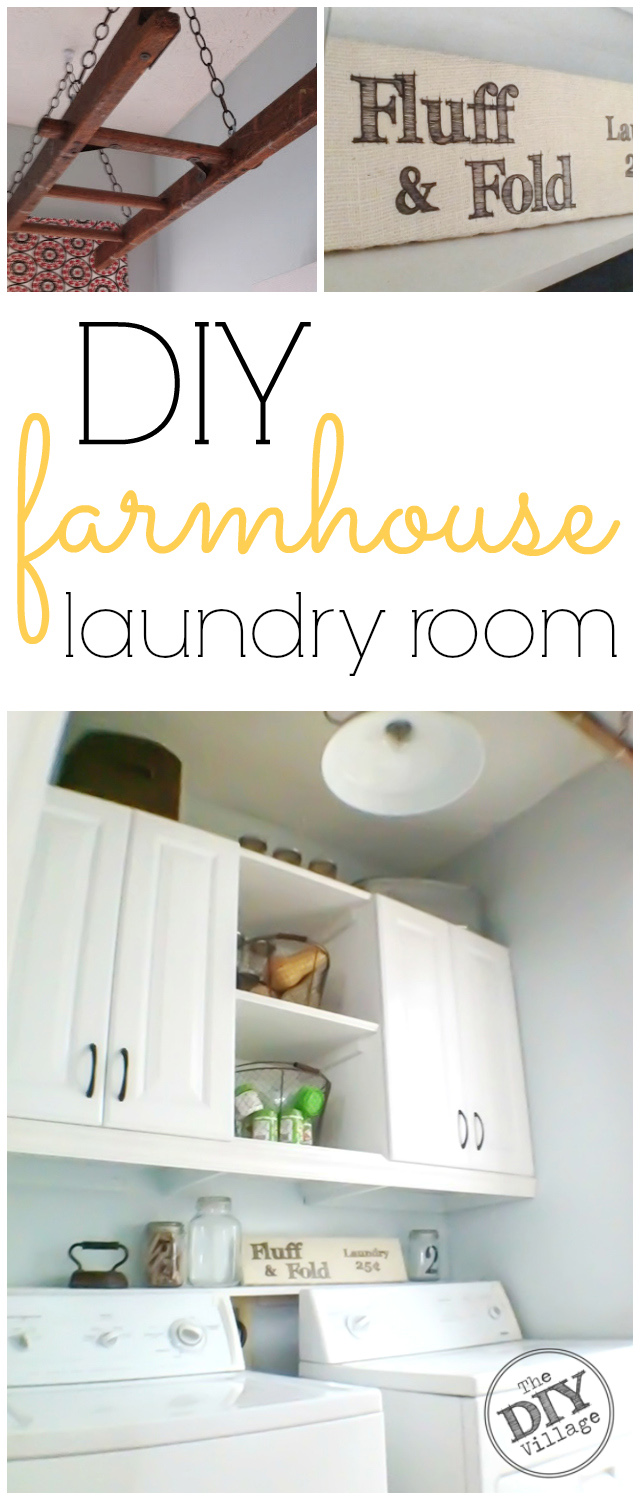
I am so excited to share our Laundry Room Reveal with everyone!
This house no longer has Laundry Room Envy.
If you remember back a few weeks ago I posted a picture of what the room looked like then and all the crap stuff that needed to find a home.
If you can’t tell from the pictures below it’s best described as ‘Square Peg Round Hole’.


Our laundry room is on the petite size.
If I were a realtor I would describe it as Cozy or Quaint, I’m sure you get where I am going here.
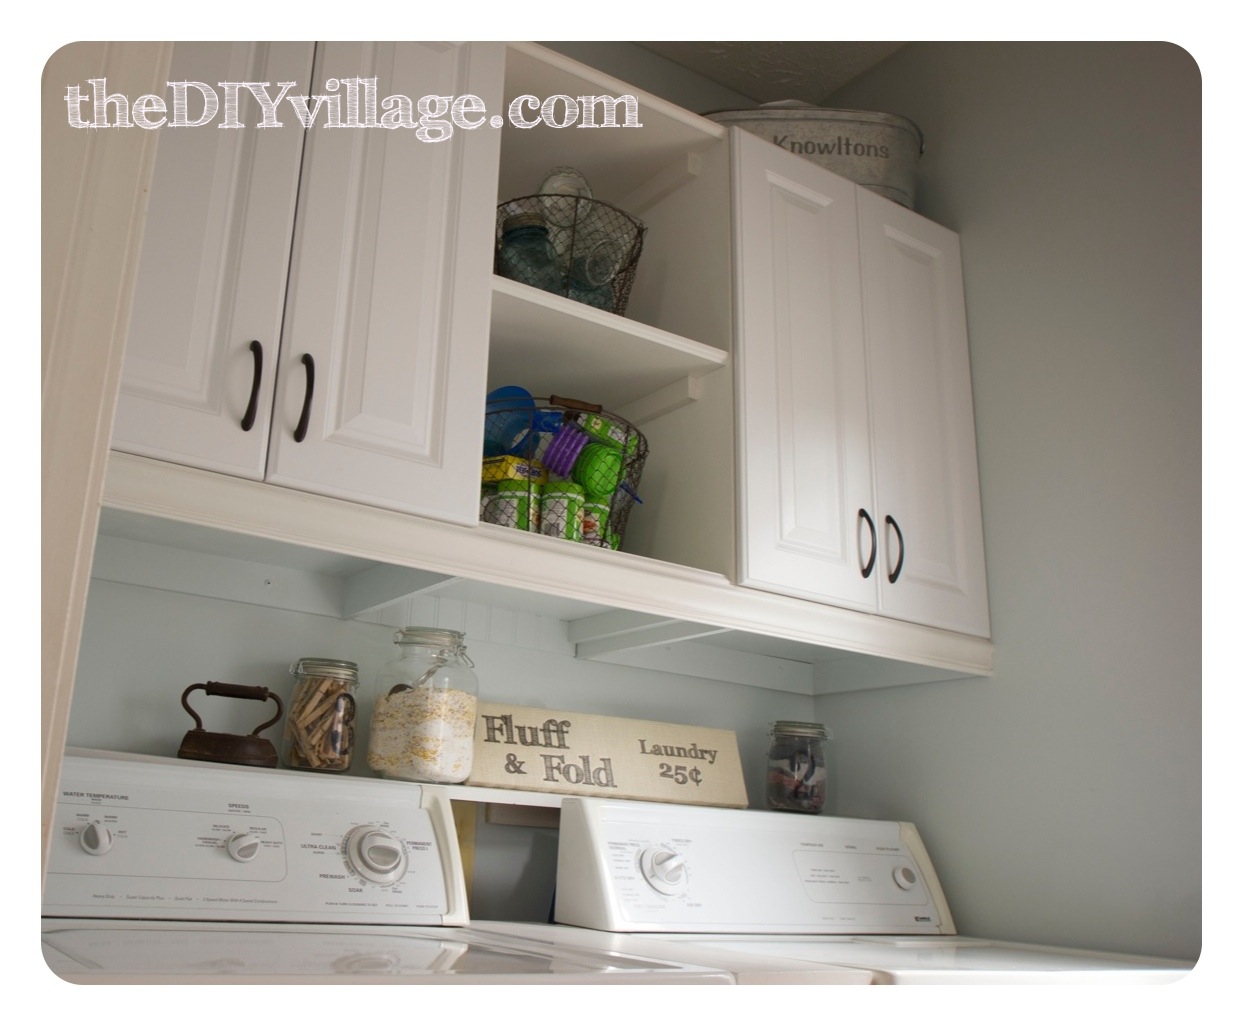
It is about 6.5′ long and 6′ wide, throw in a small space with a floor air vent, a large window and a washer & dryer you really only have one way to go and that is up.
So that’s what we did, we went vertical with the storage.
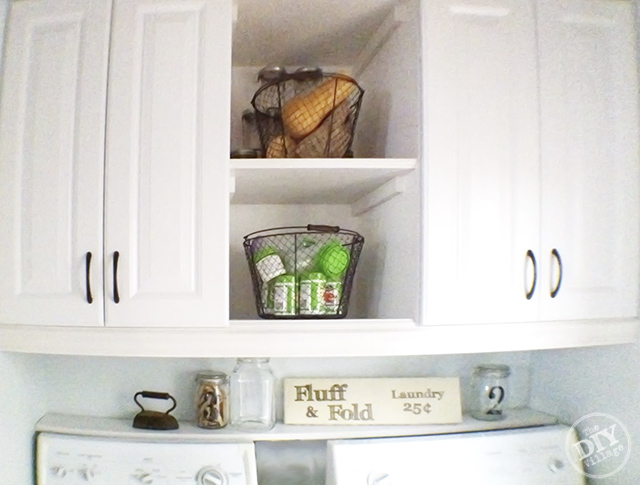
The first thing we did was remove the old wall cabinets. They were your standard 12″ deep and were just wide enough to leave this awkward wasted space in-between them. So down they came.
See that weird space???

Thankfully our floors are in awesome condition, unlike our previous home where the floors were torn and sad (I had strongly considered using peel and stick tile in that house)
So here we were with our naked laundry room and we did what any savvy DIY’er does we headed to Home Depot and Lowe’s to check out the stock cabinets.
I knew that they made cabinets deeper than 12″ but I had no clue they had to be special order. And they have a minimum number you have to order as well,
let’s just say that number was not two (2).
let’s just say that number was not two (2).
So my 16″ uppers were out of the question at this point!
(Insert booing and hissing here)
As we were about to leave Lowe’s with our heads hung low, admitting defeat, my brilliant husband threw a suggestion out there. Let’s go see what they have in the utility and organizer area. I mean seriously at this point what could it hurt,
I was already trying to formulate plans D & E.
I was already trying to formulate plans D & E.
Low and behold there they were, utility cabinets 15 3/4″ deep. Let me be a little more specific here BASE utility cabinets. Now I know you are thinking to yourself,
‘I thought you were going vertical’ and I can promise you we still are and did!
‘I thought you were going vertical’ and I can promise you we still are and did!

We mounted the base cabinets on the wall.
Yup it is possible and I am so happy we went with this because at this point in the makeover all of that crap stuff I showed you earlier is already nicely stored inside the cabinets with room to spare!
As one of my friends would say that’s ‘Smack yo granny good!’

Most people would stop here but since I suffer from the whole eyes bigger than the stomach thing,
I didn’t want to leave any wasted space.
I didn’t want to leave any wasted space.
So of course, I needed to add shelves between the two cabinets to store my canning supplies.
To keep him from going on strike,
I decided to bribe Matt with a new air compressor and new nailer to make the install easier 🙂
Thankfully this worked!
He’s a good man and went along with my shenanigans with only the occasional eye roll, LOVE him.And now the moment you have all been waiting for the Reveal …
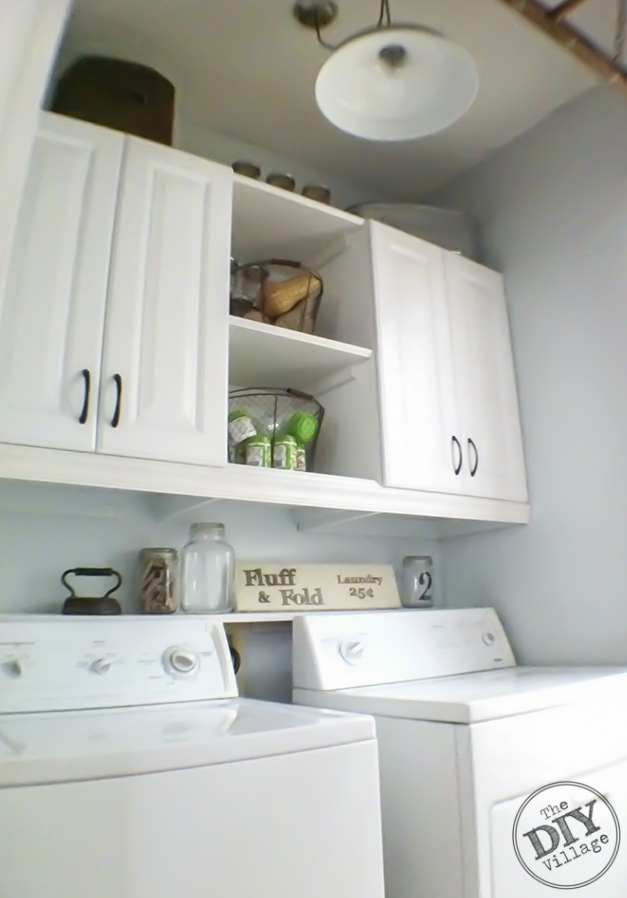
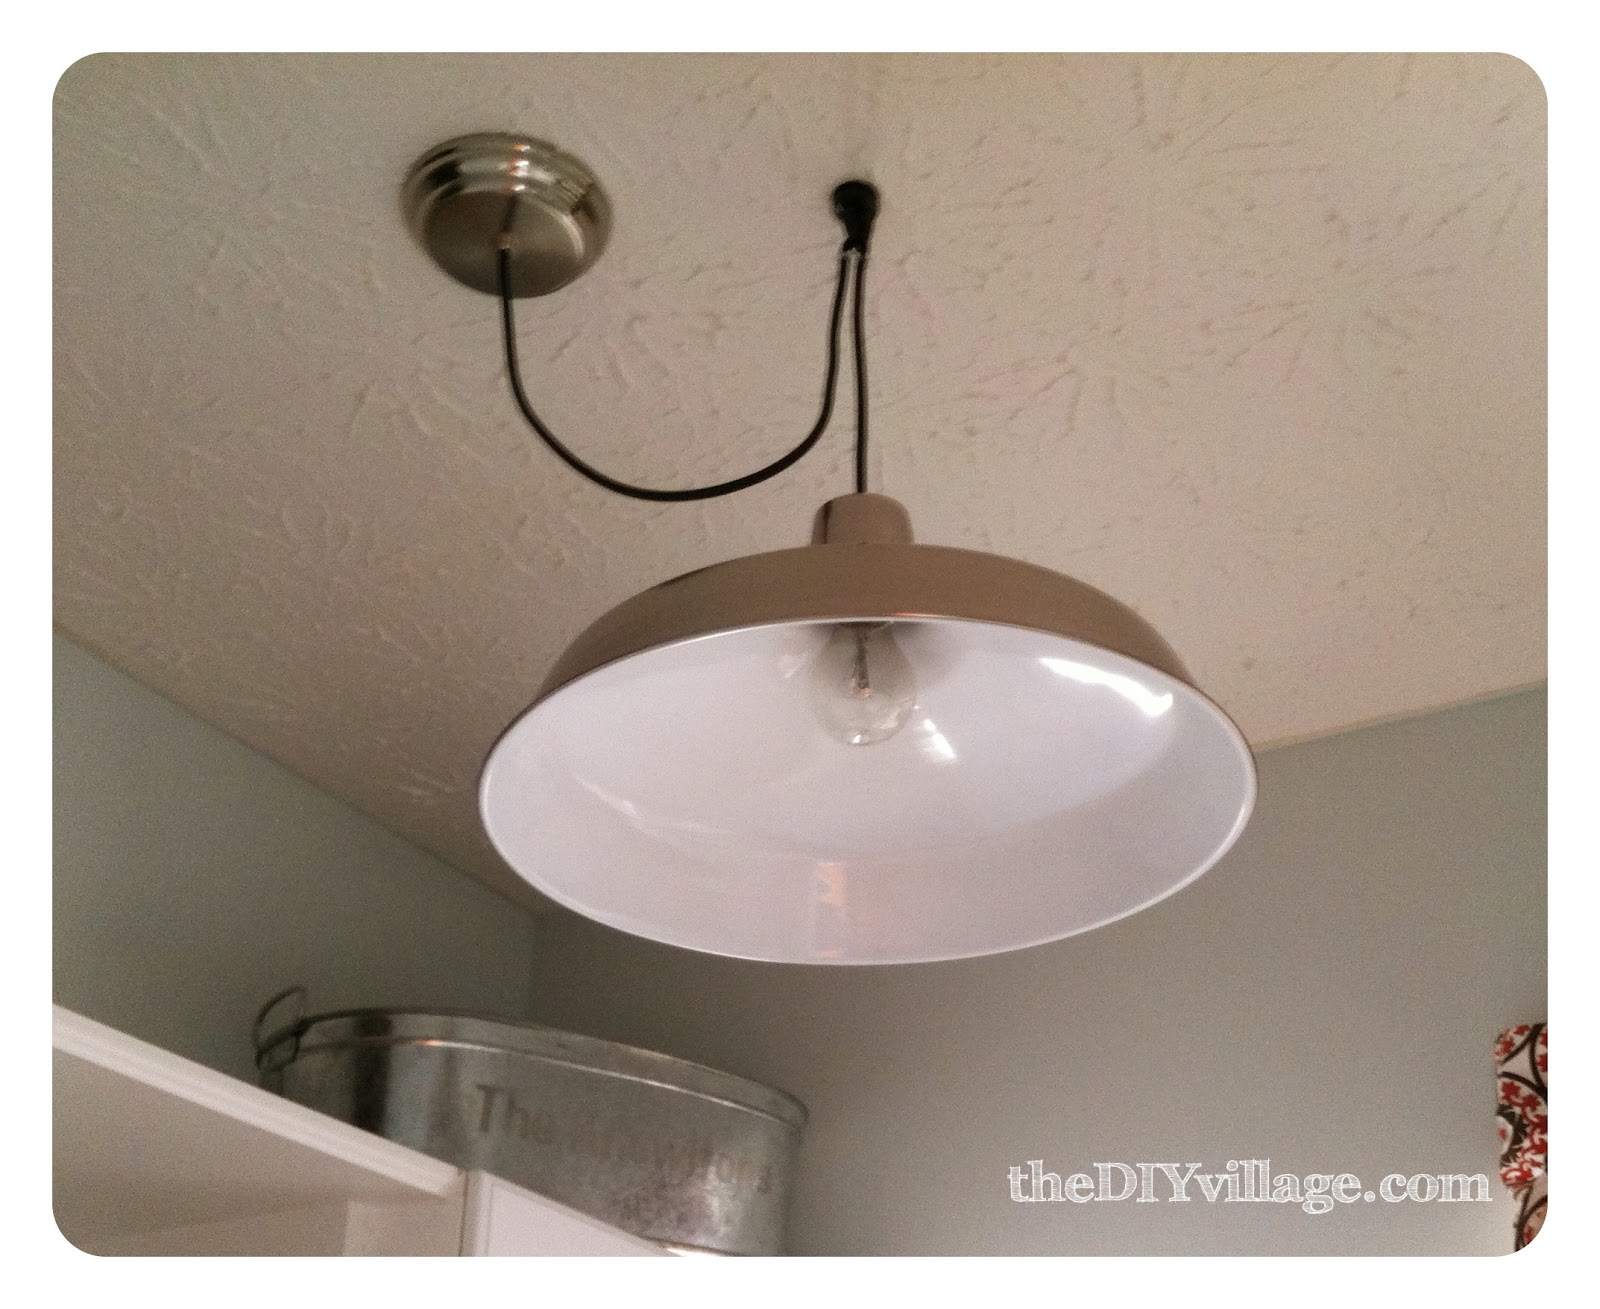
I also got a new light fixture (woohoo). The old one was your builder basic model, nothing fancy and no frills. Oh yeah and it was hung off center in the room by a good 9″ each direction … still not sure about that one, but anyway.
I found this cute pendant light, Matt installed it and swagged it for me so that it would be center in the room. Yet just another thing that I absolutely love!

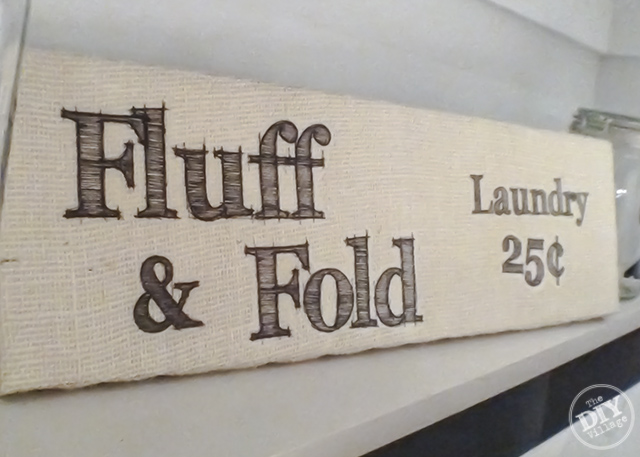
Complete with little shelf for my burlap laundry sign and jars.

A place for my canning items!

Asher and Fenway even have their own little space in here.

To say that I am pleased with the outcome of this room is an understatement.
We both L O V E this room, it’s fabulous and everything about it is US.
The best part is that we did it together from start to finish, this was our room.
On any given day you can catch Matt and I sneaking a peak into our Laundry Room, just standing in the doorway with the light on, smiling.
Yup, no more Laundry Room Envy in this house, not one tiny bit!
Check out our before and after below …
– Jacque

It looks awesome!!! It's such a difference (and I haven't even seen it in person *yet*) 🙂 Love that you thought outside the box and found the base cabinets – they look great! I also saw the cameo of the “Knowlton” tin – It looks nice in there, and seems to fit the design theme 🙂 Love you guys –
I love that the Knowlton tin works in there too! I'm using it to store my canning supplies <3
LOVE this!! If I get my wish on the new house, I'll be working on a similar project… Fingers are crossed!!
Regina
Crossing my fingers and toes! This one was actually pretty easy. Oddly enough I spent more time trying to figure out how to make the Fluff & Fold sign then I did putting the room together! That will be a future 'Nailed It' post!
I will totally need you to do a seperate tutorial about how to print on burlap! :o)
Haha okay I can promise it will start out with what NOT to do!
Look out HGTV!
Wow what a cute laundry room! You did an incredible job and love the light, I have it over my kitchen table.
Super job! That compressor and nail gun is not a bribe, though! It was motivation — and insurance of good help for future projects! Good investment, I'd say. I would love it if you would come link up with Busy Monday (open Monday through Thursdays) at A Pinch of Joy, a linky party for ideas that make life better, easier and more fun!
I can promise that compressor was more a gift for me than it was for him :o)
What a great job. You had a wonderful vision and did it. Your laundry room looks so cozy…who wouldn't want to do laundry in there.
Congratulations!
Geneva
Thank you! If i could get a chair in there I would never come out!
WOW looks awesome! Love it!
http://fitcraftystylishandhappy.blogspot.com/
Thank you!
Beautiful makeover!! What a great space to do to laundry!
Thank you Brandi, so sweet of you to say! Now if I can just get the rest of my house up to par with the laundry room … haha
Excellent laundry room it really does make a difference and dirty washing seems so much nicer to deal with. Enjoy! Maureen
Thank you Maureen! You aren't kidding those 9 loads I did this past weekend were so much more enjoyable to do, who knew it was possible. Plus now that it's pretty I'm obsessed with keeping it tidy! Win Win!
You did a Great job! now it looks really pretty and organized! It got my attention b/c I had the same issues with my small Laundry Room and I just finish fixing that! would love if you could visit me. I'm now following you on Linky and GFC.
Thank you! Your laundry room is fabulous, great job :o)
you must just love it!! and all that storage. enjoy!!
I am your newest follower..pls follow back if you can.
happy Thursday!
Thank you! The storage makes me so happy especially because it is so pretty haha
You had me at the light and the ladder…the rest is just icing on the cake! Nice job! Thanks for coming by and linking up – please come back this week to link up again!
Stacey of Embracing Change
I love them both too, especially the ladder. When Matt hung it for me I got a lil teary – I love having part of my Pops right there for me to use everyday!
Great job! Good thinking on the lower cabinet thing! I'm going to have a nice laundry area – someday…..
Haha thanks Karen! I know that feeling all too well!
JUST WHAT I BEEN SEARCHING FOR AN ANSWER WITH PICTURE PROOF! I’ve been looking at those Lowes base cabinets wanting to put them on the wall. Reviews one person said they did but I didn’t know how it would look. A BASE cabinet on the wall? Well looks great! I was thinking of hanging mine upside down and attaching crown molding to the base board part. Now I know I have more than one option. Thanks or the post.
Looks great! I love the little fluff & fold sign.
Y’all did such a great job! When I read ‘base cabinet’ first thought? Uh Oh…. this isn’t gonna be pretty. Wrong! I’d love to see a tutorial on how they were hung. Enjoy it, I don’t blame you one single bit, I’d be standing in the doorway gazing away all day! Really well done!
Struggling with this same issue right now and facing the project this weekend. Would you mind sharing the width of you cabinets and the size space between?
Thanks!
The cabinets are 22 5/8″ wide and the space in the middle is about 17 5/8″ wide as well.
Trying to find similar cabinets but no luck yet. Would you mind sharing the manufacturer of the cabinets you used. Hopefully that will help me locate them on-line.
Was struggling with the same issue and stumbled on your project. Stop at my local home improvement store on the way home tonight but had no luck locating any deep cabinets. Would you mind sharing the name of the manufacturer so I could attempt to locate the product online?
I haven’t gone to the store to check, but I can’t find them online, which is a total bummer.
I did find this, http://m.lowes.com/pd/ESTATE-by-RSI-23-75-in-W-x-34-5-in-H-x-16-5-in-D-Wood-Composite-Wall-Mount-Garage-Cabinet/999968897, which is similar. It’s slightly deeper which might not be an issue and has a pull out slider. The top drawer is faux and if it were me I would leave it off as replace that area with decorative crown molding. My only concern with this particular cabinet is that even though it is listed as a wall mount it looks like it might be made as a small sink base so it might not have a top. That’s a simple fix, but something to think about.
Well I finally finished my project. I did end up using these cabinets, I just drilled my own holes for the drawer slides and doors and reversed them so the drawer is on the bottom. Come out awesome. Thanks for the ideas!
That is awesome! You will have to email us after pictures so we can share them with our facebook fans!
I love a good laundry room transformation! this is up there with some of the best
Looks fantastic!