
This year marks my first ever venture into home gardening. Inspired by so many of my friends who grow and can their own produce I jumped on board. My garden this year consisted of 2 Strawberry, 4 Jalapeño, 4 green pepper, cilantro, basil and 9 Tomato plants. I thought it would be fun to have my own Salsa & Spaghetti Sauce garden. Well that is exactly what I got and then some. Over the course of the summer I have harvested about 2 bushel of tomato. 1 bushel = 53 lbs.
That’s a whole lotta tomatoes, to be fair when I planted 9 tomato plants I fully expected half of them do die. I was flat out shocked when I realized they were not only alive but thriving faster than I could contain them. One plant in particular was so out of control that I finally had to cut half of it out and pull all the tomatoes off and let them ripen on the counter.


A farmer friend told me about this trick! He also told me that if you have problems with your tomatoes splitting it’s because of inconsistent watering. Too much water causes the tomatoes to grow too fast thus splitting. I tend to pull mine off as soon as they get to a certain size to keep this from happening, especially if we have had a lot of rain.
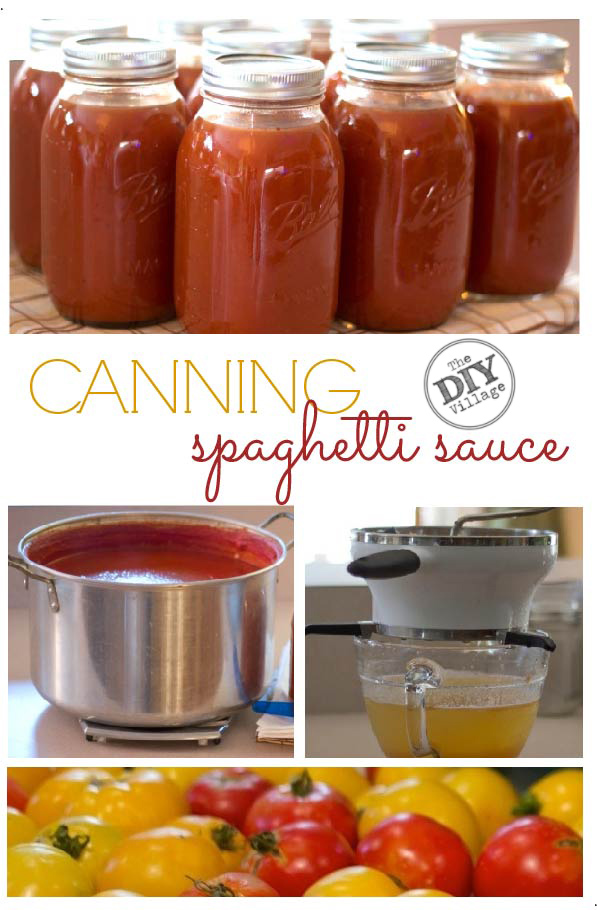
This past weekend I put up my last batch of tomatoes. There are quite a few still on the vine but those will be shared with friends and family or possibly just blanched and canned for the future. I was able to can 12 quarts of salsa and 20 quarts of spaghetti sauce.
I won’t lie I was very scared to can at first. Matt got me a canner and lots of supplies for Christmas and I’m pretty sure he fully expected everything to stay in the boxes and never get used. I made the mistake of reading the wrong book on canning and it had me petrified about poising someone. So my sweet husband got me another book. This time he got me the Ball Complete Guide of Home Preserving, (found HERE) Wow what a difference reading the right book makes, I highly recommend this book especially for first timers like myself. I used two of the Salsa recipes from this book and they turned out fabulous.
After searching and searching for a good spaghetti sauce recipe I came across this one HERE. I have made this twice this year and both times I have been very very happy with the results. I won’t be telling you how to make the sauce in this post but rather breaking down the steps involved. If you would like to try canning spaghetti sauce on your own head over and check it out.
When canning anything the first thing you want to do is prep your veggies. For tomatoes there are a few different schools. There are the blanch and peel type or the cut, blend, and food mill type. For my salsa I opted to blanch and peel but this sauce recipe calls for using a food mill, you can grab one HERE.
Canning Spaghetti Sauce
Step 1: Clean, Core, and Quarter your tomatoes
Also use this as a chance to weigh your tomatoes. Most recipes will go by weight not quantity.

Step 2: Run through food Processor
We don’t have a food processor so I use my Magic Bullet or Ninja found HERE & HERE, takes a few min longer but works great.

Step 3: Put tomatoes through the Food Mill
A food mill separates the juice and pulp from the skin and seeds. I bought this ONE (found HERE) because it has grippy feet.

Step 4: Put all ingredients in pot and cook & cook & cook
This sauce takes at least 2 hours on the stove, if you want a thicker sauce you need to cook it longer.

Step 5: Prep Canning Supplies
While your sauce is cooking use this time to wash all of your Jars, Rings, & Lids in hot soapy water, set out to dry (found HERE, HERE, & HERE)

Get items ready you will need for the canning process – Items on the towel are from a set-found HERE.

Lastly get your canner out – if you have a flat top stove check your owners manual before attempting to can on it so you don’t cause any damage to the stove top

Step 6: When your sauce is ready – Prep your Jars & Lids… AGAIN
A little different this time though. You want your jars to be warm when you put the sauce in so that the jars don’t crack and break. I fill the sink with hot water and keep my jars in the water bath till I am ready to use each one.
Put lids in a small pot on the stove keeping them warm – do not boil

Step 7: Fill Jars with Hot Sauce
This is a multi step process. Use the funnel to help fill the jar and then use the bubble remover/head space tool to remove any air pockets. Use the head space end to make sure you are not too full. Your recipe will tell you how full to go.

Step 8: Add Lid & Ring
Wipe the lip of the jar clean with a rag or towel making sure here is no food on the edge. Use the magnetic wand to remove the lid from the hot water and place on the jar and then add the ring and hand tighten down.


Step 9: Transfer to Canning Pot & Process
Make sure to have at least 1″ of water above the jars. Your recipe will tell you how long to process in the hot water bath.

Step 10: Remove from Water Bath
Once your jars have processed turn heat off, remove the lid from the canner. Wait at least 5 min before removing the jars. Use the jar lifter to take them out and place them on a towel or a wooden cutting board, with at least 1″ space between each jar. Place a towel over them, keeping the draft off. Leave them like this for 24 hours. While the jars are sealing you will here this cool “Pop” sound … totally music to my ears!

Step 11: Label & Enjoy!
WAIT! Before you label your jars make sure and check to see if they are sealed. Using your finger press down in the center of the lid. If it makes a “POP” sound it didn’t seal and needs to be eaten with in the next week. If you hear no “POP”, Congratulations you just processed your first batch of veggies! Remove the towel and label each lid with the year they were canned. It’s also a good idea to write what is in the jars. You would be surprised how similar some things look a year later …


Don’t forget to give yourself a big pat on the back. This is a lot of work, but nothing better than popping the seal and enjoying the fruits of your labor. Even better sharing them with friends and family! Have you ever thought about canning but been too afraid to try it yourself? Like I said earlier I was petrified but after the tomatoes started rolling in I had two choices – preserve them or find homes for them … lots and lots of homes!
Don’t forget to save your jars and rings for future canning (you will need new lids- found HERE). As long as there is no rust or chips in the jars they are easily reused!!
(I was not paid or compensated in any manner by Ball, I just really like their products and think they are great for beginners! These are the steps I use to process this particular recipe, make sure to read the directions for your recipe carefully and follow their directions.)
That is so awesome! I so need to try canning!
Thanks Jess, you really should try it. Even if you don’t grow your own produce, check out your local farmers market and see what they have, you would be amazed at the prices. Some farmers will even let you pre-order bushels and just pick them up on Saturdays.
Our area only has an abundant crop of tomatoes about every 4 years. In the years between I purchase tomatoes by the gallon can to make my salsa and spaghetti sauce. It’s not near as good as using tomatoes you have grown but if I don’t tell others don’t know.
What can you do if you pan processed spaghetti sauce,I did not use hot water bath method
I cooked my sauce in a pan as well. The hot water bath is only for sealing the jars for storage.
I put zucchini in my speghetti sauce,I sealed the hot sauce in hot jars.
I did not put them in hot water bath or pressure can.
Will they be ok
mmmm..mmmmm…good girl. What an awesome idea. Thanks for sharing.
Thanks Debbie this sauce really is awesome! The recipe I use is adjustable to how many quarts you want to make so if you are looking to make a homemade sauce for just a meal or two I highly suggest this one as well!
Great job! That’s a LOT of tomatoes! I canned about one bushel a couple of weeks ago. You’re right, it’s a lot of work, but I have to say the sauce came out great. Just made some chicken cacciatore that my hubby said was the best he ever had and he thinks it was the sauce. I added a couple of jalapenos which gave it a nice kick.
So true Doreen, nothing better than homemade sauces!
I love to can! I can several things including tomato sauce every year and I even give the jars away as gifts at Christmas. Some tomatoes I make up into pasta sauce but others I leave pretty basic- salt, pepper, and garlic- so I can use it in chili, salsa, sloppy joes, and other recipes that may not use Italian seasonings.
Canning can be a lot of work, but it doesn’t have to be. You don’t need to use a pressure canner. The high acidity level of tomatoes keeps bacteria from growing inside the sealed jars. All you need is to put the jars in a rolling water bath on the stove for 15-20 minutes. I use the same pot for sanitizing the jars and canning (unless I sanitize them in the dishwasher). Once you get a rhythm down, it goes by pretty easy.
Also, I’ve found that since there’s only 2 of us in the house, an entire pint of sauce is too much to use up in a single meal. I’ve started canning all of my sauce in pints which is the perfect size for 2 people.
I also prefer to use only the wide-mouthed jars. I think they’re easier to store one top of each other.
Thats a good idea leaving some more bland for other types of meals. We may try that next year.
I didn’t mention in my post that the canner I use is a pressure canner for a few reasons two of which you already mentioned but also in our home I only have one stock pot and I needed that one to cook in so I remove all of the gauges on the pressure canner and use it as a large water bath. Getting into pressure canning low acid foods is not something I am anywhere close to posting about … not sure I ever will be ready for that one. 🙂
Thanks for the tips, canning is very rewarding and I hope more people try it for themselves!
I really want to try canning, but I’ve always been nervous (plus I have a flat-top stove, so… I’m not sure if it would be too difficult!)
Last year, our garden died in the intense drought (we were fighting through it, but over vacation, our house sitter didn’t get quite enough water to them, and we couldn’t seem to revive them at all).
I really need to pin this so I can try next year! I freeze a lot of my stuff, but canning would last longer and be better, I think!
We were lucky here in East TN we had an incredibly hot spring and a nice rainy summer … very strange but I was very pleased with how my garden turned out!
Yum, homemade tomato sauce! I love canning. 🙂 Thanks for sharing at The Fun In Functional!
Thanks for hosting Jessi! I love linking up to your party!
Just the other day I was telling my husband I wanted to learn how to can so I could have my own pasta sauce on hand. This is great, I can’t wait to try it!
Thats great Alli! Come back next year and let us know how it turns out!
Hi, yes i am afraid of canning..my question is how do you store the products you can? especially the sauce. Thanks for posting.
Don’t be afraid especially with high acid foods it’s easy easy easy!!!
I always keep my trays the jars come in so I can stack them on top of each other in the pantry. This is the recommendation from Ball – “Where is the best place to store home canned foods? The optimal location for home canned foods to be stored is in an area that is cool, dry and as dark as possible. A temperature range of 50°F to 70°F is best. Food stored at temperatures higher than 70°F may lose some of its nourishing qualities. Freezing temperatures can cause the contents of a jar to freeze and expand, which in turn can break the seal or the jar. Be certain the area you select to store your home canned foods is a dry location. Damp locations can cause lids to corrode.
Since light hastens oxidation and destroys certain vitamins, a dark storage area is preferred. Light can also cause certain foods to fade in color. Placing filled jars in cupboards or boxes protects them from light.” Here is a link to their site for FAQ (http://www.freshpreserving.com/tools/faqs.aspx) Good luck!
I have been canning for well over 20 years, and really do enjoy it, even though it is hard work. I can enough spaghetti sauce to get me through fall to spring. My pressure cooker dies so I water bath this year. Thanks for sharing your inspiration with Sunday’s Best – you helped make the party a success!
I laughed when I saw you wrote about being scared of canning! That’s me for sure, but your post helped make me think about trying it! Thanks for the great instructions!
Hi there, I have looked all over cannot find a recipe or intructions or even advice about adding meat to the homemade sauce and do you process the jars differently that the sauce recipe call requires?
how long can you keep them for and do you just store in your pantry?
I am 78 and have not canned for 30 years. But your instruction is tempting
Me to try this year . Thanks
Did you add citric acid to the jars?
No, I did not.