If you are looking for a last minute gift idea, boy do I have the project for you.
What do you think about a $ 1.00 monogrammed jewelry box?
Not bad huh?

I recently entered contest offered by Debbiedoo’s and Fox Hollow Cottage.
They were giving away a $ 50.00 gift card to the Dollar Tree and I WON!
Can you imagine how much damage I could do with that much money in there … that’s at least 50 items Yahoo!!!
Of course the first thing I did when I got the gift card in the mail was run to the Dollar Tree and I spotted these beauties …
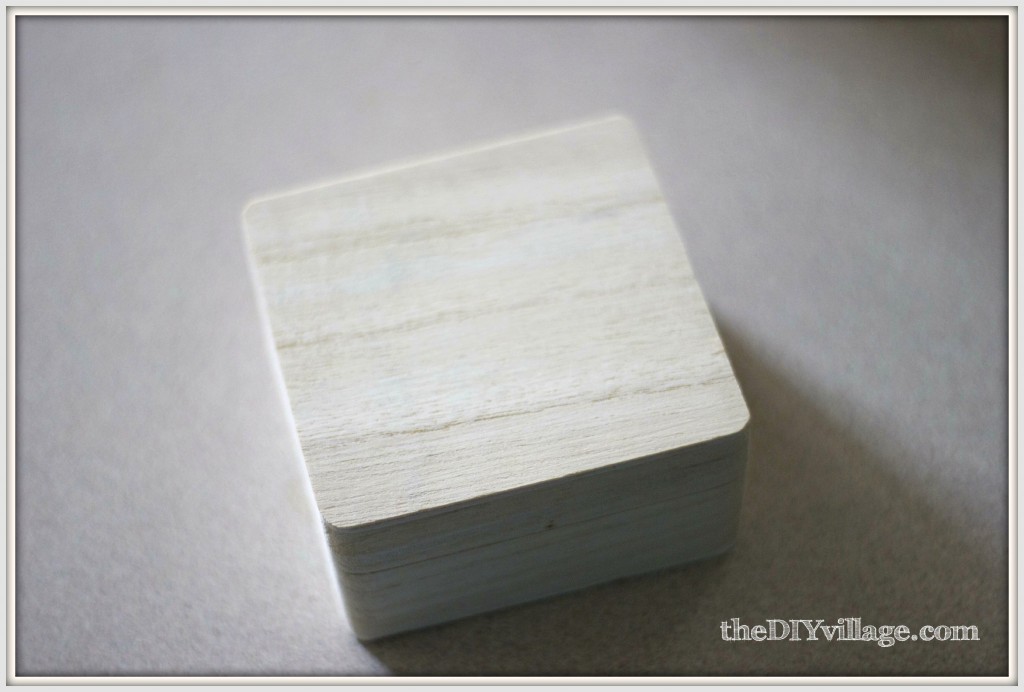
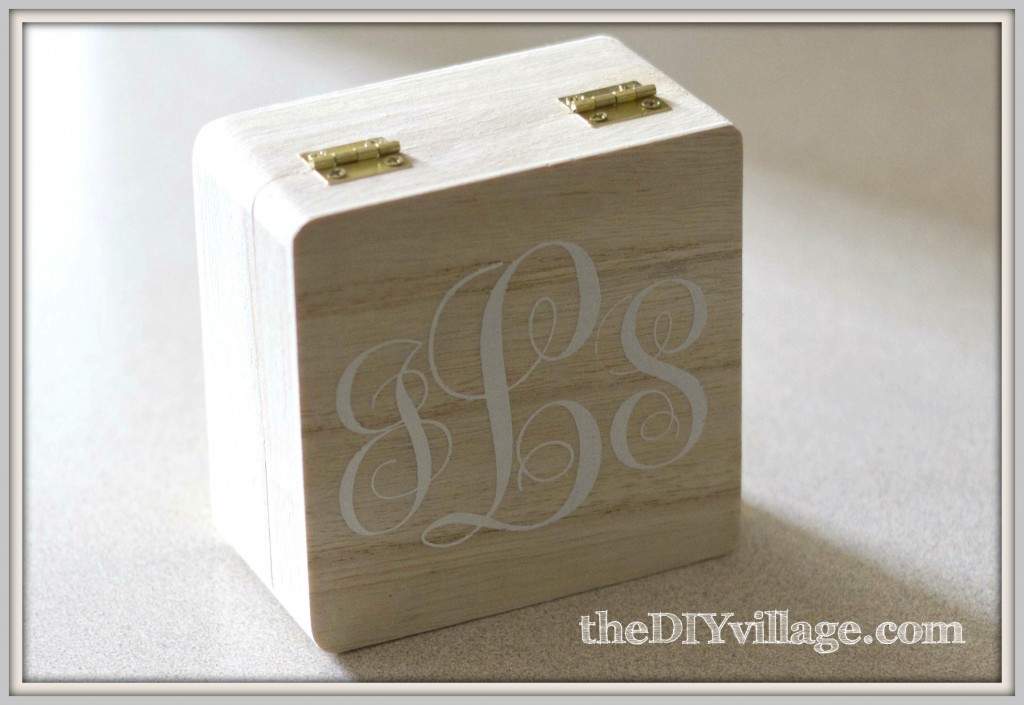
These adorable pine boxes.
They have piano hinges on the back.
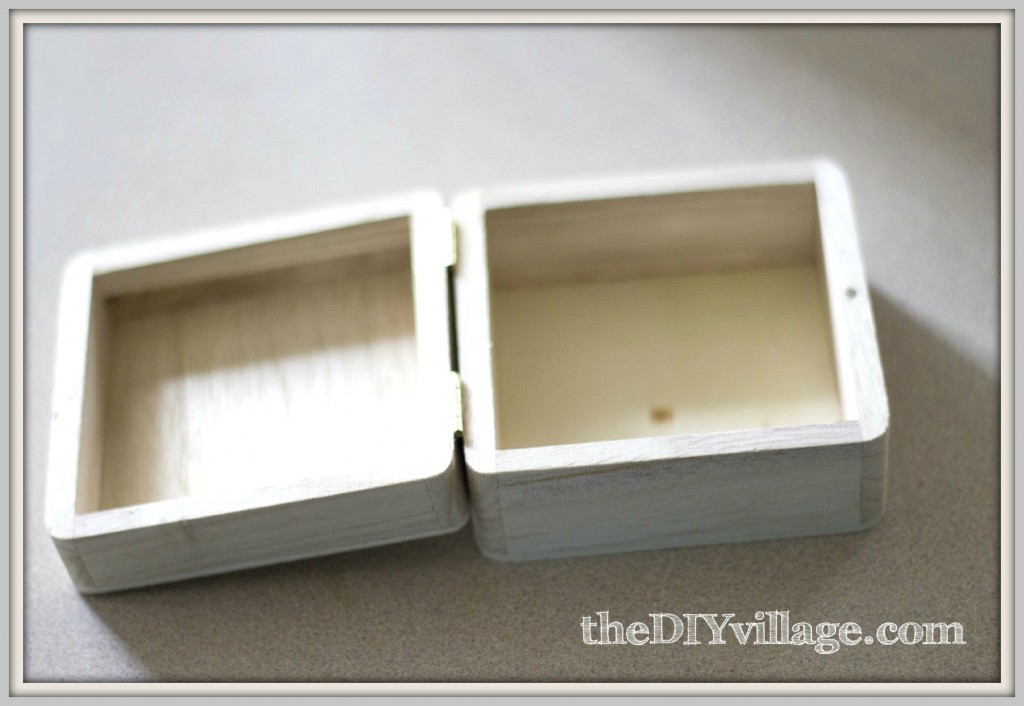
And even a little magnet inside to help keep the boxes closed.
Pop Quiz.
How cute would these little boxes be with a monogram on them?
Better yet, how cute would these little boxes be with a monogram and stained like my vintage industrial bar stools?
Are we on the same page here?
These little boogers would look AWESOME!
I created the monogram I wanted, cut it on our vinyl cutter, and then applied it to the box.
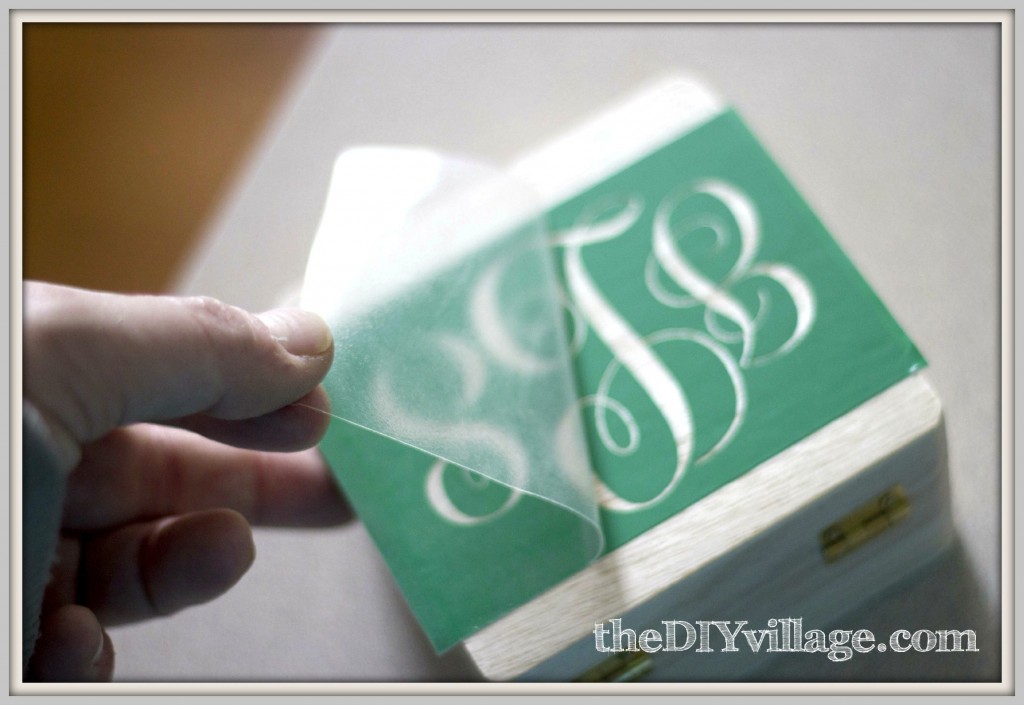
Using latex paint (Behr White Truffle) I stenciled the letters on to the box.
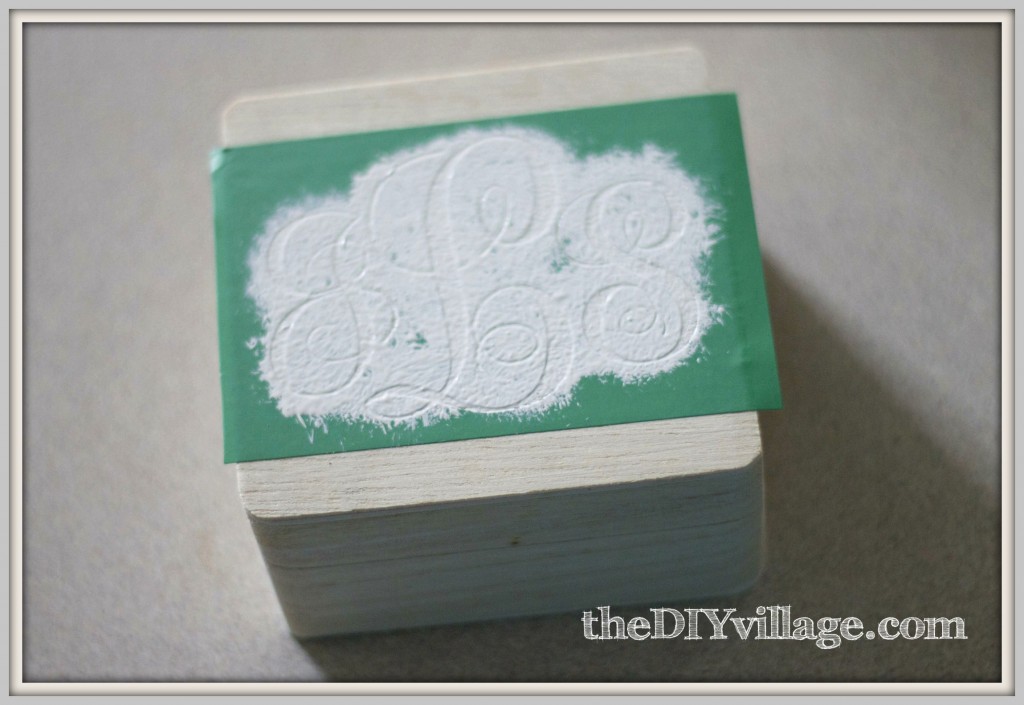
And carefully pulled away the stencil.
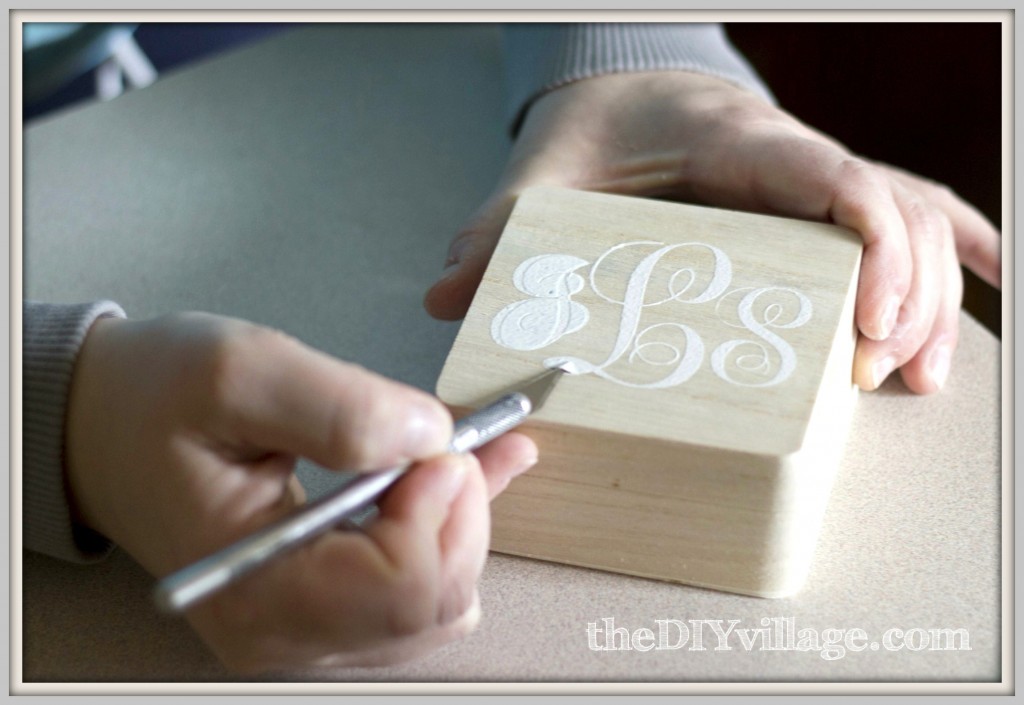
Once all of the vinyl is gone you have a beautiful monogram.
Let the paint dry thoroughly and then apply your stain.
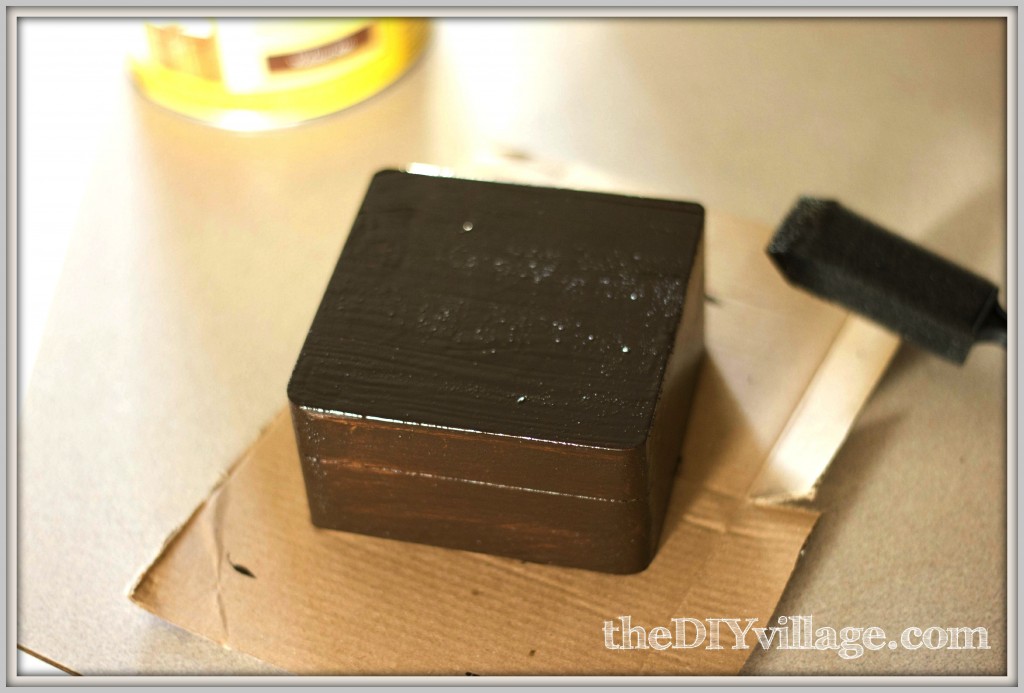
I chose Minwax Gel Stain in Walnut.
Follow the instructions on the can (paint on wipe off).
Once your stain is on and dry you will need to lightly sand your box.
The stain raises the grain and will be rough to the touch.
No one wants a rough box!
Let your box set for the recommended 6 – 8 hours and then you can apply a few coats of polycrylic.
When it is all said and done you are left with an adorable handmade LAST MINUTE gift!

What do you think?
Not bad for a $ 1.00 eh?

This is such a beautiful gift idea! I love how you applied the stain over the white stencil – such a special and personalized gift!!
Ooh, that turned out gorgeous! Wow!
I am GEEKING out over this idea in a MAJOR way. It has all the best DIY elements: cheap, last-minute, and ends up looking SUPER expensive. LOVELY. Sharing on FB right this second!
LOVE that technique of stain over those stenciled paint letters! So personal and gorgeous! Pinning!
Gorgeous, I just love it! That font is great too 🙂
Thanks so much Jessi and thank you for hosting the Fun in Functional Party every week!
You’re welcome! 🙂 Just wanted to let you know I featured this on my blog today! Stop by and grab a button if you want! http://practicallyfunctional.net/2013/01/the-fun-in-functional-link-party-31/
That is so pretty!!
I love it! A vinyl cutter really should be on my Christmas list! I’m stopping by from the Fun In Functional, and following you now!
Thank you Kendra! If you don’t have a cutter on your list this year make sure it’s on there for next year, you won’t be disappointed!
Hi! This is really cute–such a good idea!
I wanted to introduce myself–I am the person that redhead can decorate paired you with as your secret santa! I hope you got the ornament. Y’all are so cute–and my son is in grad school at UNCG, so we have something in common. Have a great holiday!
I love the ornament you made it’s perfect and hanging on our tree! I instagrammed a photo but didn’t realize that it wasn’t linking properly to FB for you to see that I got it! Can’t wait to post about it Friday! THANK YOU!!!
pssst…I am making one of these for Kate for Christmas…I love it!!!
Oh yayy! That is great – I hope she loves it!!!
Beautiful!! And to just drop a little necklace or bracelet inside…it would be perfect!
Love this! Such a simple, yet brilliant idea!
It looks great! I really like that you stained it instead of just painting it!
Absolutely beautiful project! and for $1?!? love it
That is really sweet!
Thanks for linking up this week!
Stacey of Embracing Change
Too cute! I really love the stained one, it looks expensive! 🙂
– April Hoff
housebyhoff.blogspot.com
Very pretty!
Great idea!
This looks great! Very professionally done!
I think you ROCK..and you are so talented and clever. Where is your pin it button? I have to pin these babies!
That is an awesome idea. Can you please tell me what cartridge you used on the Cricket for this – I have been looking everywhere for a monogram one. Thanks so much – Merry Christmas.
Hey Sheri! We actually don’t have a cricut cutter, we’ve got a Roland GX-24. We bought the font in a collection from fontbros.com. But try searching for the font, monogram kk, it’s very similar! Merry Christmas to you too!
I’m going to try and remember this for later! Great gift idea 🙂
Merry Christmas,
Debbie
What a pretty gift idea – I officially NEED a vinyl cutter!
Well done Jacque, it turned out just beautiful!
Love this last minute gift idea!
CONGRATS!!!
You have been featured at The DIY Dreamer… From Dream To Reality!! Please come on over and grab your featured button… you deserve it!!! http://thediydreamer.com/from-dream-to-reality/from-dream-to-reality-linky-party-48/
I love your jewelry box. I will be featuring you tonight at my Winter Blues Wednesday party that opens at 8pm EST. Please stop by and pick up an I’ve Been Featured button. Thanks.
Such a cute idea. This would make a great gift. I would love to have you come link up to my Get Social Sunday party and follow along. Such a great idea for other bloggers to see!
http://alivedinhome.blogspot.com/2013/01/get-social-sunday.html
How did you design the monogram? Which font did you use?
Hey Eleni – We purchased the font we used but it is very very similar to Monogram KK.
What a cute project! I love it so much that I decided to feature it in our roundup of monogram crafts! Check it out here: http://www.favecraftsblog.com/monogram-crafts/
Have a great day!
I absolutely love this idea! I was looking through your DIY gallery and this one instantly caught my eye. Wow how simple, easy and beautiful. It would make such a great gift for a bridesmaid or a teacher or anyone really. I found you guys on Hometalk and I’m your newest follower! Great job. (I wish my hubby was a DIYer with me 🙂 )
What type of vinyl and vinyl cutter did you use?
I think we used scrap vinyl and our Roland GSX-24 but I have also used Cricket vinyl with my Silhouette machine to create other boxes as gifts.
Do you have more detailed descriptions on how to make these? Like where I could make that monogram, and also the pop-up photo box.. because i’d love to do that for my boyfriend. thanks for your time and consideration!
Thanks for the great idea but I really love it when bloggers give us some alternate ideas in case we don’t have a piece of equipment to use (such as your monogram.stencid maker) and need an alternate way of doing the project.. Could I just cut out the letters or maybe cut out a design and use it instead? Everyone doesn’t have a cutter
You can most definitely cut the design out yourself but I would suggest having a local store that sells vinyl monograms make one for you. Using vinyl you get a much cleaner finished product. Any design would work for this project and I have seen people use contact paper for years to create stencils, so that might work as well.
LOVE these! Gorgeous. Sue via All Things Creative