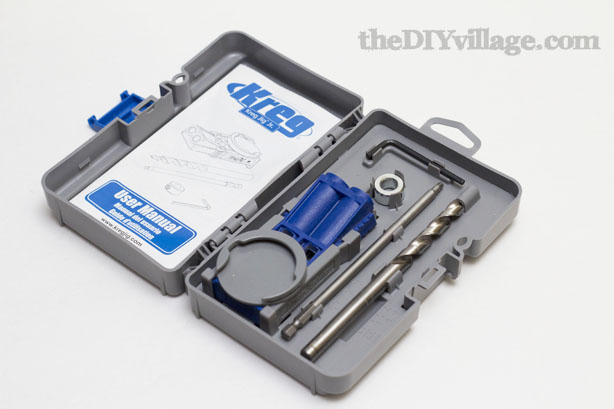
 We are in the process of building some cabinets for our pantry renovation, so it’s a great time to write a tutorial on how we use the Kreg Jig Jr
.
It’s a reliable and easy to use tool for making strong and dependable joints for all of your woodworking projects.
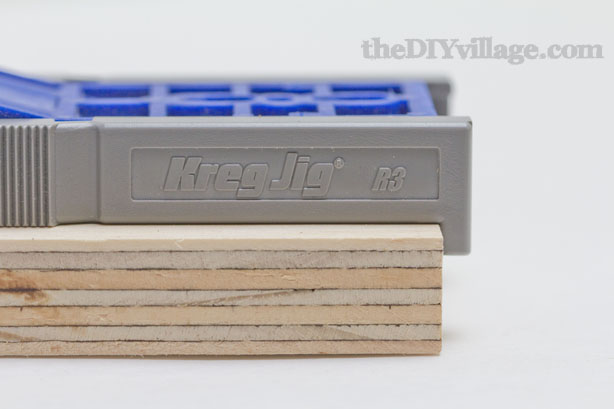
Let’s take a look at the Kreg Jig Jr!
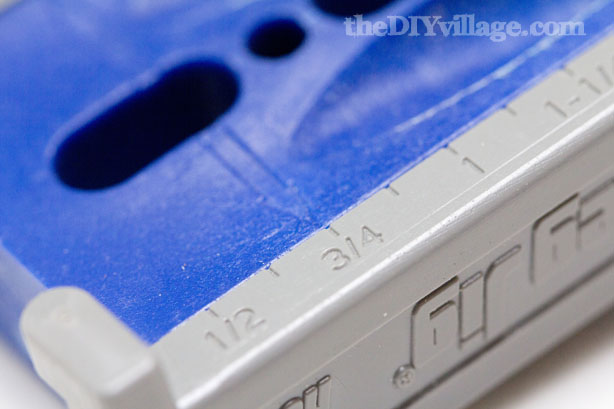 On the bottom side of the Kreg Jig Jr, there are adjustable sliders that have numbers on them. Those numbers correspond to the thickness of the wood that you’re using for your project. So, if you are using 3/4″ plywood for your project, you’ll need to set both sliders to the 3/4″.
 The grey sliders have small feet that hang down to act as a lip to butt up against the edge of your wood.
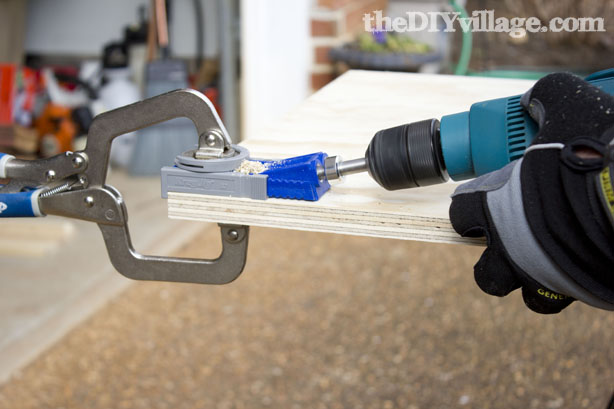 Most any bar clamp or c-clamp will secure the Kreg Jig Jr in place, but I’ve found that when I’ve got multiple pocket holes to drill, I prefer using a Kreg Face Clamp
.
It easily attaches to the Kreg Jig Jr and it’s easily adjustable for clamping different thickness woods.
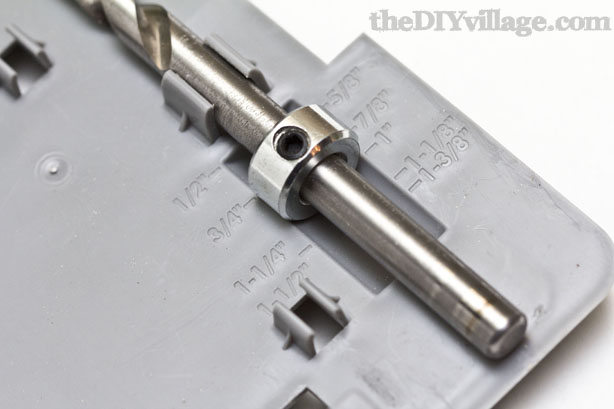 Inside the Kreg Jig Jr. case, you’ll find a drill bit with an adjustable collar. The collar acts as a depth gauge for drilling into woods of varying thickness. To set the collar to the correct depth simply slide the collar onto the drill bit, place the bit into its holder in the case (It has built-in gauge markings), slide the collar to the same measurement as the Kreg Jig Jr, and tighten the allen screw on the collar.
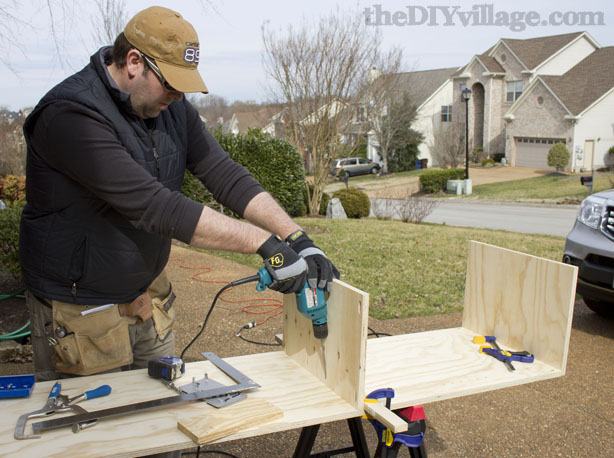
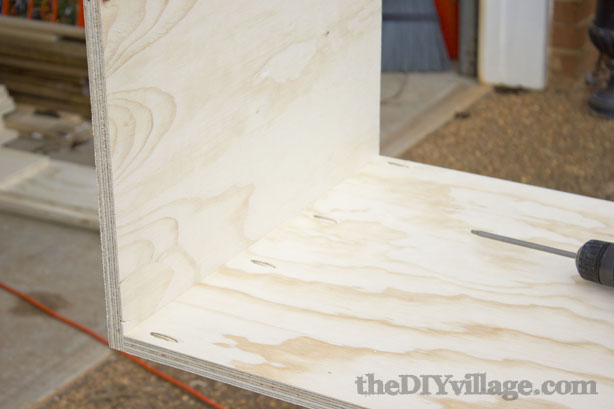 The cabinets we are building are about 20″ deep, so we chose to connect each joint with 4 separate pocket hole screws. Using the Kreg Face Clamp, we secured the Kreg Jig Jr. into place, then drilled the four evenly spaced pocket holes for the first joint.
 Kreg makes another kind of clamp that makes assembling a lot easier. It’s called the Kreg Right Angle Clamp
.
One side has a round flat surface, while the other side has a pin just large enough to fit inside one of the pocket holes.
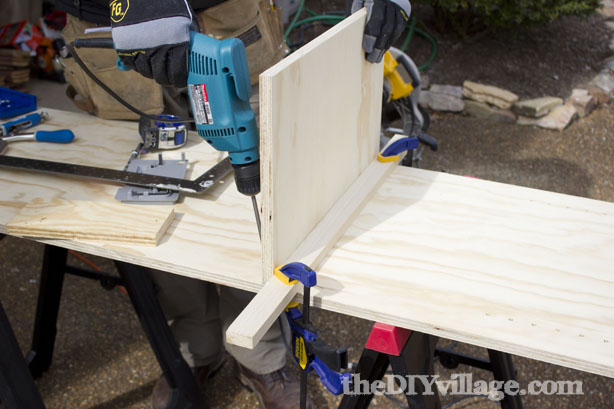 Following the same principles as we’ve already discussed, it’s really easy to install a fixed shelf using the Kreg tools as well! Measure and mark where the fixed shelf will be placed. Take a straight scrap piece of wood and clamp it into place so that the edge lines up with your shelf marks. This will help hold the shelf in the correct position as you begin to screw it into place.
Here I am finishing up the assembly. At this point, I repeated the same process on the opposite side of the cabinet until all of my joints were secure.
Using a Kreg Jig Jr makes easy work of building and assembling your own custom cabinets. The Kreg Tool Company has a lot of other worthwhile tools in their cache. But don’t just take our word for it. Head over to Pretty Handy Girl where our friend Brittany shows us the value in using a Kreg Jig or stop in over at Chief’s Shop and see what Chris has to say about using the Kreg Shelf Pin Jig!
Interested in seeing how these cabinets turned out? Check out our kitchen pantry renovation reveal!
Thanks for stopping by!
Disclaimer: We were not paid to endorse the Kreg Jig Jr. This tool however, was given to us by the Kreg Tool Company while attending a conference. The opinions found here are honest and my own. There are affiliate links within this post.
Sharing With:

I love Jr! The Kreg jig is a life saver 🙂
Debbie
Debbie, I saw your bench that you made with you Kreg Jig! Love it! My to-do-list just grew by a few projects!
It looks interesting, but I think that’s something my husband would use. He’s the tool man in our house, even though I am learning.
Debbie 🙂
Debbie, you’d be amazed at how easy these are to use! Plus, they open up a whole new world of DIY opportunities!
Okay, I’m totally running to home depot to pick up these cool toys! I’ve been wanting to try one of these out so this will be perfect to get me started. 🙂 Let’s see… what kinda project do I wanna start next?? haha
Ellora,
I looked to see what Kreg equipment HD carries, but didn’t see many options. But, I know for sure that the Lowes on Peters Rd has a good selection! Which ever Kreg tool you get, I don’t think you’ll be disappointed!
You make it look so easy! I am going to tell my hubby about this cool tool!
Amanda, I wish I was just that talented, but in truth, the Kreg Jig really is just that easy to use!
Totally putting this in my list of things to do! Tools and I are going to become good friends this summer!
Jessica, You’ll love it! You’ll tackle those tools in no time!
Thank you!! I haven’t been brave enough to tackle a Kreg. But, now I think I could manage!!
Janel, I only wish that I would have found it sooner! With the projects I’ve seen you tackle, the Kreg should be the one intimated by you! Love your work and congrats on the CWTS! We’re cheering for you!
Nice tool! Pinning this for future reference!
Thanks Jessi, it’s probably my most recent favorite tool!
I tried to go to Home Depot a few months back to buy one of these sucker to build my headboard and those turkeys told me that version was discontinued!!! I will definitely be putting it on my list to grab up from Amazon very soon! Thanks so much for the instructions, yall!
Gwen, I haven’t seen them at the HD in awhile, but we were at Lowes last night and they were still carrying the Jr. They make a few other kits, but I found the Jr to be a pretty good bang for your buck!
This is one fine tool! I think I might need to add it to my collection :o)
Laura Beth, We’ve already started planning new projects to use it on…Just be prepared, once you get one, the DIY projects may take on a life of their own!
I still haven’t unpackaged my Kreg jig from Haven last year. I’m a bad DIY blogger. But, I’m pinning this for later so I’ll be able to find it when I do!
Beth,
You won’t be dissapointed! I’m kicking myself in the rear for not using the Kreg Jig sooner!
Great article. I’ve been using this jig for a couple months and am sold. I keep finding new reasons to use it.
Thanks John! From the moment I used the Kreg jig for the first time, I’ve been hooked!
Thanks so much for the how-to. I have been wanting to use the one I got at Haven, but didn’t quite know where to start. I’ve pinned this for future reference.
Thanks Sheila! I think you’ll pleasantly surprised just how easy it is to use! I was working with it over the weekend while I was building doors for the pantry and still can’t believe how easy it makes custom building!
LOVE, LOVE, LOVE my Kreg jig! I will definitely be adding to my Kreg family.
Kathleen, the Kreg Jig Jr Kit will be a perfect addition to you workshop! I’ve already been eyeing my next Kreg Tool product!
yup, yup…. I love the Kreg Jig Jr.! 🙂
catching you!
gail
Ah, thank you Gail! It’s an honor to be “caught”!
So Ana demo’d this at SNAP this weekend and made it look easy. She and the Shanty sisters agree it’s a game changer. Better put it on my Mother’s Day list!
Oh, you won’t be sorry! Over the years, I’ve managed to accumulate a few different Kreg products and I’ve yet to find one that didn’t make my projects WAY more manageable!
The Kreg Jig Jr. is especially handy for repairing kitchen cabinet drawers when they pull apart. pull the little brads and put in the screws, voila, never worry about them separating again. Also adding shelves to the bottom cabinet under the sink. Makes life much easier.
If im useing the 3/4 setting what screw sides should i use ?