The DIY Village

  • Facebook
  • Google+
  • Instagram
  • Pinterest
  • RSS
  • Twitter
  • Home
  • Honey Do List
  • Project Gallery
  • Home Tour
  • About Us
  • Contact Us
  • Disclosure & Privacy

Tulip Door Wreath

March 11, 2013 By Jacque 102 Comments

With all the door wreaths I have made in the past year you would think that I have one for every season.
And I do, well almost.
For some reason I never made a door wreath for spring.
I have no clue how that one slipped through but it did.
I have been wracking my brain on what to do for a spring door wreath.
I found a cool post by Jocie at One Project Closer: The Better Half on how to make a fabric flower.
I love her tutorial and think these would be super cute on a wreath and then I remembered that our front door is out in the open and any fabric flowers I might make wouldn’t last very long.
(whomp whomp whomp)

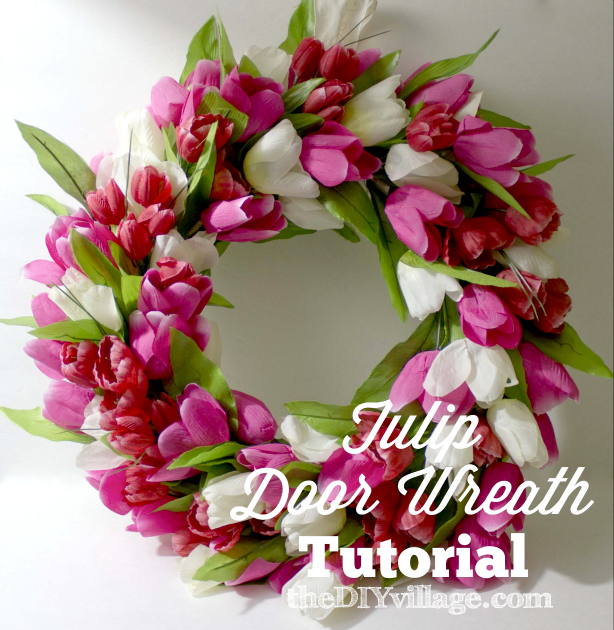
Thankfully my friend Virginia over at LiveLoveDIY posted the cutest tulip door wreath and I knew I had to make one for our house!

Tulip Door Wreath Tutorial by: theDIYvillage.com

This post contains Affilate Links. Proceeds from these links are usually rather small, but allow us to keep the website running & help to fund smaller projects. Thanks for helping us help you

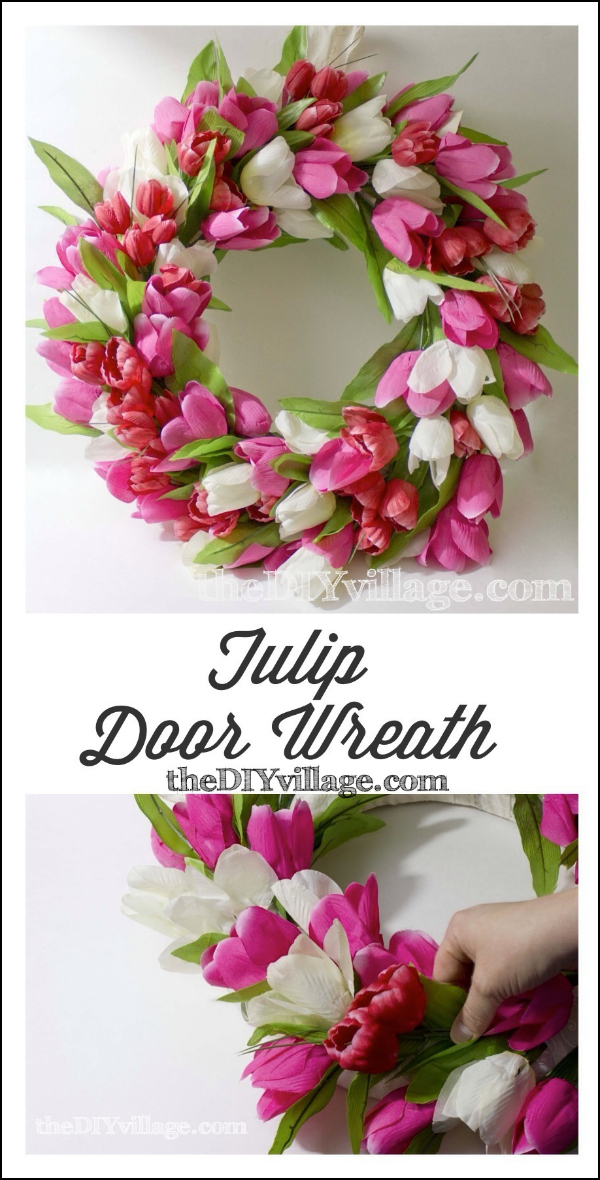
I made a quick trip to the dollar tree and picked up about 15 bundles of tulips in three different colors.
You will also need a foam wreath form and ribbon.

Tulip Door Wreath Tutorial by: theDIYvillage.com

Take a neutral ribbon and wrap your wreath form.
You will want your ribbon to over lap so that you can slide the tulips in between the ribbon and the form.

Tulip Door Wreath Tutorial by: theDIYvillage.com

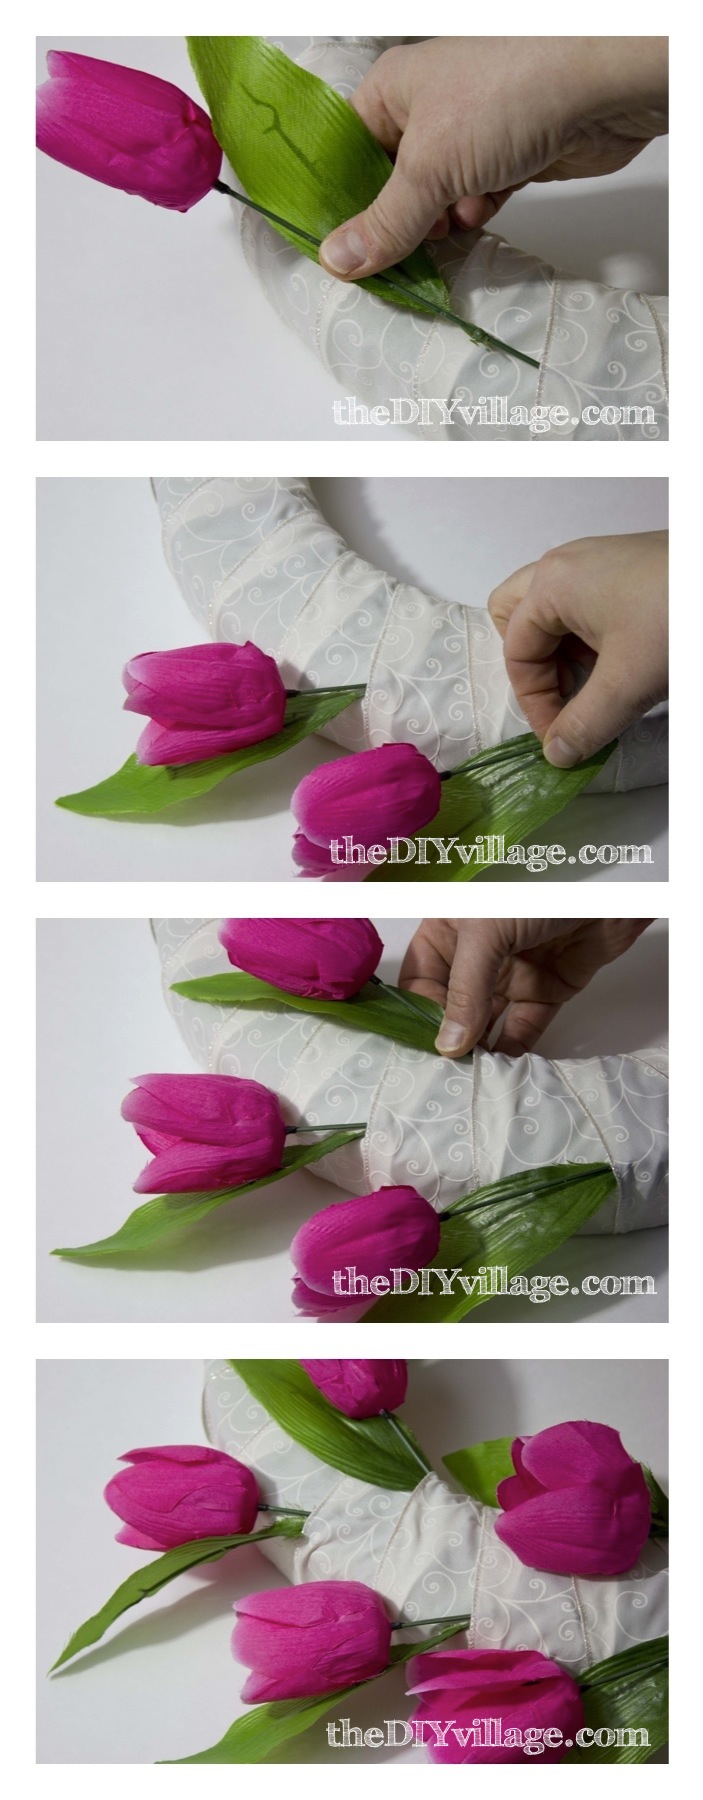
Cut your tulip stems from the bundle using wire snips, and begin adding one color at a time into every other ribbon overlap.
Start on the outside and then move to the inside of the wreath.
You will end up with one tulip per overlap.

Tulip Door Wreath Tutorial by: theDIYvillage.com

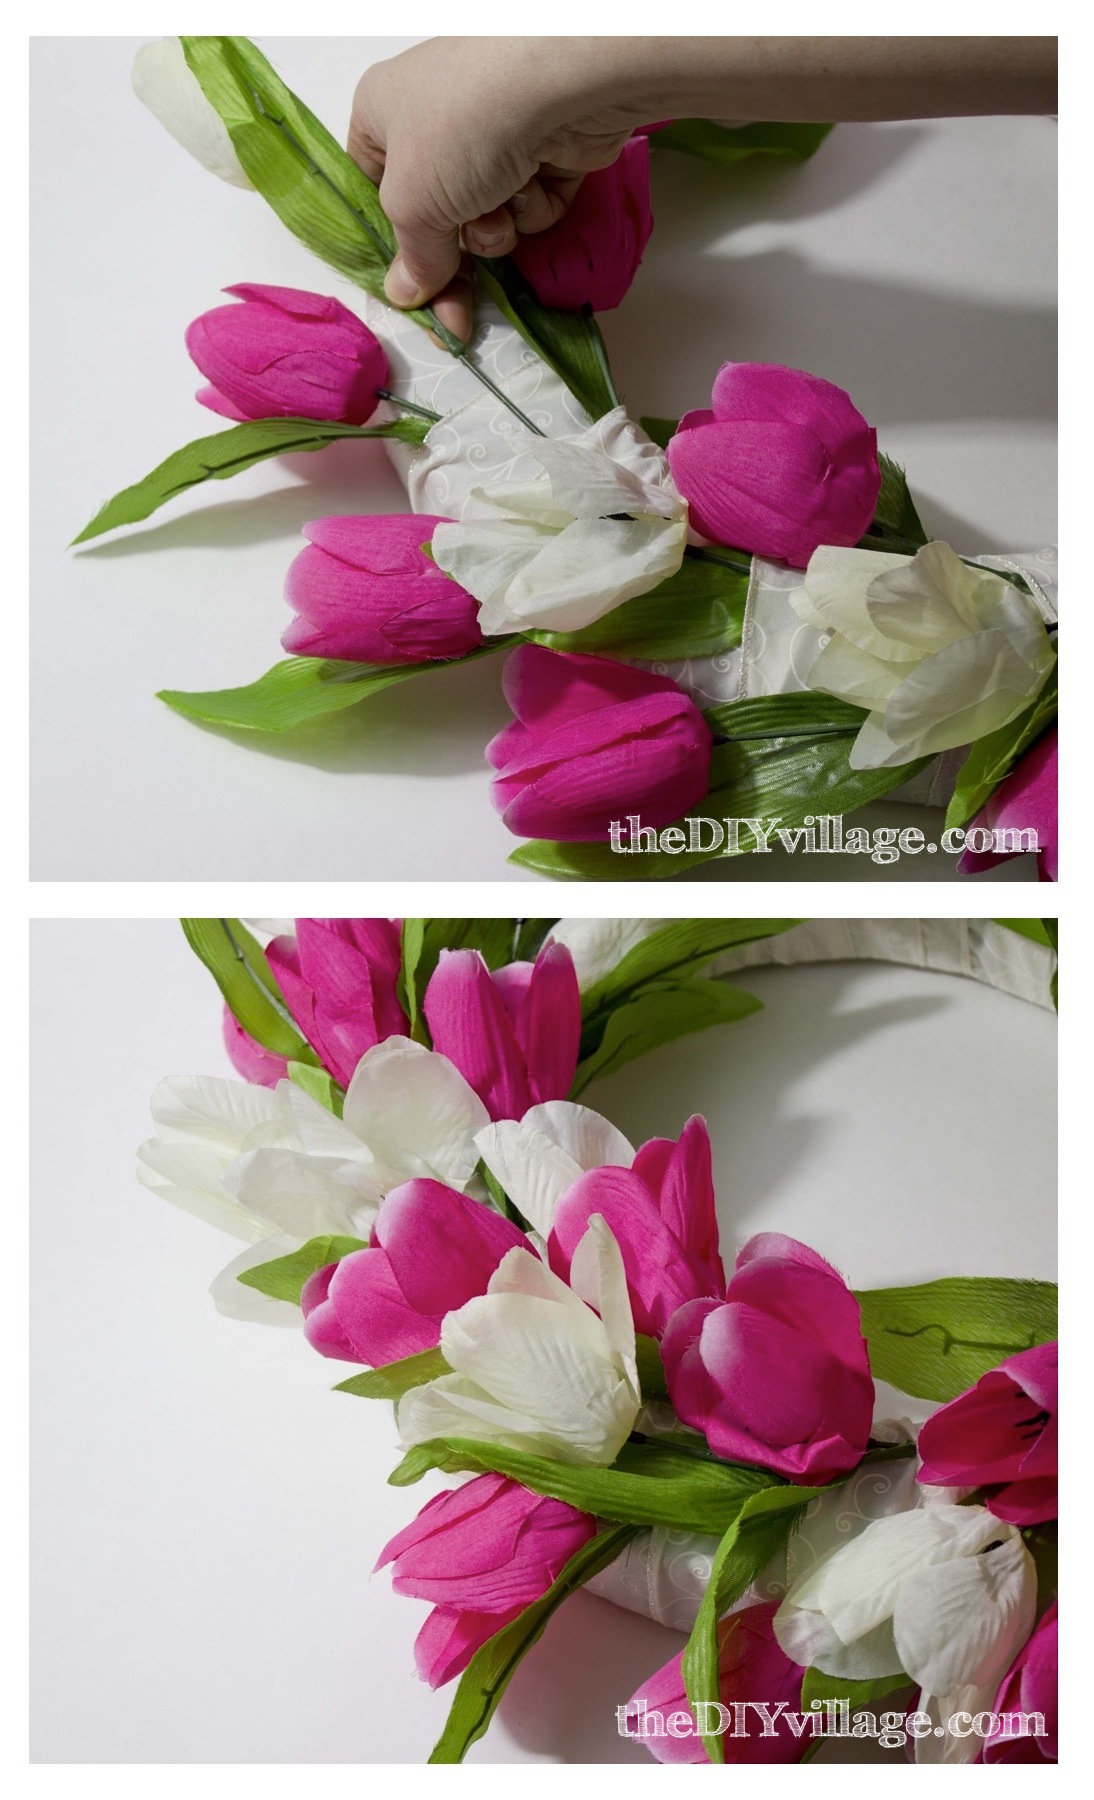
Next you will add the white tulips to your door wreath (or whatever color you chose that will compliment).
Continue with the same process as the pink tulips in every other ribbon over lap.
The only difference this time is you will want your white tulips towards the middle of the wreath.

Tulip Door Wreath Tutorial by: theDIYvillage.com

If you want to add a third color like I did you will also add this to the middle.
I chose a smaller tulip for the final layer.
Once all of your tulips are in go back and check for any bare spots and fill in with any color you choose.

Tulip Door Wreath Tutorial by: theDIYvillage.com

It’s that easy!
You can wire them in if you like but If your ribbon is wrapped tightly enough there is no need the tulips will stay in place perfectly.
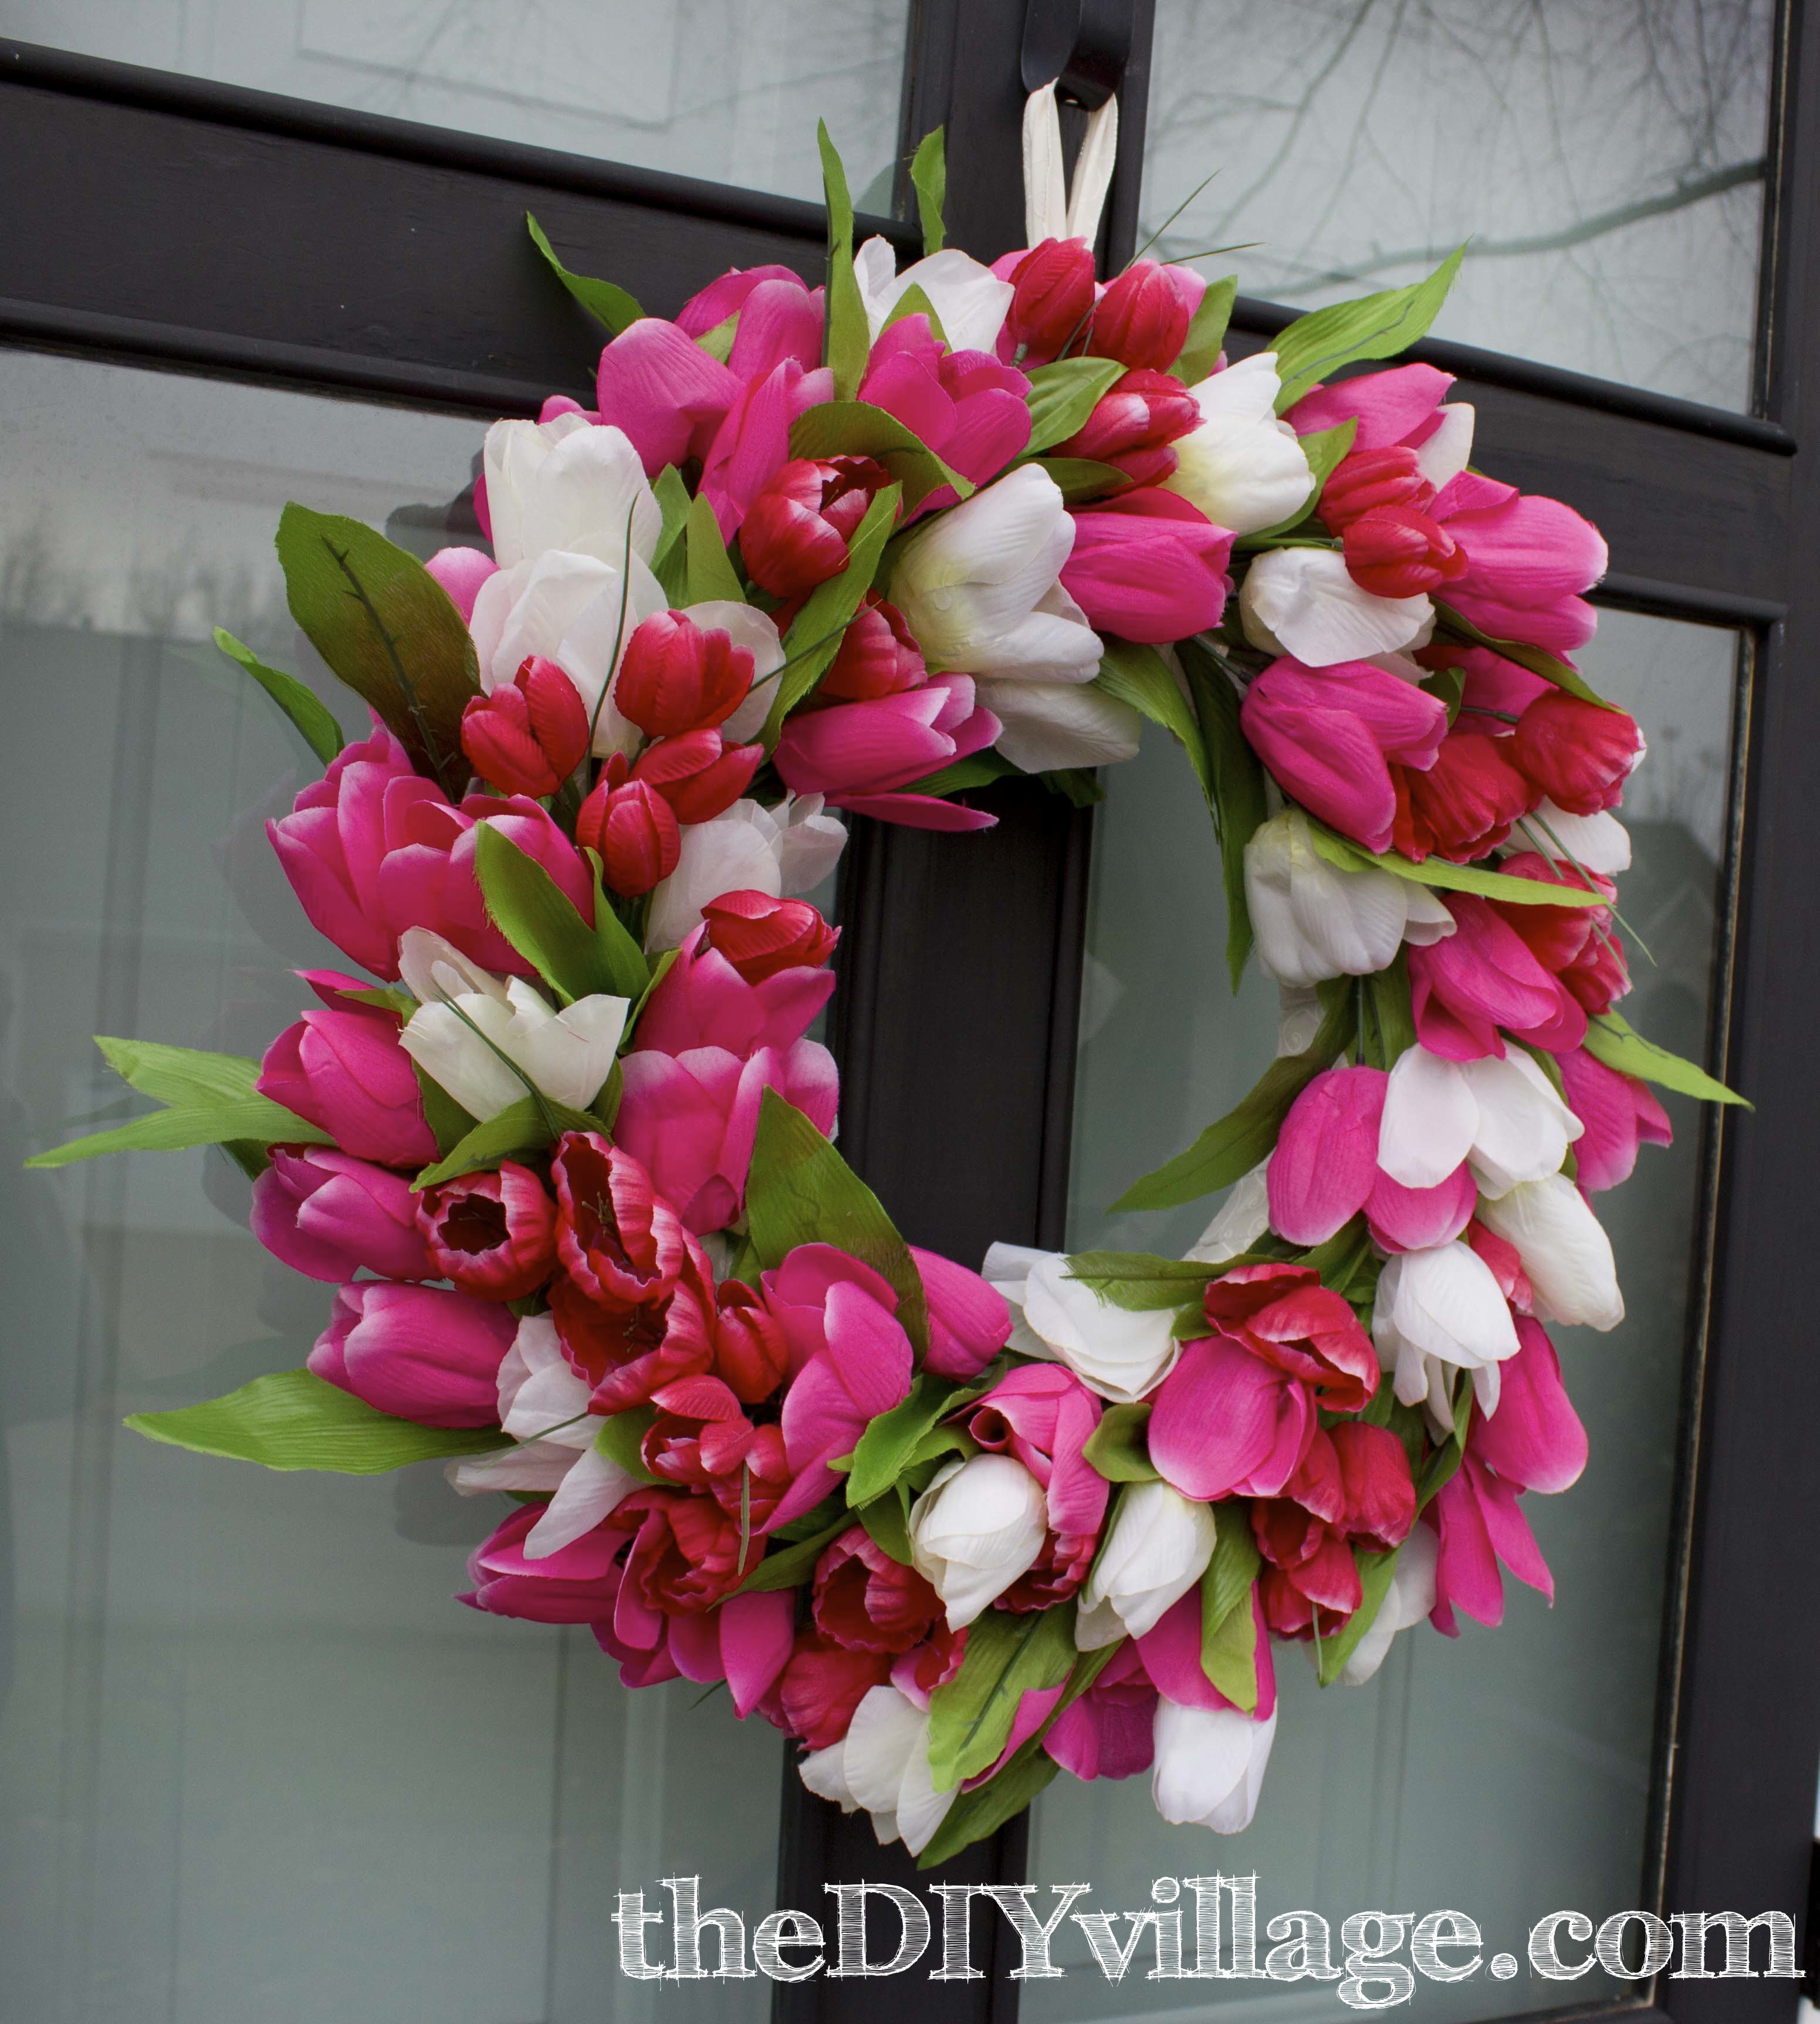
Tulip Door Wreath Tutorial by: theDIYvillage.com

What do you think?
Are you ready to it the dollar tree and make your own tulip wreath?

Tulip Door Wreath Tutorial by: theDIYvillage.com


Filed Under: All, Crafts, DIY, Home, Outdoor Tagged With: Crafts, DIY, Wreath

Comments

  1. Heather says

    March 11, 2013 at 12:53 pm

    Love this wreath and all the shades of pink! Great pop of spring for a door!

    Reply
    • Mary says

      March 7, 2016 at 6:06 pm

      ok, I have never tried anything like this before, how do you attach the ribbon to the wreath?

      Reply
      • Jacque says

        March 10, 2016 at 1:34 pm

        I used a floral pin to attach it to the foam at one end.

        Reply
  2. Stephanie G says

    March 11, 2013 at 2:06 pm

    I ADORE this!! I really hope there are enough tulips at my Dollar Tree to make this. I think it adds such a great burst of color, and tulips are one of my absolute favorites.

    Reply
  3. debbiedoos says

    March 11, 2013 at 2:20 pm

    This looks so beautiful Jacque..and so real!

    Reply
  4. Ann Drake says

    March 11, 2013 at 4:04 pm

    Holy cow Jacque I love this! I am sort of obsessed with wreaths anyways…so this is right up my alley. I have never seen the ribbon trick either. Brilliant! I probably would have stuck the tulips in the form! Thanks for sharing. Pinning this one for sure. 🙂

    Reply
    • Linda Halliday says

      March 11, 2013 at 4:39 pm

      I’ve never seen the ribbon trick, either! I would have done the same thing you said – stuck the wire stems in the form. That is a superb idea that I’ll remember and use for other wreaths, as well!

      Reply
  5. Jessica @ Mom 4 Real says

    March 11, 2013 at 4:10 pm

    Gorgeous, Jacque…just gorgeous!

    Reply
  6. Amanda @ Dreamsicle Sisters says

    March 11, 2013 at 4:15 pm

    What a great idea with the ribbon. I am so going to try this!

    Reply
  7. keri @ shaken together says

    March 11, 2013 at 5:48 pm

    Brilliant and beautiful and perfect for Spring! Pinning!!

    Reply
  8. Ellora @ Creatively Southern says

    March 11, 2013 at 7:44 pm

    Oh my gosh, it’s beautiful! Perfect for Spring and love the colors! Pinning and sharing on facebook!

    Reply
  9. Atta Girl Amy says

    March 11, 2013 at 8:37 pm

    I would never have guessed those were Dollar Store flowers.

    The wreath is so beautiful and colorful. Such a wonderful pop of spring on your front door. Love it.

    Reply
  10. Gwen says

    March 11, 2013 at 9:36 pm

    Dang. That is some serious Dollar Store Loveliness!

    Reply
  11. Steph @ Crafting in the Rain says

    March 11, 2013 at 11:06 pm

    Hooray for spring colors 🙂 Looks lovely!

    Reply
  12. sandy says

    March 12, 2013 at 5:35 am

    Simply beautiful.. this one deserves
    a pin….
    Sandy

    Reply
    • Kimberly says

      April 20, 2020 at 8:26 pm

      I’m joining the chorus of many here who think this is GORGEOUS and are planning to make one. Thank you for a clear tutorial–and our little girl can help, since no glue gun involved!!

      Reply
  13. Heather @ new house new home new life says

    March 12, 2013 at 8:00 am

    This is terrific and so easy. I’m heading to the dollar store today to pick up supplies!!

    P.S. Found you through Home Talk.

    Reply
  14. Kristen says

    March 12, 2013 at 10:50 am

    Love, Love, Love that wreath…it looks so lovely hanging on your door…I’m definitely going to hit the Dollar Tree to make on of my own…

    Reply
  15. Denyse @ Glitter, Glue & Paint says

    March 12, 2013 at 1:15 pm

    Jacque! I love this. It’s so “springy”. I might just have to make me one 😉

    Reply
  16. Emily says

    March 12, 2013 at 5:05 pm

    It is so cute! I love tulips, happy spring

    Reply
  17. Consie @ Atop Serenity Hill says

    March 12, 2013 at 5:40 pm

    That is just beautiful and the colors really pop! Don’t you just love the dollar store?! Visiting from the DIY Dreamer link party.

    Reply
  18. Krista Low says

    March 13, 2013 at 8:11 am

    I Love Love Love spring flowers. The Tulips are perfect for this and you did a beautiful job. Thanks for inspiring!

    Reply
  19. k says

    March 13, 2013 at 12:12 pm

    Love your wreath! The tuliops are so cute! I have never seen a tulip wreath before. Visit me at greatastestuesdays.blogspot.com I would love to have you do a guest post for me on Fridays!
    Kimberli

    Reply
  20. Katie Goin says

    March 14, 2013 at 12:10 pm

    Tulips are my favorite flower and this is a gorgeous idea. I like how you slide the tulips in place instead of using a glue gun. Ingenious. I”m pinning it and trying it! Thanks for sharing!

    Reply
  21. KC @ The Real Thing with the Coake Family says

    March 14, 2013 at 8:26 pm

    Wow! What a gorgeous wreath! I love how full it is and the beautiful colors.
    I would love if you would share this at my link party.
    Take care,
    KC

    Reply
  22. laura@Top This Top That says

    March 14, 2013 at 10:17 pm

    This is so beautiful! Featuring on my weekly wow’s on saturday.

    Reply
    • Jacque says

      March 15, 2013 at 11:17 am

      Oh wow thank you so much Laura!!! I Can’t wait to share that with my readers!

      Reply
  23. DeDe@DesignedDecor says

    March 15, 2013 at 3:03 pm

    I love this wreath. It looks real! Very pretty and great idea!

    Reply
  24. Chelsea @ Making Home Base says

    March 16, 2013 at 1:01 am

    Oh my goodness girl, at first glance I thought those were real tulips! This is a gorgeous wreath! LOVE it.

    Reply
  25. Susan Durrett says

    March 16, 2013 at 1:49 am

    WOW! That is GORGEOUS!!!
    Susan

    Reply
  26. Sharon says

    March 16, 2013 at 1:36 pm

    Wow, this is so pretty and looks so much like spring! Sharing, for sure.

    Reply
  27. Jaime ♥ Raising up Rubies says

    March 16, 2013 at 2:28 pm

    Girl, this is gorgeous!! I’m not usually a fan of artificial flowers, but this is the exception!! …and on your beautiful front door, you can’t even tell! Love! thank you for sharing ♥

    Reply
  28. jenny says

    March 17, 2013 at 10:35 pm

    Your wreath is gorgeous!

    Reply
  29. Christine says

    March 18, 2013 at 12:35 pm

    Oh WOW!! They look like real tulips!

    Thanks so much for sharing this at The DIY Dreamer.. From Dream To Reality! I can’t wait to see what you link up tomorrow evening!

    Reply
  30. kristin says

    March 18, 2013 at 5:39 pm

    Love this!! Thanks for linking up to the party!

    Reply
  31. Melissa @ Keep Calm and Decorate says

    March 19, 2013 at 8:02 am

    Your wreath is beautiful!

    Reply
  32. KIM says

    March 19, 2013 at 9:30 am

    Simply beautiful!

    Reply
  33. Babs says

    March 19, 2013 at 8:03 pm

    Gorgeous! Love the mix of tulip colors.

    Reply
  34. GlamorousMommy says

    March 19, 2013 at 9:15 pm

    This is just gorgeous! Truly eye-catching 🙂 Found you linked up at Savvy Southern Style <3

    Fotini

    Reply
  35. Debbie says

    March 19, 2013 at 10:15 pm

    I love this!!

    Reply
  36. GlamorousMommy says

    March 22, 2013 at 8:25 am

    Just wanted to let you know I featured this wreath on my blog today! Have a great weekend 🙂

    http://glamorousbride.blogspot.com/2013/03/fab-pins-of-week_22.html

    Fotini

    Reply
  37. katie says

    March 24, 2013 at 10:02 am

    WOW! You make this look so simple. I’ve never been a good wreath maker but you really convinced me that maybe I can actually create something that is beautiful!

    Reply
  38. Michelle says

    March 24, 2013 at 3:52 pm

    This is lovely! Thanks for sharing!

    I’m Hosting a giveaway over at my blog, so feel free to stop by and check it out!

    http://cloverandmustard.blogspot.com/2013/03/a-few-of-my-favorites-giveaway.html

    Have a great week.

    Michelle
    Clover&Mustard

    Reply
  39. Samantha says

    April 1, 2013 at 11:34 am

    LOVE this! Been wanting to figure out how to make these wreaths for months! Thanks for posting!

    Reply
  40. Julie says

    April 3, 2013 at 8:00 pm

    It looks real, in fact I thought it was! Just so pretty!!

    Reply
  41. Mary K says

    July 28, 2013 at 12:36 am

    This wreath is absolutely beautiful, but I would think the tulips would begin to fall out if this wreath was hung outside due to the effects of wind and rain. How did it hold up outside for you?

    Reply
    • Jacque says

      July 28, 2013 at 3:37 pm

      Funny you should ask, just yesterday I had the first tulip stem fall out. It was laying on the front porch and I was able to slip it right back in. If you wrap the ribbon somewhat tight they more stems you put in the tighter it gets. Our front porch is fully exposed to all elements … this has been the best money I have ever spent on a wreath ever!

      Reply
  42. Starsastuff says

    March 20, 2014 at 8:03 pm

    Thank you for this great tutorial. I just finished making this wreath (tomorrow is the first official day of spring, after such a long winter!). My wreath came out gorgeous! What a fantastic idea about the ribbon. I’m thinking I can easily remove the tulips and easily re-create wreaths for each season. Thanks again, I can’t wait to hang my wreath in the morning (too windy tonight) I’m hoping I don’t have to hot glue most of the tulips down due to high winds!

    Reply
  43. DENISE says

    March 24, 2014 at 5:51 pm

    About how many tulips are needed and size of wreath? Would like an idea so,don’t come home with too many or not enough. Many thanks.

    Reply
    • Jacque says

      April 3, 2014 at 2:18 pm

      It really depends on how full you want the wreath. I purchased 15 bundles and used them all!

      Reply
  44. Carrie says

    April 2, 2014 at 8:43 pm

    is it 15 bunches of each color or just 15 bunches total?

    Reply
    • Jacque says

      April 3, 2014 at 2:15 pm

      I had 15 bunches total! If you need more you can always pop back over to the Dollar Store and get more!

      Reply
  45. Laura says

    April 18, 2014 at 3:26 pm

    Awesome wreath!! Is the wire edged ribbon the key to making it work? Thanks so much for such a detailed tutorial with beautiful photos!

    Reply
    • Jacque says

      April 30, 2014 at 12:40 pm

      Not really, I think that any ribbon would work, you just want to make sure and wrap it tightly.

      Reply
  46. Cheryl P says

    August 13, 2014 at 1:37 pm

    Great wreath – love the tulips for spring. I can see hydrangeas and sunflowers for the summer…..mums and colored leaves for the fall…..pine branches and holly or poinsettias for winter. Possibilities are pretty much endless!!

    Reply
  47. Maggie@ Polka Dots in the Country says

    February 8, 2015 at 6:25 pm

    I love how bright and Spring-y it is and I had no idea these were so easy to make!

    Reply
  48. Diana Rambles says

    February 16, 2015 at 9:40 am

    This is gorgeous!!

    Reply
  49. Kay Robinson says

    February 22, 2015 at 12:33 pm

    This is a lovely wreath, I live in London and I always have a wreath at Christmas time but recently I put up a couple of hearts on my front door and my neighbour thought it strange and silly thing to do.I did it because I thought it looked great on my white door, I wondered how many people think that as well

    Reply
  50. Jenny Lynn says

    February 23, 2015 at 3:01 pm

    It is so pretty. I want to make one. I love that you found the tulips at the dollar store.

    Reply
  51. Susan Tetrick says

    February 28, 2015 at 6:44 pm

    love this…what size wreath?

    Reply
  52. Paul Ebbert says

    March 7, 2015 at 8:25 am

    I just started doing crafts in November 2014. I’m having a blast doing the crafts I see, still learning about many things, yep I love to do a lot of everything I see keep up the great work , Thanks

    Reply
  53. Camille Wynn says

    March 31, 2015 at 8:32 pm

    I’m in love with DIY wreaths! I love this one especially! I just started a blog and would love it if you would check it out! I posted a wreath tutorial on my blog as my first post! Check it out @ http://www.camilleiam.com!

    Reply
  54. S tella says

    April 15, 2015 at 4:56 pm

    This is exceptional. thanks for the tutorial !

    Reply
  55. Joan says

    December 1, 2015 at 5:28 pm

    I love this so much, I have to make one this winter for spring, thank you for sharing!

    Reply
  56. Rose Simmons says

    March 6, 2016 at 4:13 pm

    I never saw what size wreath you started out with…is it 12″ or 16″?

    Reply
    • Jacque says

      March 7, 2016 at 12:02 am

      I have done both and prefer the 16″ for a front door.

      Reply
  57. Jodie says

    March 9, 2016 at 10:55 pm

    I love this and decided I wanted to make one for my front door. Dollar Tree didn’t have any tulips, so I got all my supplies at Michaels. My tulips are smaller, but I love the finished product. Thanks so much for sharing this idea!

    Reply
  58. Pam says

    January 9, 2018 at 8:01 pm

    I LOVE this and wanted to try it, but the Dollar Tree I went to did not have many tulips, and all the pink ones they had we’re flattened. Will hit my other 2 stores and see if I can find unsquished tulips. (They did have some GORGEOUS and expensive looking roses, though!)

    Reply
  59. Sindy says

    February 4, 2020 at 1:44 pm

    So pretty, I love the colors you picked out!

    Reply

Trackbacks

  1. Bunnies and burlap Spring Centerpiece oh my - Debbiedoo's says:
    March 12, 2013 at 7:54 am

    […] see more spring inspired projects head over to theDIYvillage.com and check out my Tulip Door Wreath, its super each to make and cheap to […]

    Reply
  2. Great Ideas -- 21 Wonderful Easter Ideas!! -- Tatertots and Jello says:
    March 16, 2013 at 3:57 am

    […] Tulip Door Wreath @ The DIY Village […]

    Reply
  3. 15 Lovely Spring Projects | Tried and True says:
    March 21, 2013 at 8:00 am

    […] Recycled May Day Basket 12. Cracked Egg Sugar Cookies 13. Button Carrots 14. Tulip Door Wreath 15. German Glass Glitter Easter […]

    Reply
  4. Power Of Pinterest Link Party {and Friday Fav Features!} says:
    March 21, 2013 at 9:36 pm

    […] Make a Dollar Store  Tulip Wreath with Jacque from the DIY Village. […]

    Reply
  5. The Fun In Functional! {Link Party #42} | Practically Functional says:
    March 22, 2013 at 6:00 pm

    […] Tulip Door Wreath Tutorial from The DIY Village […]

    Reply
  6. DIY Tulip Wreath says:
    March 24, 2013 at 1:50 am

    […] that was before I laid eyes on the beautiful tulip door wreath Jacque from The DIY Village made.  (And yes, she used fake flowers from the dollar store.)   So in using Jacque’s […]

    Reply
  7. Monday Funday | * View Along the Way * says:
    March 24, 2013 at 7:00 pm

    […] Tulip Door Wreath @ DIY Village // Cupcake Liner Mason Jars @ Uncommon Designs // Twine Ombre Easter Eggs at Detailed Party Mom // Free Printable Easter Subway Art @ How to Nest for Less // Round Petal Kanzashi Flowers at Pumpkin & a Princess // Easy Glitter Chevron Vase at Becoming Martha // No-Sew Felt Bunnies at Happier Homemaker // Herb Garden in a Box @ Nellie Bellie […]

    Reply
  8. Monday Funday Link Party and Features! - Creatively Living Blog says:
    March 24, 2013 at 7:13 pm

    […] Tulip Door Wreath @ DIY Village // Cupcake Liner Mason Jars @ Uncommon Designs // Twine Ombre Easter Eggs at Detailed Party Mom // Free Printable Easter Subway Art @ How to Nest for Less // Round Petal Kanzashi Flowers at Pumpkin & a Princess // Easy Glitter Chevron Vase at Becoming Martha // No-Sew Felt Bunnies at Happier Homemaker // Herb Garden in a Box @ Nellie Bellie […]

    Reply
  9. Monday Funday #11 says:
    March 24, 2013 at 11:12 pm

    […] Tulip Door Wreath @ DIY Village // Cupcake Liner Mason Jars @ Uncommon Designs // Twine Ombre Easter Eggs at Detailed Party Mom // Free Printable Easter Subway Art @ How to Nest for Less // Round Petal Kanzashi Flowers at Pumpkin & a Princess // Easy Glitter Chevron Vase at Becoming Martha // No-Sew Felt Bunnies at Happier Homemaker // Herb Garden in a Box @ Nellie Bellie […]

    Reply
  10. 20 Gorgeous DIY Wreaths - Spring and Summer - A Helicopter Mom says:
    April 22, 2013 at 1:44 am

    […] 15. Tulip Door Wreath […]

    Reply
  11. 10 Colorful Spring Wreaths | Vicki O'Dell... The Creative GoddessVicki O'Dell... The Creative Goddess says:
    May 3, 2013 at 10:49 am

    […] Tulip Door Wreath from DIY Village […]

    Reply
  12. DIY Spring Welcome Wreath | Practically Functional says:
    June 12, 2013 at 1:06 am

    […] for our curb appeal! But I was totally inspired to make a spring wreath anyway when I saw this fun tulip wreath tutorial from my friend Jacque at The DIY Village a few weeks ago. It’s so cute and so easy to make, I […]

    Reply
  13. 5 DIY Spring Wreaths Ideas says:
    February 3, 2014 at 12:35 pm

    […] by DIY Village […]

    Reply
  14. Gorgeous Wreaths for Spring and Summer UsefulForWomen says:
    March 10, 2014 at 12:46 pm

    […] 15. Tulip Door Wreath […]

    Reply
  15. 12 Cute Crafts for DIY Spring and Easter Decor says:
    March 24, 2014 at 2:13 pm

    […] DIY Tulip Spring Wreath @The DIY Village […]

    Reply
  16. 23 Spring Wreaths says:
    March 25, 2014 at 10:07 pm

    […] Tulip Spring Door Wreath from The DIY Village […]

    Reply
  17. 50 Flower Projects You Will Love! - Tried & True says:
    April 17, 2014 at 9:36 am

    […] I promise you will love! Ranging from practical (How to Edge a New Flower Garden) to decorative (Tulip Door Wreath), you are sure to find a project to fit your needs. Here are a few of my […]

    Reply
  18. Hottest Pinterest DIy’s – Wreath Edition – DIY Home Decor says:
    April 25, 2014 at 10:42 am

    […] Via thediyvillage.com […]

    Reply
  19. TUTORIALS TIPS AND TIDBITS #40 says:
    May 1, 2014 at 11:57 pm

    […] POTS from GRACE AND FAVOR … such a darling idea! Now this is a pretty TULIP DOOR WREATH from DYI VILLAGE… and so easy too! BLISS RANCH took a garage sale find and […]

    Reply
  20. DIY Ideas Monday Funday Link Party {#11} says:
    July 9, 2014 at 2:56 pm

    […] Tulip Door Wreath @ DIY Village // Cupcake Liner Mason Jars @ Uncommon Designs // Twine Ombre Easter Eggs at Detailed Party Mom // Free Printable Easter Subway Art @ How to Nest for Less // Round Petal Kanzashi Flowers at Pumpkin & a Princess // Easy Glitter Chevron Vase at Becoming Martha // No-Sew Felt Bunnies at Happier Homemaker // Herb Garden in a Box @ Nellie Bellie […]

    Reply
  21. Friday Finds #1 says:
    February 22, 2015 at 9:43 pm

    […] pretty tulip wreath to add some spring color to your front […]

    Reply
  22. | BHG Style Spotters says:
    March 6, 2015 at 3:53 pm

    […] nothing says spring like a bundle of fresh flowers–especially tulips. I love, love, love this tulip door wreath from The DIY Village. The bright colors are perfect for inviting guests and visitors into your […]

    Reply
  23. DIY Dollar Store Spring Crafts says:
    March 9, 2015 at 3:45 am

    […] This pretty wreath is inexpensive, and easy to make! The DIY Village shows you how to combine dollar store tulips with a few other materials to make your own tulip wreath! […]

    Reply
  24. 10 Great DIY Projects Anyone Can Do! || Practically Functional says:
    June 21, 2015 at 6:48 pm

    […] Tulip Door Wreath – Spring is right around the corner. This DIY is not only easy to make but easy on the pocket […]

    Reply
  25. Easter Treats & Crafts Features - #Mondayfundayparty says:
    July 17, 2015 at 10:13 am

    […] Tulip Door Wreath @ DIY Village // Cupcake Liner Mason Jars @ Uncommon Designs // Twine Ombre Easter Eggs at Detailed Party Mom // Free Printable Easter Subway Art @ How to Nest for Less // Round Petal Kanzashi Flowers at Pumpkin & a Princess // Easy Glitter Chevron Vase at Becoming Martha // No-Sew Felt Bunnies at Happier Homemaker // Herb Garden in a Box @ Nellie Bellie […]

    Reply
  26. Spring Wreath Roundup - Sugar Bee Crafts says:
    March 5, 2016 at 7:01 am

    […] I love this beautiful tulip wreath from the DIY Village! […]

    Reply
  27. 20 Beautiful DIY Spring Wreaths - The Happier Homemaker says:
    March 10, 2016 at 8:34 am

    […] Tulip Wreath via The DIY Village […]

    Reply
  28. 5 DIY spring wreaths for your front door - BestMomsTV : BestMomsTV says:
    April 25, 2016 at 5:29 am

    […] via The DIY Village […]

    Reply
  29. Easy DIY Spring Tulip Wreath - The Creek Line House says:
    March 19, 2017 at 7:15 pm

    […] wanted to make one of these tulips wreaths for a few years now, ever since I saw my friend Jacque’s that she made using dollar store tulips. Now, her wreath is the queen of all tulips wreaths in my opinion. It’s big and fluffy and […]

    Reply
  30. 10 Adorable DIY Dollar Store Spring Crafts- A Cultivated Nest says:
    February 27, 2018 at 3:45 am

    […] This pretty wreath is inexpensive, and easy to make! The DIY Village shows you how to combine dollar store tulips with a few other materials to make your own tulip wreath! […]

    Reply
  31. Easy Balloon Animals Tutorials Blog says:
    March 10, 2018 at 3:14 pm

    Looks Like A Real Pine Wreath

    […] and silly thing to do.I did it because I thought it looked great on my white doo […]

    Reply
  32. 15 DIY Spring Wreaths You Just Have To Try - The Smallest Step says:
    April 2, 2018 at 8:20 am

    […] Tutorial via thediyvillage […]

    Reply
  33. 25 Gorgeous DIY Summer Wreaths You Can Make With Dollar Store Supplies - DIY & Crafts says:
    May 17, 2018 at 12:08 pm

    […] Tutorial: thediyvillage […]

    Reply

Leave a Reply Cancel reply

Your email address will not be published. Required fields are marked *

This site uses Akismet to reduce spam. Learn how your comment data is processed.

    Welcome…
    Search…
    Categories…

    Keep Up With Us By Email

    Enter your email address to subscribe to theDIYvillage and receive notifications of our latest posts by email.

    Blog Archive

    Latest Pin

    • Follow Me on Pinterest

    Affiliates

    Copyright © 2021 · Web Hosting By RFE Hosting