
This post is a collaboration with 3M DIY. To keep up-to-date on projects, products and sampling visit 3MDIY.com.
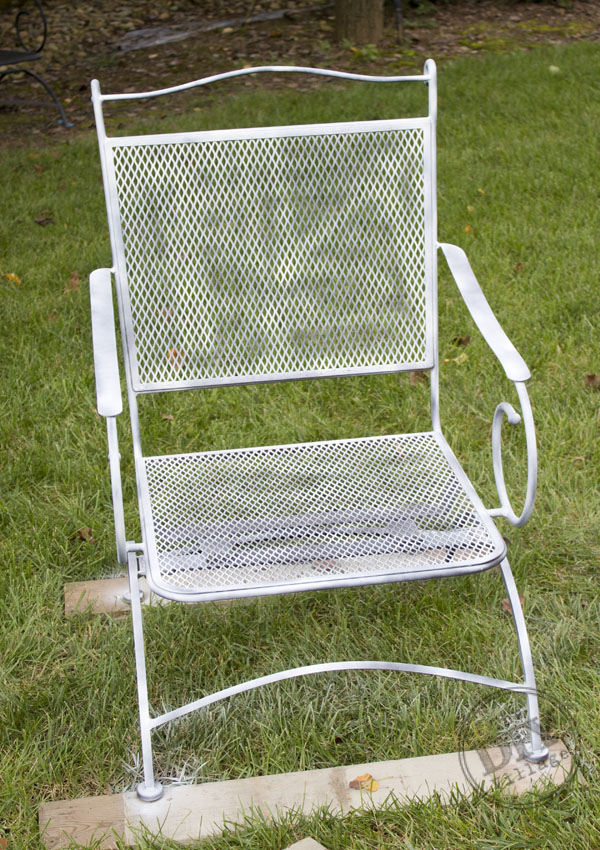
I spent most of the beautiful spring this year feeling sick and exhausted. That’s pretty much how the first trimester goes for most women. Since I spent most of my time napping and trying to keep food down I missed a prime time to do some much needed updates to our rusted patio furniture. Oddly enough 2 of our 4 chairs were in pretty bad condition. Water has not been their friend!
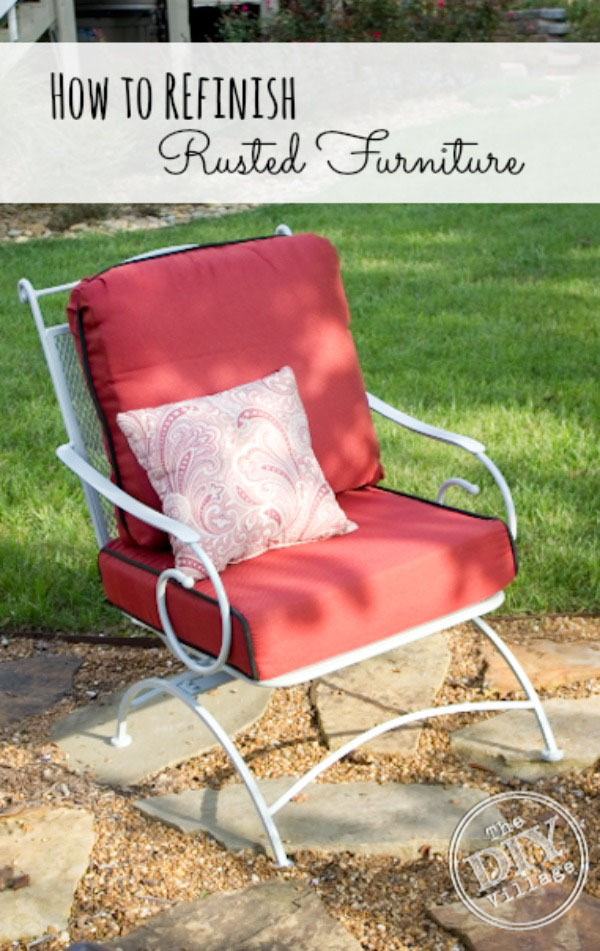
 These chairs are awesome they sit low and rock wayyyy back. Perfect for enjoying cool evening temperatures with a nice beverage … in my case flavored water :).
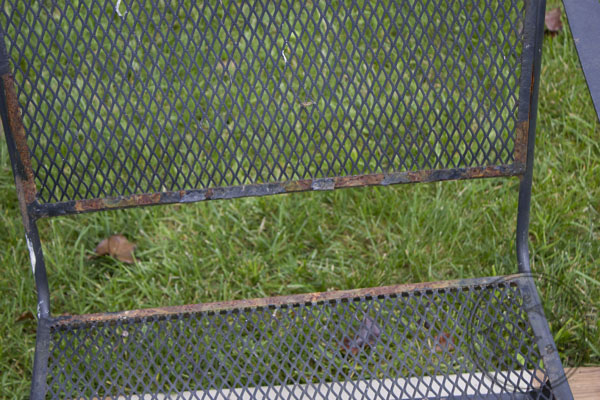 You can see on this one chair not only was the paint chipping away but it was peeling off in large strips and rusting!
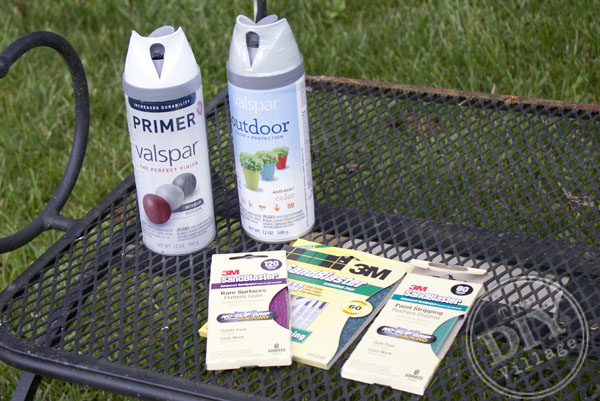 To keep my chairs from further damage an intervention was necessary. Enter 3M sanding papers and spray paint! This project though slightly time consuming is a super easy process that I really recommend anyone try before throwing rusty furniture to the curb.
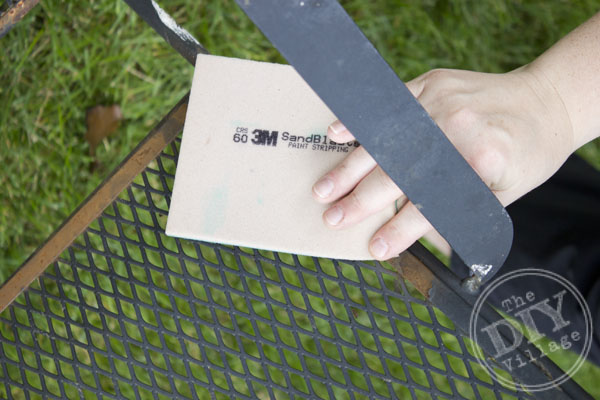
Start by peeling off any pieces of paint that can be pulled off. Now it’s time for sanding! I chose low grit paint stripping sand papers. I really wanted to get in there and get the areas as rust free as possible. This particular 3M Advanced Abrasives 60 grit sand paper has a foam backing making it super flexible for curved areas and perfect for this job. Once all of the rust and peeling paint has been removed clean your chair with a wet rag to remove any mud, bird poop (gag), and rust. You want your chair as clean as possible to get it ready for the next step.
 Give your chair adequate time to dry. The last thing you want is to start on the next step while your chair is still wet. With everything dry and clean you are ready for primer. You do not need complete coverage in this step you just want to make sure as much of the black is covered as possible. The primer is important not only will it re-seal the metal but it will also give the next step something to adhere.
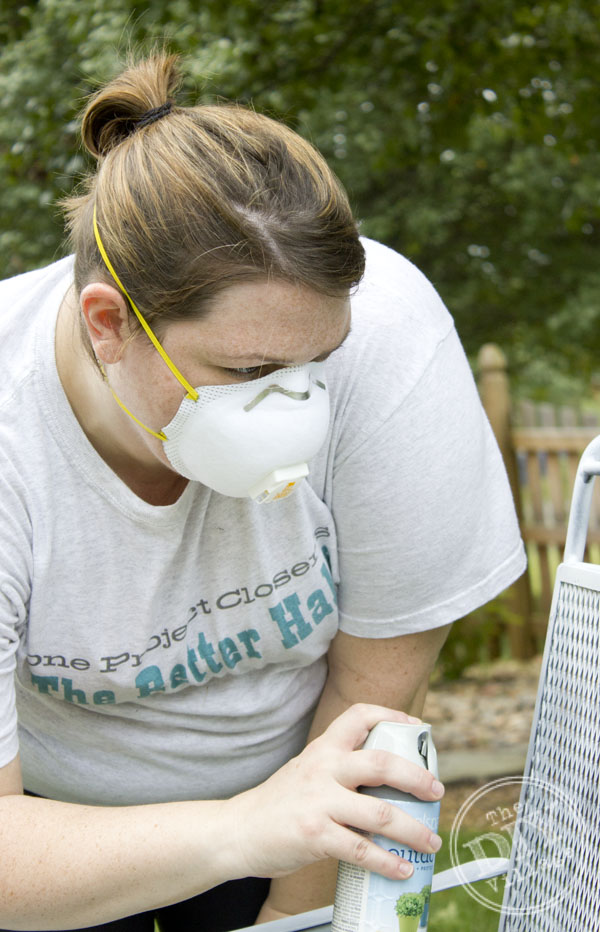 Thankfully at Haven I was able to talk with the 3M experts about proper safety measures for working with spray paint while pregnant. They told me the best mask out there for this is the 3M Tekk Protection Respirator 8511HA1 with cool flow valve! It’s not the prettiest look but trust me it was worth it to keep my lungs clean for the baby!
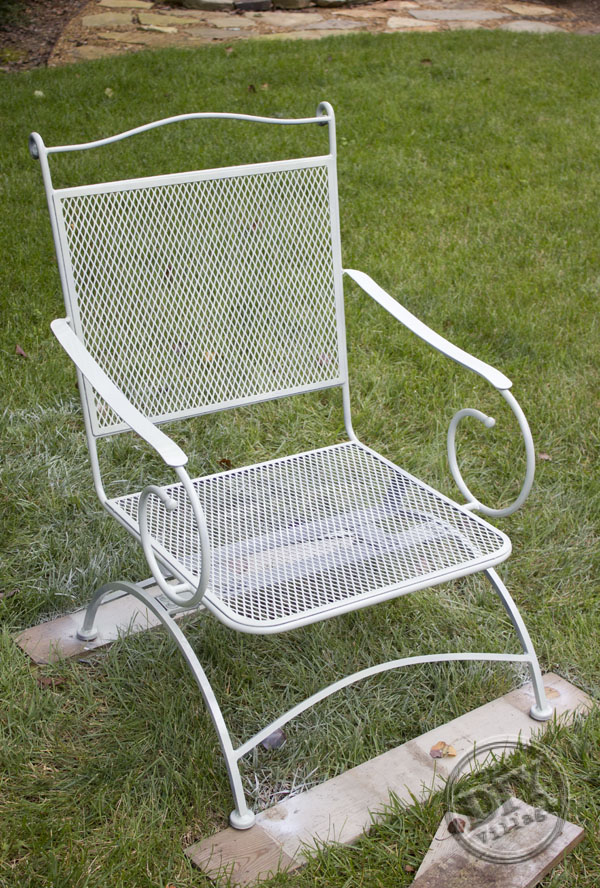 Once your primer has had an adequate amount of time to set up (read your can if you are unsure) you are ready for the final steps the top coat! For this particular color I needed 2 – 3 coats of paint. I ended up using 1/2 can of primer and 1.5 cans of spray paint per chair. You may need more or less depending on the size of your pieces of furniture.
 Most spray paints are ready to be handled within one hour of painting. I recommend letting your chairs set for a day or two to cure before adding cushions.
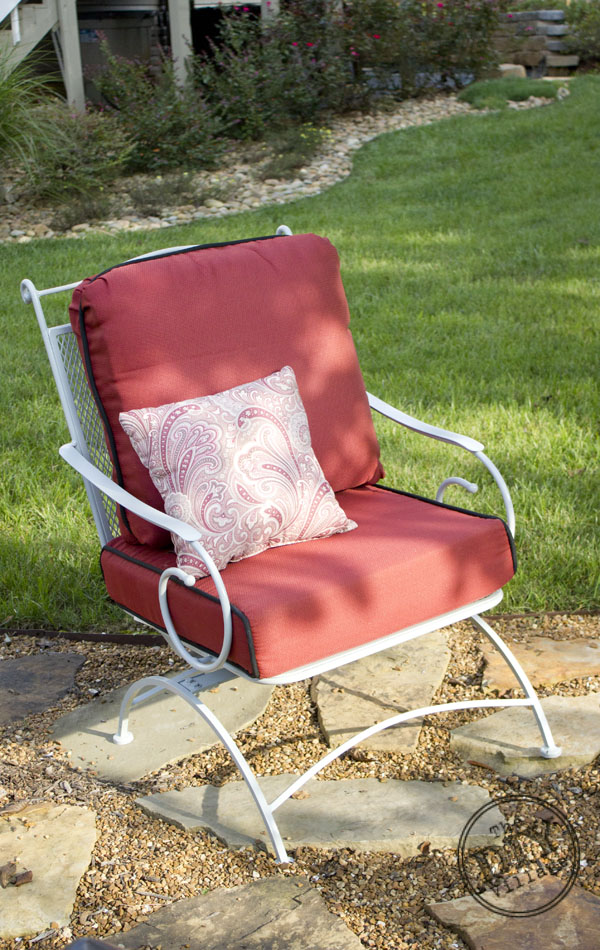 Once your cure time is over add your cushions back …
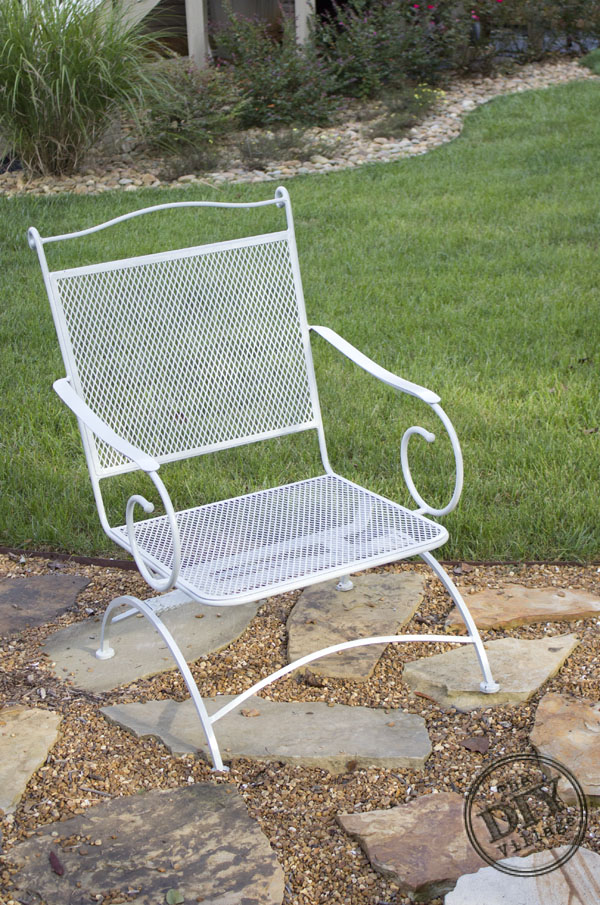
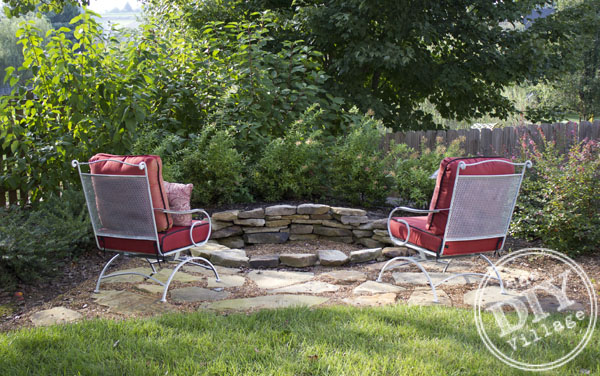 And get ready to enjoy your furniture all over again! I personally cannot wait till we get some cooler temperatures so we can sit around the fire pit and enjoy the wonders of fall!
The total time to makeover my chairs was one day. And the best part all I needed was a rag, spray paint, 3M Sandblaster Sand Paper, a 3M Tekk respirator, and a little patience!
If you want to learn more about 3M DIY products or just be inspired you can follow them on 3M DIY Pinterest, 3M DIY Twitter, 3M DIY Twitter page and 3M DIY Facebook.
Those look brand new! Very nice work. I’m going to check out that respirator mask. Not for the same reason you did of course, but because I need something to wear up in the attic. I suspect this one with the vent would allow me to survive the choking mystery fiber mess up there without constantly fogging my glasses like the cheaper masks do.
Thanks John! This respirator would be perfect for working in the attic. It’s 3M Tekks Sanding and Fiberglass valved respirator! It was warm but the heat was easily let out through the cool valve.
You go girl! That mask is awesomesauce. Can’t let a little life growing inside slow you down, right? hehehe.
I love that primer. I used it on my wrought iron bench that’s on my porch and it was great!
HA thanks for the support about the mask picture … not my finest moment but seriously it worked great!
Who’s that hottie in the OPC shirt?!?!? furniture looks awesome!!
Thanks Jocie!!!
Great tutorial. I have a couple of chairs that I need to do this with…now I know how. Thanks for sharing.
I can’t wait to see what they look like when you get them done 😉
Way to keep the baby safe!! And those chairs look like you just brought them home from the store!
Thanks Laura Beth! I had considered getting rid of them before the makeover but there’s no way that is happening now. Just don’t tell Matt 😉
I just bought some metal chairs that I love so I see this info coming in handy in the next couple of years, I’m sure! Also, I totally never thought to wear a mask! Any time I’ve needed to spray paint lately, I’ve just held my breath, sprayed for about 15 seconds and then ran around to the other side of the garage to breath for a few minutes. And repeat. Get a mask! Duh!
Oh my gosh, you have me laughing so hard! Well that is one way to protect yourself. I like my way much much better haha
LOL at Courtenay!! I would pass out on the ground using that method! Not a good look for a DIYer. LOLOLOLOL!
The chairs look great, Jacque. Good job on updating them instead of hauling to the dump like a lot of folks would have done. Save $$ and the planet! YAY!
Thanks,
I was wondering about this very thing, as sometimes good finds pop up and it is good to know the process and how much rust is too much. Prep is so important, thanks for the great steps. I am ready to find tose chairs now!
I love how you guys refinished your rusted patio furniture! It looks brand new again! I always use that respirator when I’m spray painting! Not pretty–but safety first! 😉
Wow – looks soooo much betterand I love your fire pit area!
Great tutorial, and those chairs turned out gorgeous!!! I’m pinning this, and thanks so much for sharing it at my link party!
What a wonderful transformation! Adding these products to my shopping list.
This is great! I have a milk can that I need to redo – it’s super rusty! Now I know how to refinish it – thanks!
Gorgeous before and after!! Thanks so much for partying with us at the Inspiration Monday Party- xo
Wow! that chair only looks about a million times better. great job!
That furniture looks great! The style is similar to the set that I have, only mine looks like 3 attempts of trying to keep it white. You have empowered me! If a pregnant woman can do this in a step by step process then so can I! I’m going to get down to sanding mine and get ready for my “hammered bronze” look and make it happen! Thanks for documenting your work, keep posting all of your DIY stuff, we’re paying attention.
girl, i was just checking out your post and saw you rocking that OPC shirt! YESS! MY GIRL!
Haha yup! And there was a baby Jossie in there too!
Great job! You have really inspired me to get busy!
Your chairs turned out amazing! What were the three types of sandpaper and how did you use each one (and which order?) ? I am a a total newbie to DIY and just got vintage patio furniture that has a lot of rust!
Thanks for sharing. It looks great love your idea.