![]()
I grew up in family with a lot of traditions. Out of all of them, my favorite would have to be our annual Christmas Make-a-Gift. Every year, we’re given a different person’s name and we have to come up with a handmade gift for them. With the impending birth of our daughter, I wanted to continue our family tradition by making her first Christmas gift. What I didn’t expect was that she’d arrive on Halloween instead of the first week of December…So I decided I’d make her gift a bit early. And knowing that Jacque and I would be spending a lot of sleepless nights in her nursery, I chose to make Josslyn, a Custom LED Night Light.
Material List:
- (1) 1″ x 4″ x 6″
- (1) 3/4″ x 12″ x 48″ Stain Grade Panel
- (1) Sylvania Mosaic Flexible LED Lighting Kit – found HERE
- (1) Drop Cloth – found HERE
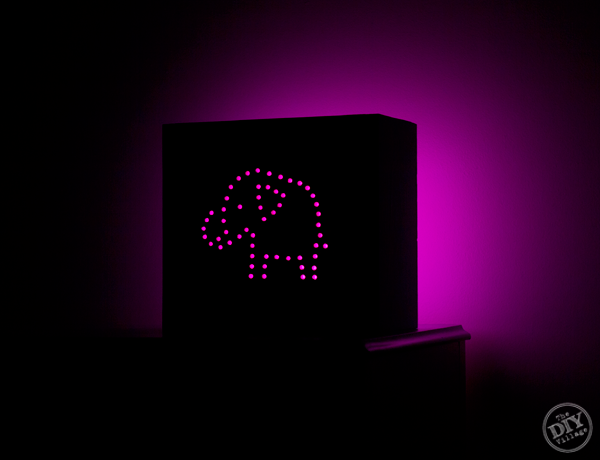
I thought an elephant shape would be fun to use, so I created an elephant template using adobe illustrator. Feel free to download our elephant template. If you’ve got a vinyl cutter, you could easily cut the template out of vinyl or just as easily, you can print the template onto a piece of paper and tape it onto your work surface.
Cut List:
- (1) Wood panel cut down to 12″ x 12″
- (2) 1×4 @ 12″
- (2) 1×4 @ 13-1/2″
If you choose to use a vinyl template, apply it to your plywood and using a pencil, transfer the pattern onto the wood surface, then remove the vinyl. (Since vinyl has an adhesive back, I find it best to remove it before drilling, so you don’t gum up the drill bit.) If you choose to use a printed template, you can drill right through the paper! Just make sure to secure the paper securely in place with some tape.
Place a scrap piece of wood under your work surface to reduce splintering and using a sharp 1/4″ forstner bit (found HERE), drill the pattern into the wood. (I chose to use a drill press to help keep the holes uniformly straight, but you could use a handheld drill, just make sure to keep the drill as straight as possible.)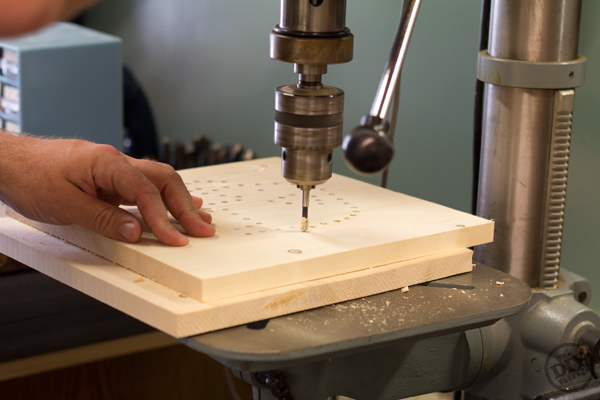 Now you can assemble your frame around the wood facing. I used wood glue AND nails to hold the frame together, but if you’ve got a good set of clamps, the nails may not be necessary!
 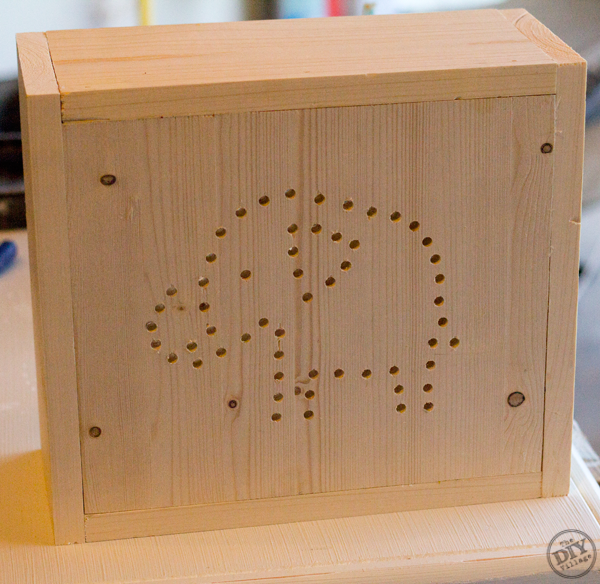 Once you’ve assembled the night light, fill in the cracks and nail holes with a wood filler, then sand until smooth.
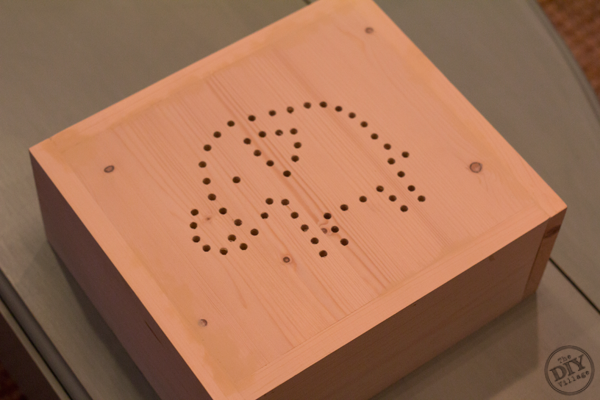 Next, prime the night light box.
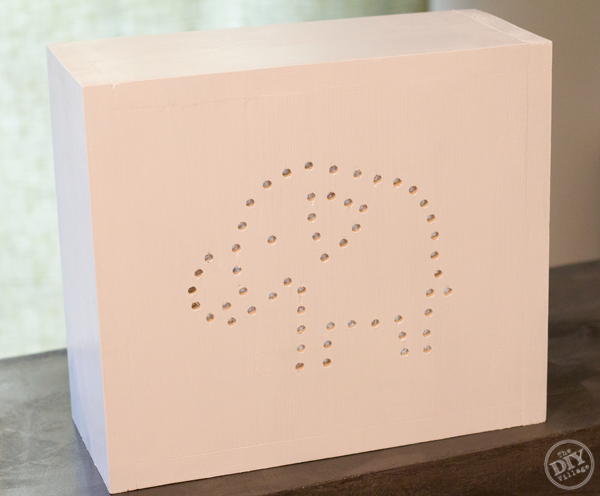 Now get creative and deck out the front of your night light!
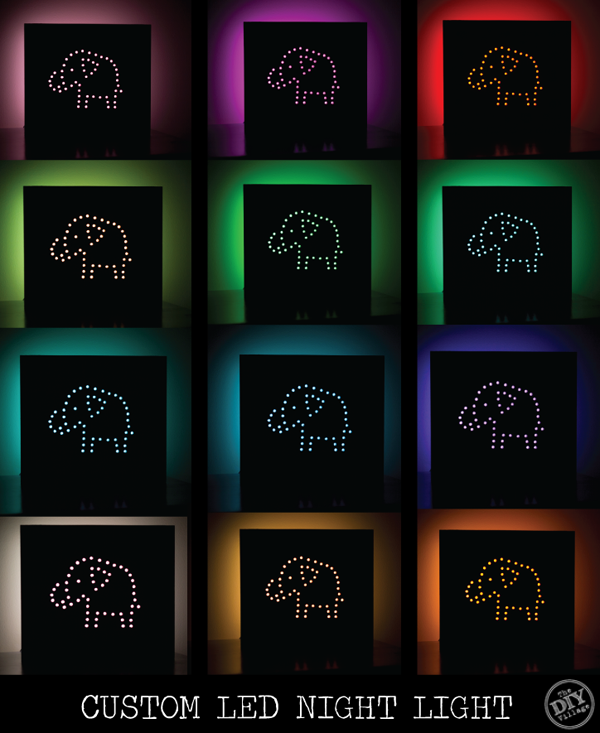
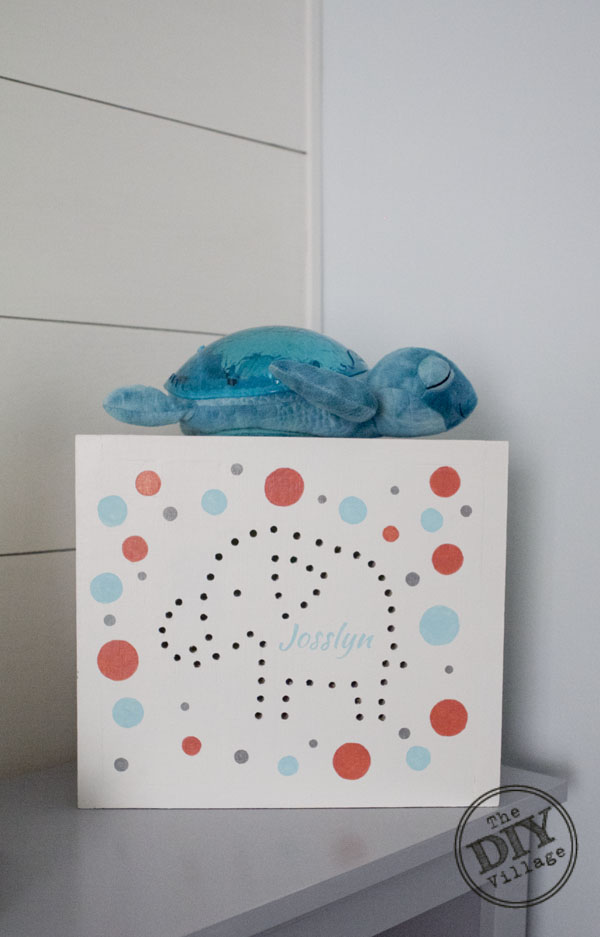 With the outside of the night light complete, now it’s time to add the lights! Lowe’s sells this Sylvania Mosaic Flexible LED Lighting Kit. It’s super easy to work with and it allows you to add multi-color options and patterns to your custom night light!
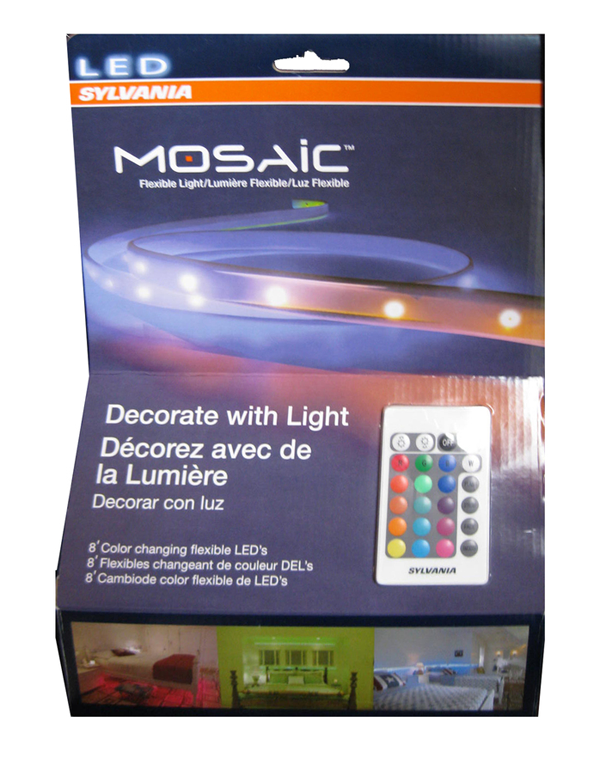 The LED strips have adhesive on their backsides, so remove the paper backing and secure the strips around the inside of your night light box.
 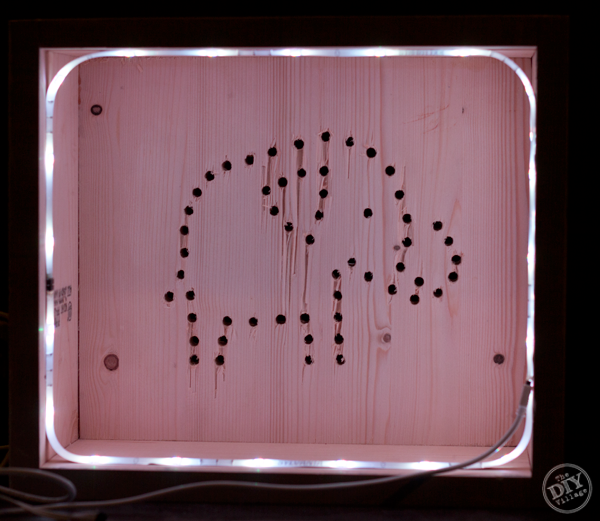 To finish off your night light, trim the drop cloth down to approximately to 12″ x 12″ to cover the open back of your night light. With the drop cloth cut , staple it in place using some 5/8″ staples. The drop cloth fabric diffuses the light that comes from the back of the night light.
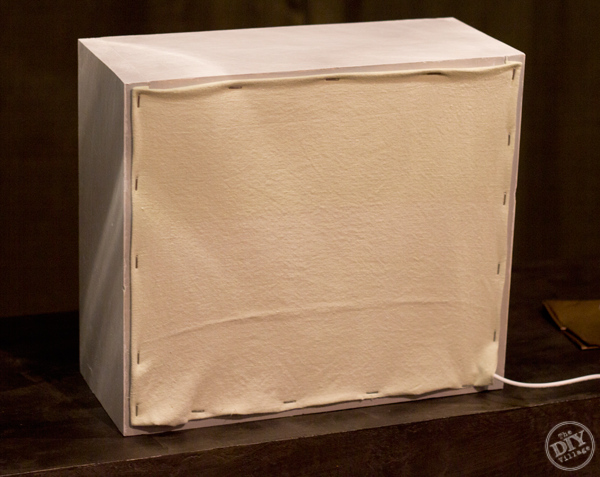 With Josslyn’s early arrival, we’ve had a chance to try out her night light and we couldn’t be happier with it! I just hope that all of the gifts I make for her will turn out this perfect! Since we plan on continuing on with our make-a-gift tradition, I’ll have plenty of practice!
 Using the same concept, you could easily make up your own pattern for whomever you’re making the night light for. I think a boat or an airplane would be a pretty cool pattern! What other patterns do you think would work well? Keep an eye out over the next few weeks as we reveal the work we’ve been doing in her nursery!
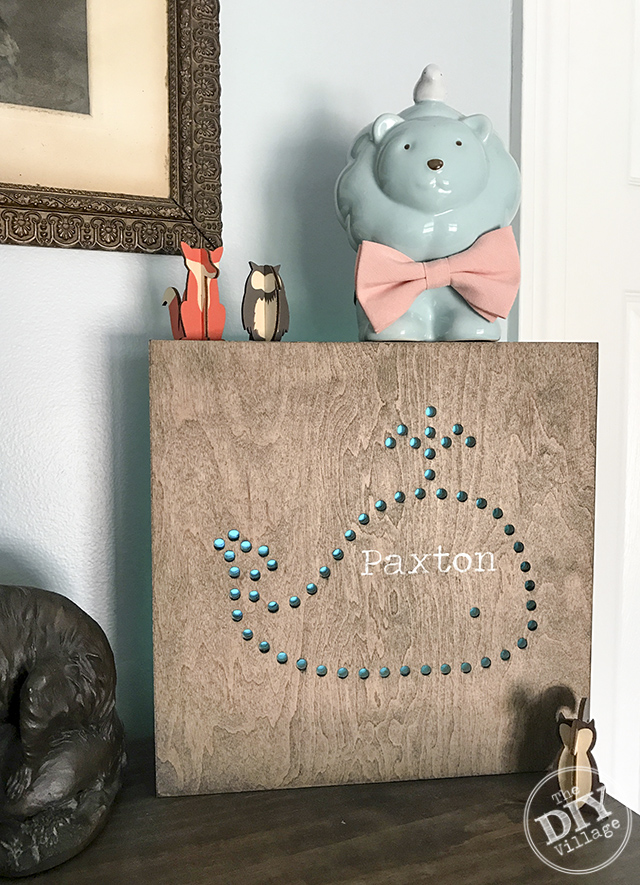
UPDATE 2016: When I found out we were having a little boy I knew I had to make him, his own nightlight. Since Josslyn got the Elephant I went with a Whale for our little mans room. It’s rustic and fun. these are still the best night lights ever!

Disclosure: As a Lowe’s Creative Ideas Handyman, I was challenged to complete a project that involved creating a handmade holiday gift. I was provided a gift card to cover the cost of materials for my project, but I was not told what to write. All the ideas and words found here within are my own
Looking for more Lighting projects? We’ve got you covered!
Mason Jar Pendant Lights
Kitchen Pendant Light
Old Marquee Letter update
Lantern turned to Cordless LED light (IKEA Hack)
Chandelier Makeover
How to install Landscape Lighting
What a cool idea. I’ve not seen anything like it. The LED kit is new to me as well. Our kids are a bit old for it, but I’m thinking the concept could be expanded into holiday decorations. It turned out great.
John, There are so many things I want to do with these lights, I might actually be on LED overload! I think using them in a holiday project would be perfect!
This is BEYOND adorable and I love the sweet little elephant!
Thanks Keri! I’m not sure why I chose the elephant , but once I was done, it definitely felt right for her!
OMG Matt I LOVE this! The elephant is super cute, and what a genius idea overall! Pinning for sure!
Ah, Jessi, thanks for the love! This was definitely a special project for me! Sorry it’s taken me so long to get back to you! I’m still adjusting to the new demands in our life! Hope all is well!
This is so super sweet and beyond adorable! I’m sure that my boys would love it if I made them something fun like this too! I’m thinking a rocket ship would look pretty cool 🙂
Heidi, I think a rocket ship would be awesome! Hopefully someday we’ll have another little one to make another one for!
Ack! This is awesome! My girls have a similar LED light with the remote but I had no idea you could buy the kit at LOWES- and my husband works there! This is such a great idea, and so easy too. My girls love their light, it’s a perfect gift for any young child.
Jenny, these lights are AMAZING! Definitely check them out! And congrats on your new addition!
So stinkin’ creative! LOVE this idea, Matt!
Thanks Jessica! We’ve broken it in well!
Thank you so much for the great tutorial. I did not know about the led decorate with light product. Love it. Looking forward to giving it a go. Thanks!
Thanks for the comment love Jackie! When you get around to trying it out, we’d love to see a picture!
Ummm this is too stinking cool… I see a big one of these being made for our baby boys room!
Thanks Katie! I absolutely love how soft the lights are, plus Josslyn is enamored by the changing colors! I bet your son would love something like this too!
Thanks for sharing your holiday family traditions. Looks like you’re starting out right for the little one.