I have been spying these beadboard picture frames for quite some time and have always hesitated buying them After some thought I decided that our half bath needed picture frames! Beadboard picture frames to be exact. I set out on the journey to figure out how to make them myself for a FRACTION of the cost of the ones sold in the stores! And because I love all of you so much, I am going to show you how to make your own!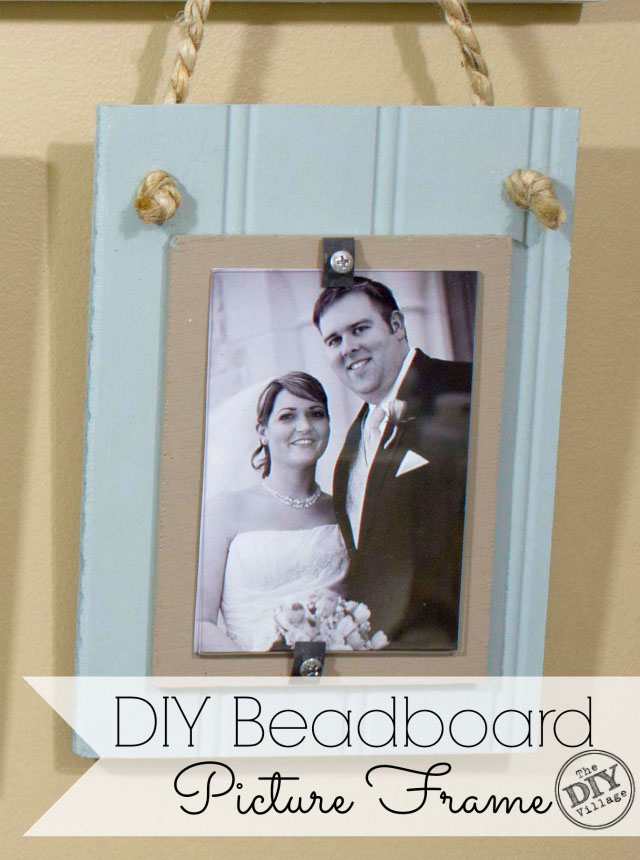
Before you get started I will give you a quick list of materials you will need. In my case I was able to use most things I already had around the garage with only one quick trip to Lowe’s for a couple of items.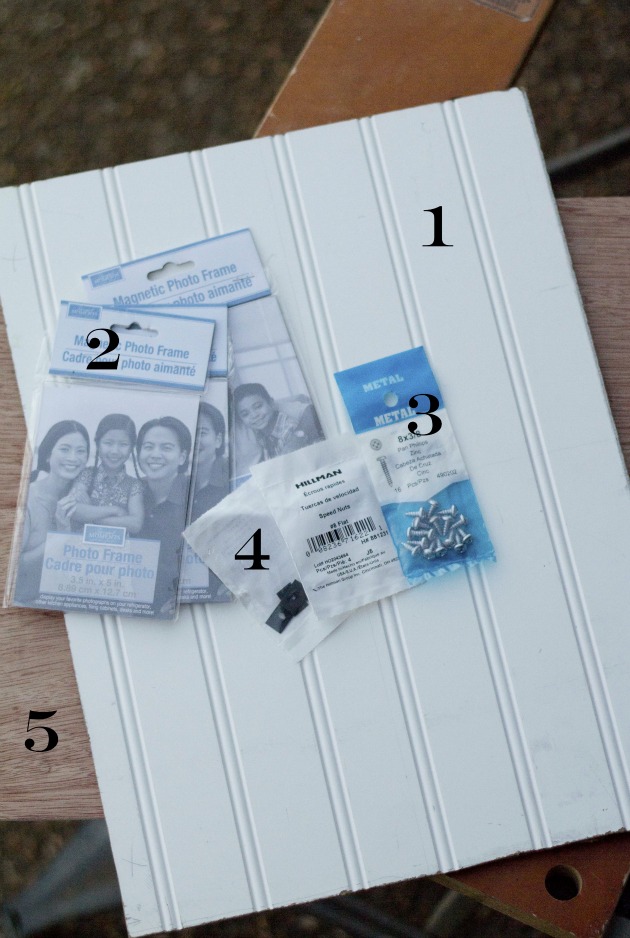
MATERIALS:
- Beadboard (I was able to use scraps in my garage)
- Plastic Photo Frames (these are from the dollar store)
- Metal Screws with rounded heads (2 for each frame)
- Speed Nuts (#8 Flat – 2 for each frame)
- Luan
Not pictured –
6. Paint
7. Rope
8. Liquid Nails
Decide the over all dimensions of the frames.
My sizes are as follows:
Frame – 3.5 x 5″, Beadboard – 6.5 x 9″, Luan – 4.5 x 6″
Frame – 4 x 6″, Beadboard – 8.5 x 12″, Luan – 6 x 8″
Once you have decided the sizes of your picture frames transfer those dimensions to your beadboard and cut your pieces.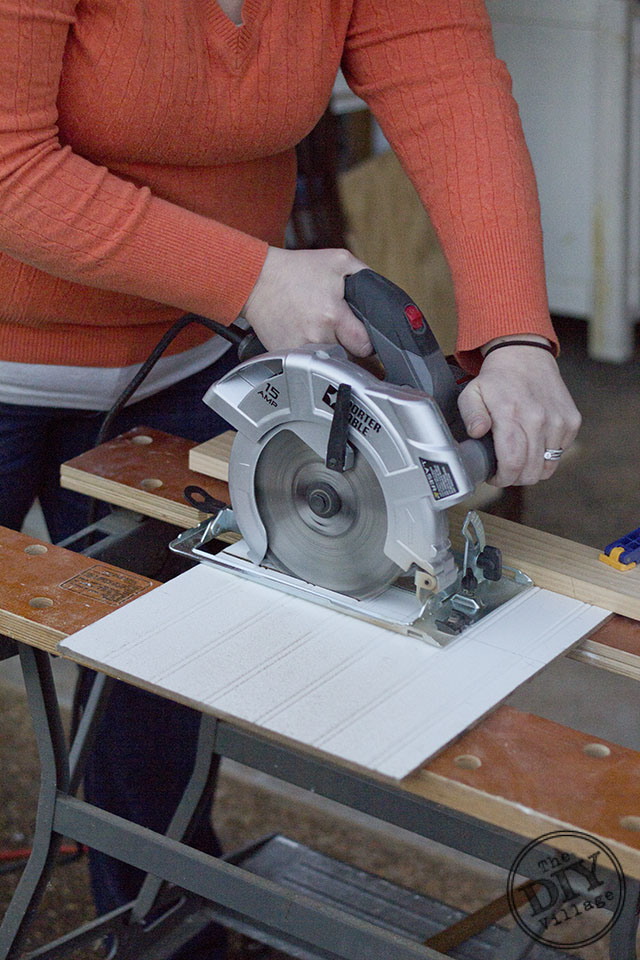
With all of the beadboard and luan cut it’s time for paint! I chose a brown for the luan and a two complimentary colors for the beadboard (AnnieSloanChalkPaint – Duck Egg and Arles).
When the paint is dry do a dry fit of your pieces and then glue the luan to the beadboard using liquid nails or any other type of heavy duty adhesive. (Do not glue the plastic picture frames to the luan.)
Give your adhesive ample time to dry and then lay the plastic picture frames onto the luan. Take one of the speed nuts center it on your frame and mark with pencil where it will go.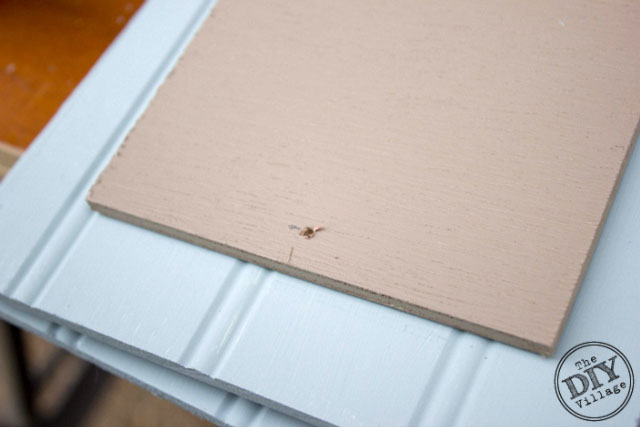
Following the pencil mark pre-drill a hole for the screws.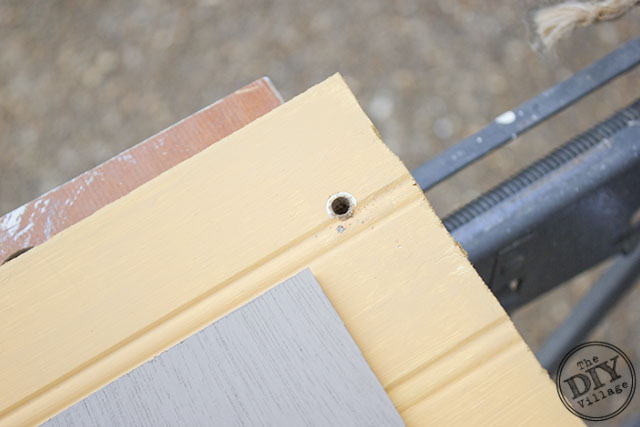
While you have the drill out, use a larger drill bit and drill two holes in each board towards the top. This is where the rope will attach to the picture frames.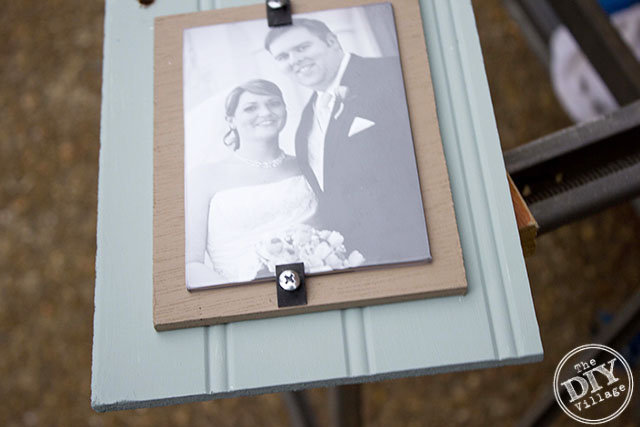
Take a screw and begin to thread it through the speed nut. Then line the screw tip up with the pre-drilled hole and tighten the screw.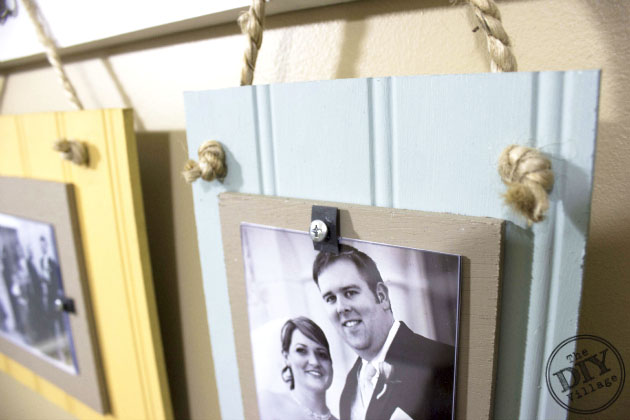
Once all of the speed nuts have been added and the picture frames are secure, the rope can be added. The length of the rope is up to your discretion. Slip the rope through the holes and knot each end. (If you are having trouble getting the rope through the hole try adding scotch tape to the ends and remove the tape once the rope has been pulled through)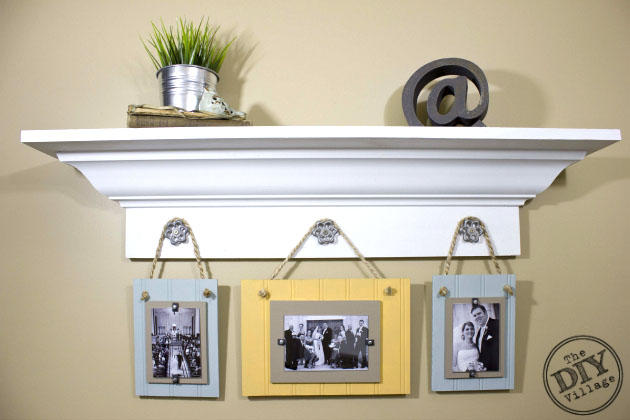
With the rope securely attached to the frames it’s time to hang them up! This is an easy afternoon project that will save you a ton of money! The frames in the boutique were selling for $20 and up, I made my frames for under $5.00 each!
Great job Jacque! I have scraps of beadboard…and this would be an easy thing for me to make with some of those!
pinned!
Thanks Gail! I used scraps for mine and was able to easily get the sizes I needed!
Absolutely LOVE these!! Might be stealing your idea soon :o)
Woohoo Thanks girl! Don’t throw those beadboard scraps away they make the best frames!
I am obsessed with bead board! LOVE this project!
LOVE!!! I’m pretty sure I have some bead board scraps in the garage too! Pinning!
This is so creative! I love how it turned out!!! You look gorgeous btw… what sweet photos!
Those are so super cute! And you!!! What a gorgeous bride!
Jacque,
I love this idea. So clever. It would look great anywhere but I first thought, Beach House, Vacation Home.
Have a great weekend.
Patti
These are gorgeous! I love beadboard, and what a cute way to frame those photos, love it!