Here at the DIY village, we’re no strangers to paint! As a matter of fact, in our current home, we’ve added at least a coat of paint to every single room! Along the way, I’ve tried different rollers and cut in tools that claimed to make painting less of a hassle, most of which left me with empty pockets and a less than desirable finished result! Luckily, I didn’t throw in the towel. While Jacque and I were working on our latest paint project, Covering Red Paint, I finally found the right combination of paint tools I’ve been looking for! With help from the HomeRight QuickPainter and the Paintstick EZ-Twist, I’ve finally figured out how to paint like a pro!
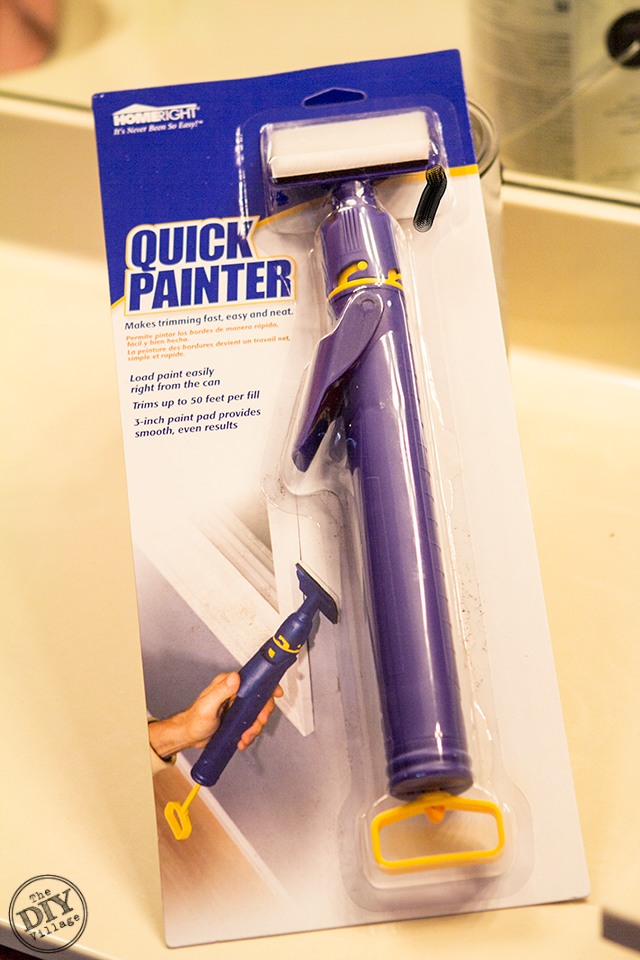
Let’s take a look at the QuickPainter!
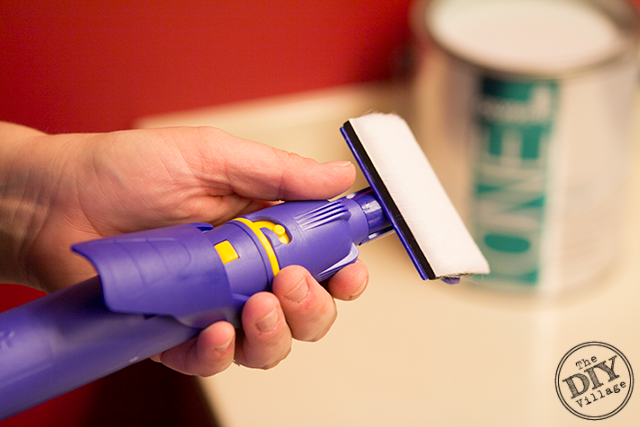
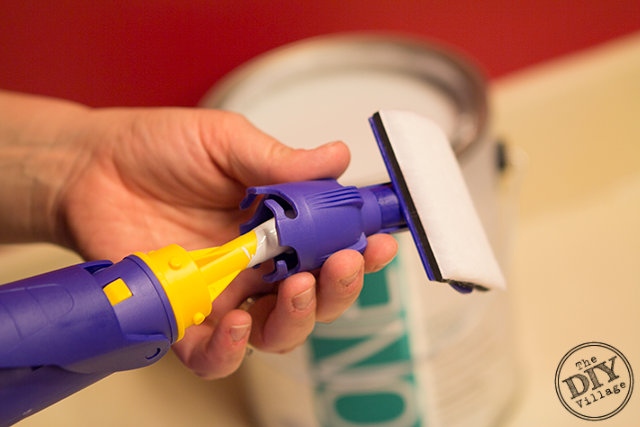
To load the paint, you’ll need to remove the pad assembly. Simply twist and pull off.
With the pad assembly removed, submerge the tip into the paint, depress the trigger, and pull back slowly on the handle. Once you’ve drawn up the paint, release the trigger.
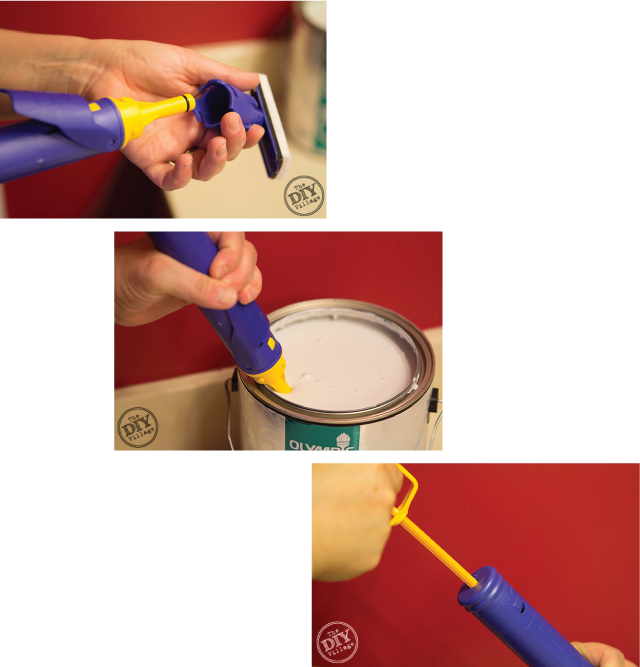
Then reattach the pad assembly.
Before you begin painting, you’ll need to load the pad with paint. I’ve found that it’s best to hold some resistance on the handle while depressing the trigger. (The trigger can be a little sensitive, so holding back on the handle will allow for a more controlled loading of the paint.)
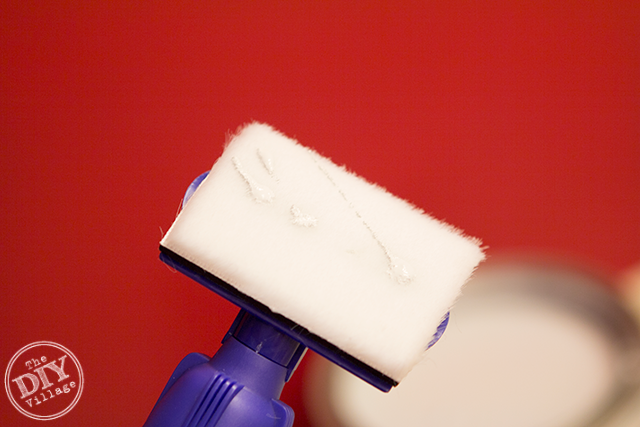
Now you’re ready to begin cutting in!
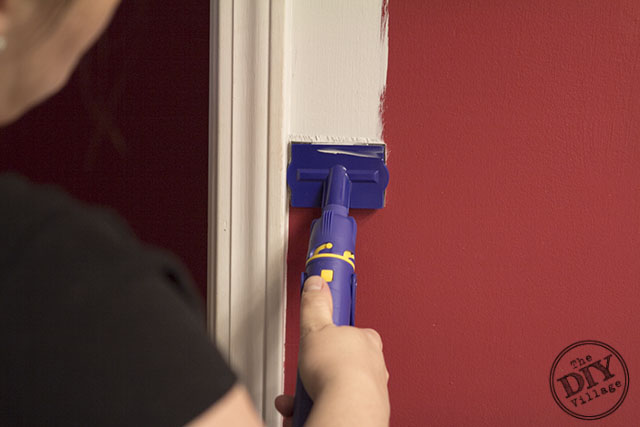
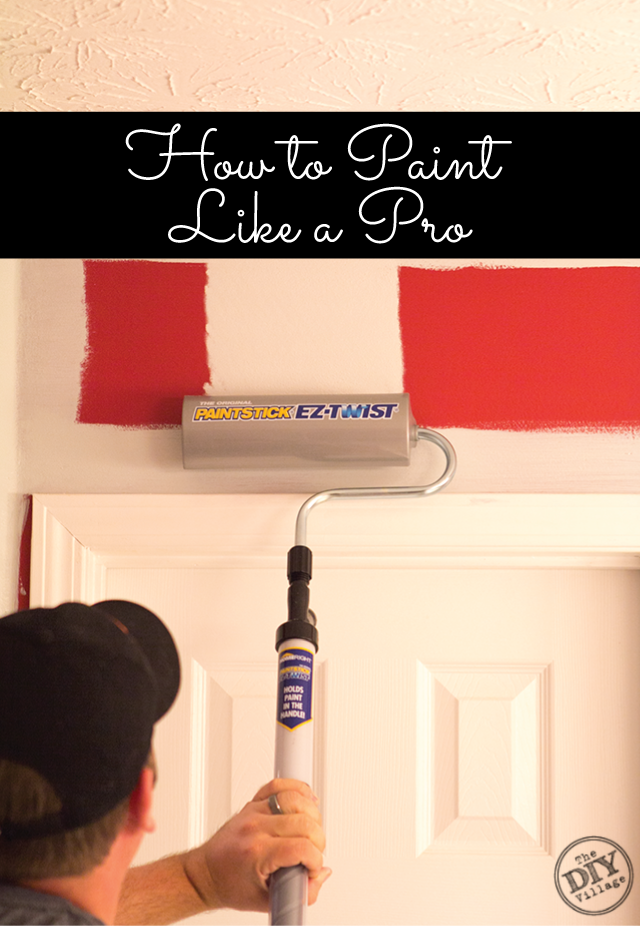
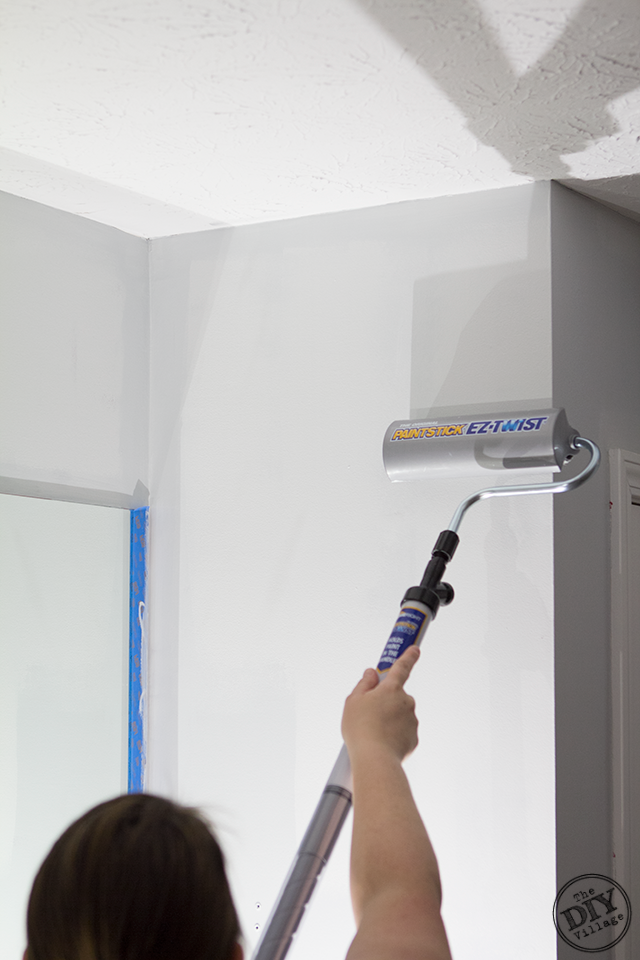
Once the cutting in is complete, switch over to the PaintStick EZ-Twist Roller to fill in the rest.

I’ve got a great tutorial on quick and easy painting using the PaintStick EZ-Twist, take a look at it here!
Using the QuickPainter and the PaintStick EZ-Twist, we managed to cover the red walls in our master bathroom in only TWO coats and used a total of ONE gallon of paint!
Not only will you be left with professional results, you’ll use less paint and save money in the process!
I’m intrigued. I’m not a big fan of painting, mostly due to the mess. How difficult is it to clean these widgets up before stowing them for next time?
What great timing! Hopefully the weather will be cooling down some to make the unbearable project a bit more bearable. I hope I win!!!
I would love to try this.
I’d love to try this when painting my guest bath.
These are two tools I have never tried or seen in stores, but would love to try! Thank you:)
When we moved into our house, we hired a professional painter to paint every surface of our home. (I know… shame on me!) But the color I chose for the family room is no longer one of my favorites, so I would like to repaint it. Unfortunately, the same color also goes into the breakfast area and the kitchen. So there’s lots of it! I have never actually painted a room myself, so I would really like to give it a shot!
Thank you!
Funny, I just looked at this this morning. I need to paint Kate’s bubble gum pink bedroom walls a cream color, I need to paint our bright yellow bathroom some neutral color, and then our bonus room!
Every. Single. Room. I’m notorious for starting and never finishing a room.
I think even the hubby could master painting with that system.
I think even the hubby could master painting with that system. I think the master bedroom and bath is the last to do.
We are in the process of building our house – so all of them!
We’ve been repainting every room, mostly with Lowe’s clearance paints (such great deals!) but I’m not done and I’m so tired of painting! I’d love to win this. Lovely blog, your kitchen looks great!
the family room needs painting
Now that Benjamin is 13 months old, I finally am getting the urge to tackle some house projects…painting a few rooms being of them! Your tutorial makes it look pretty easy, so am keeping my fingers crossed my name is picked by rafflecopter!
Want to start in my bedroom!
Just bought a new house and this would come in handy!
I have so many rooms to re-paint! I need to start somewhere though, so I’d start with our sunroom – it’s a mess and needs a fresh coat of paint more than any other room! Thanks for the great product review.
the family room!
I really need to paint my master bedroom and bath. SOOO BAD! These tools would help so much!
My den is the first room on my “to paint” list! Thanks for the chance to win these handy gadgets!
Anything that can make work fun is a good investment and motivates you to get more done. Tools become toys to play with. This looks like good, clean fun! lol
the kids bedroom
We are preparing our home for sale and I need to neutralize my apple green laundry room. This would be so handy!
the family rooM!
One of my daughters just moved into a new house so we have a whole house to paint!
I’m currently repainting all of the rooms in my house so I could definitely put this to use!
family room!
The kids room needs tons of paint
I need to paint my guest bedroom.,
I would LOVE to try this in my great room. I don’t relish cutting in 20 foot ceilings with scaffold and brush!
Totally amazeballs! I need one of those guys!