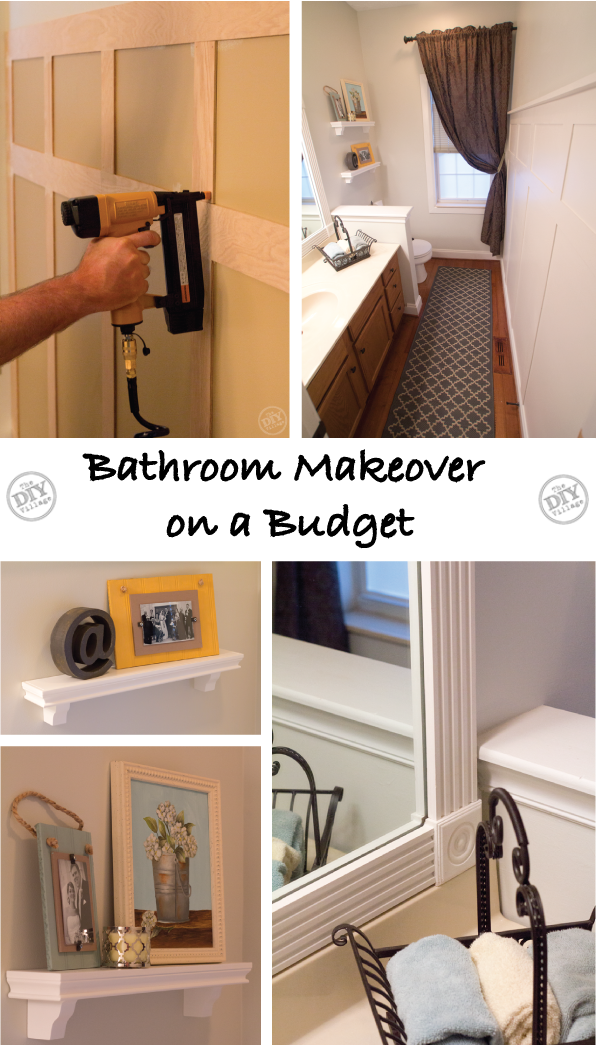
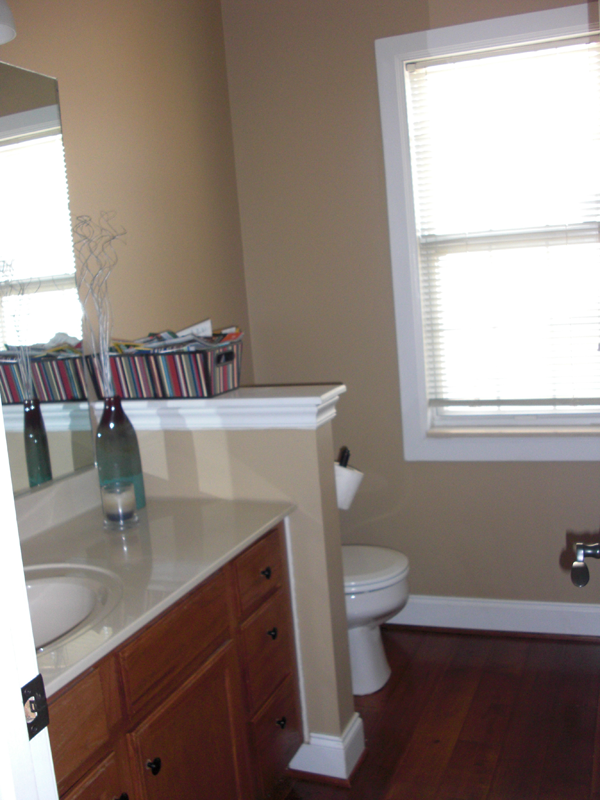
Our half bath is long, narrow and has tall ceilings. In hopes of breaking up the wall a bit, we previously added a few things (i.e. Decorative Shelf With Crown Molding and DIY Beadboard Picture Frames), but even then, the room still felt like it needed a refresh. Here’s a look at the bathroom before the makeover.
 So after some brainstorming, we decided to try our hand at a board and batten wall! But that’s not all! We also decided that it was time to frame in the builder grade mirror with some decorative trim too! Hey, some people go big or go home, we go big at home!
We made our way to Lowe’s to get the materials we’d need for the bathroom makeover on a budget! What we didn’t know was that Lowe’s offers a fantastic in-store service that can make your home DIY projects WAY easier! After talking with Alex, a super helpful Lowe’s employee here in Knoxville, we learned that they’ve got a cutting service available in-store! So, thanks to Alex, I was able to have all of the 1/4″ plywood for the board and batten wall, ripped down to 3″ strips before I even left the store. And the best part about it….It was FREE!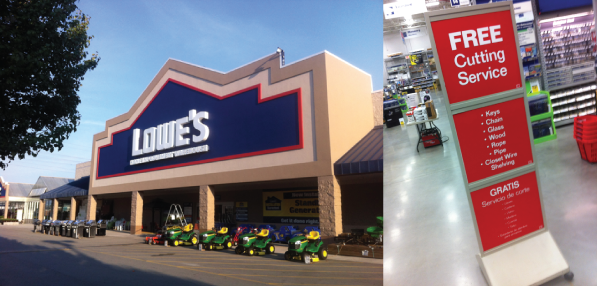
Once we made it home, we got right to it! Using a stud finder (like this one HERE) and a pencil, we marked the existing studs on the wall.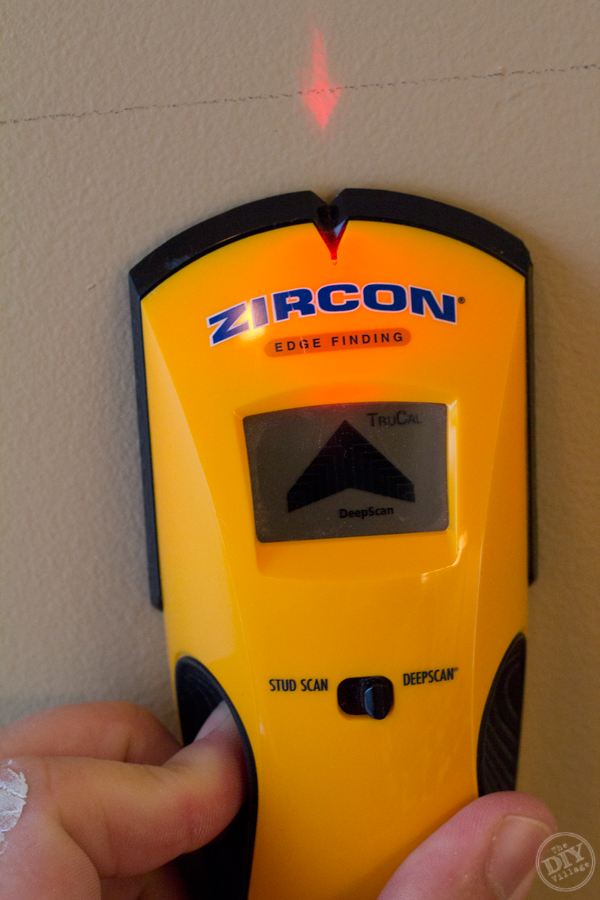
Since the plywood was already ripped, we cut the strips to length and started placing the horizontal strips. 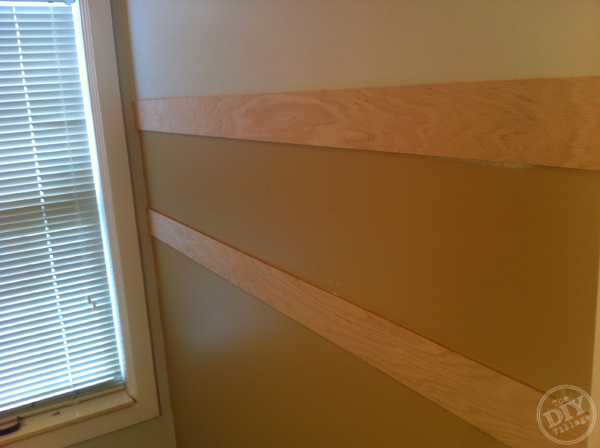
Then we continued with the vertical pieces, securing them to the wall using liquid nail adhesive and a nailer. Any place that we could shoot a nail into an existing stud we did.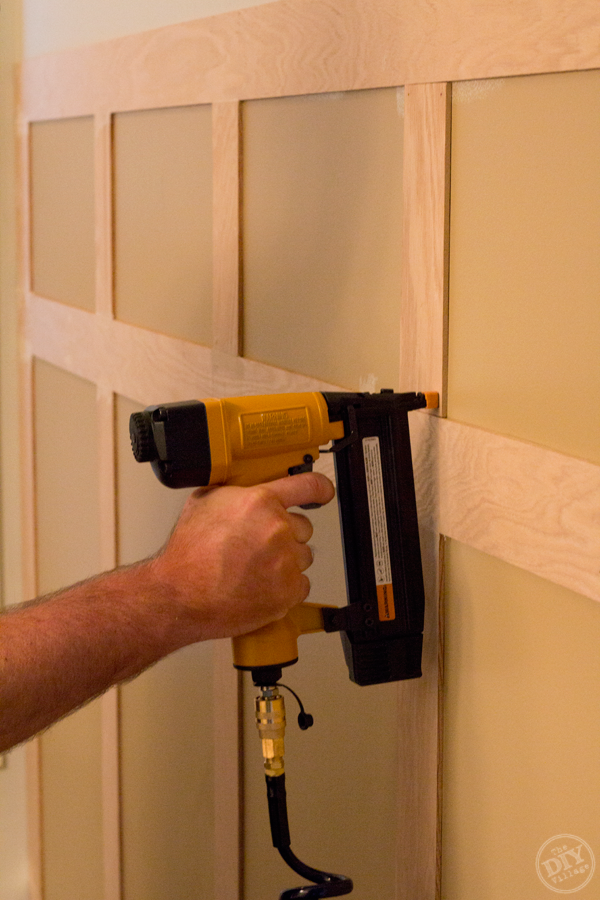
Next, we began filling nail holes and any place where two pieces of wood intersected with wood filler (found HERE). It’s super easy to use and is ready for sanding and painting pretty quickly.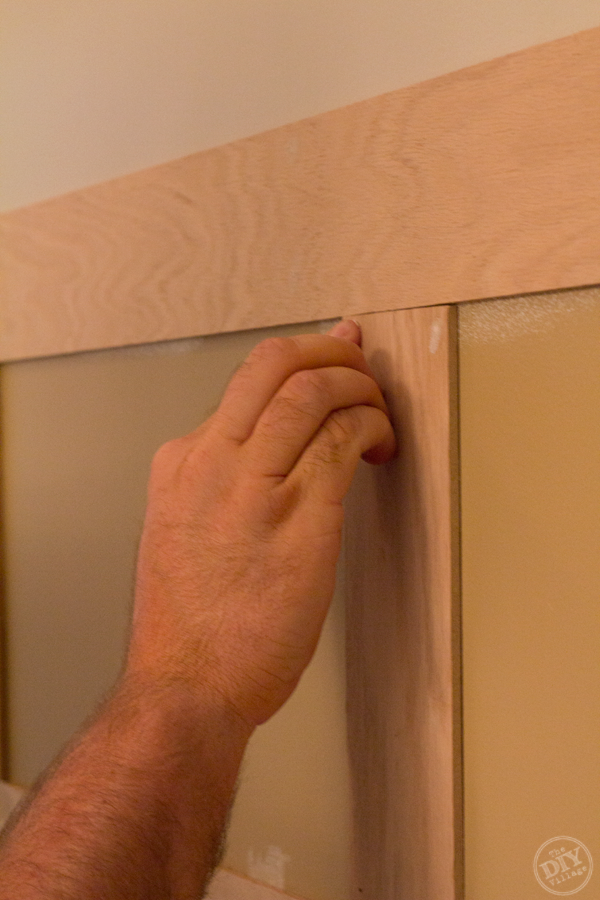
Using Valspar Paint + Primer, we began cutting in the area around the plywood strips.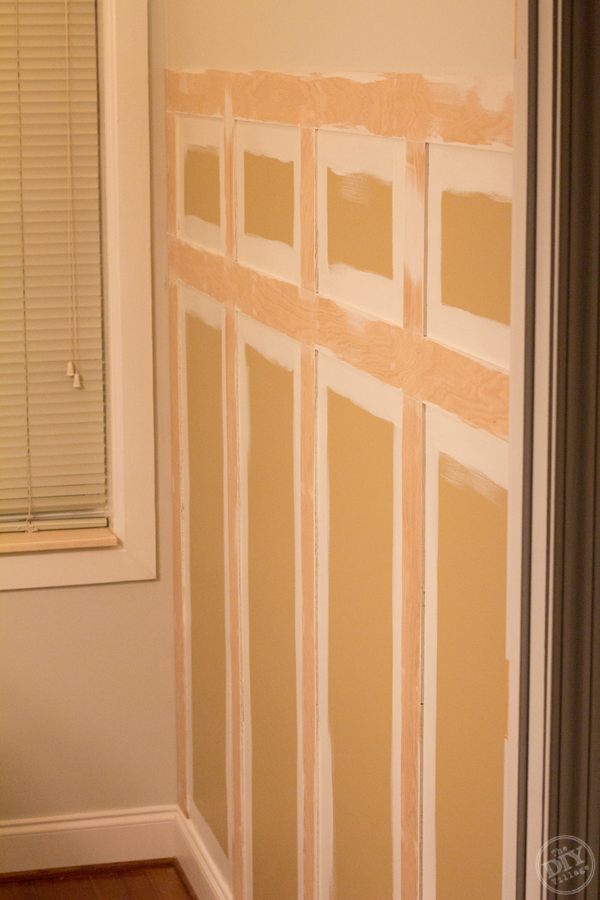
To finish off the board and batten wall, we added a 1×2 poplar cap to the top and caulked around the edges.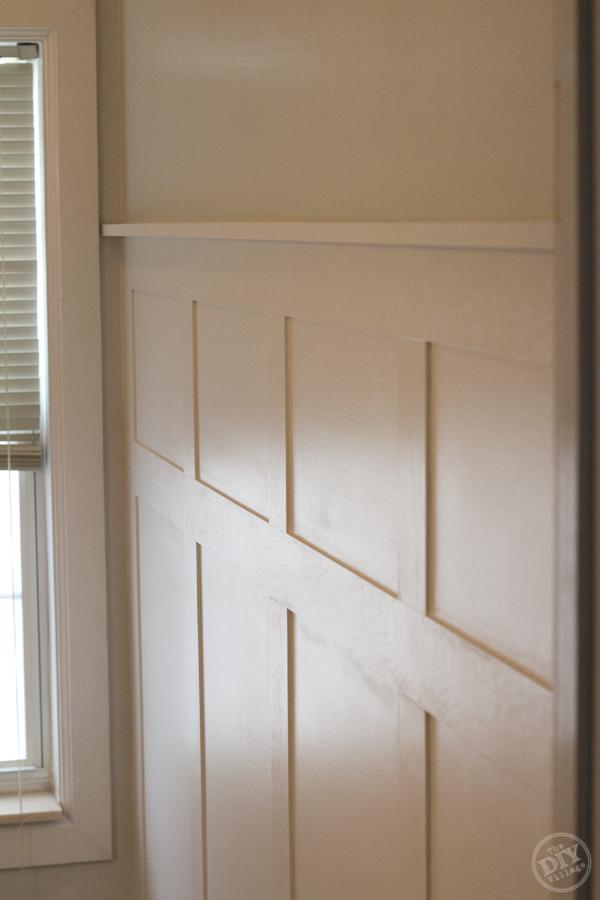
As for encasing the builder grade mirror, we purchased four Pine Rosette Molding Blocks to go at each corner. We secured them in place using Loctite Mirror Adhesive.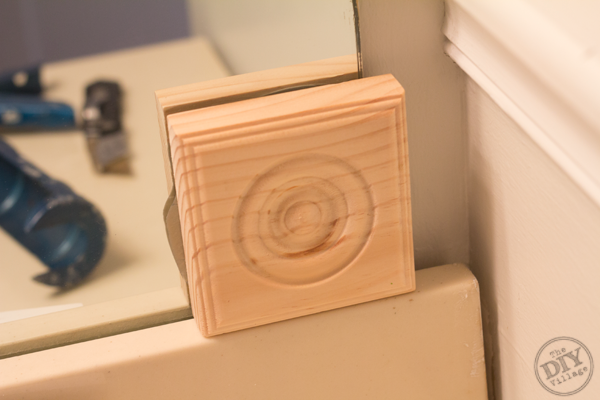
The rest was as simple as cutting the wood pieces to fit. 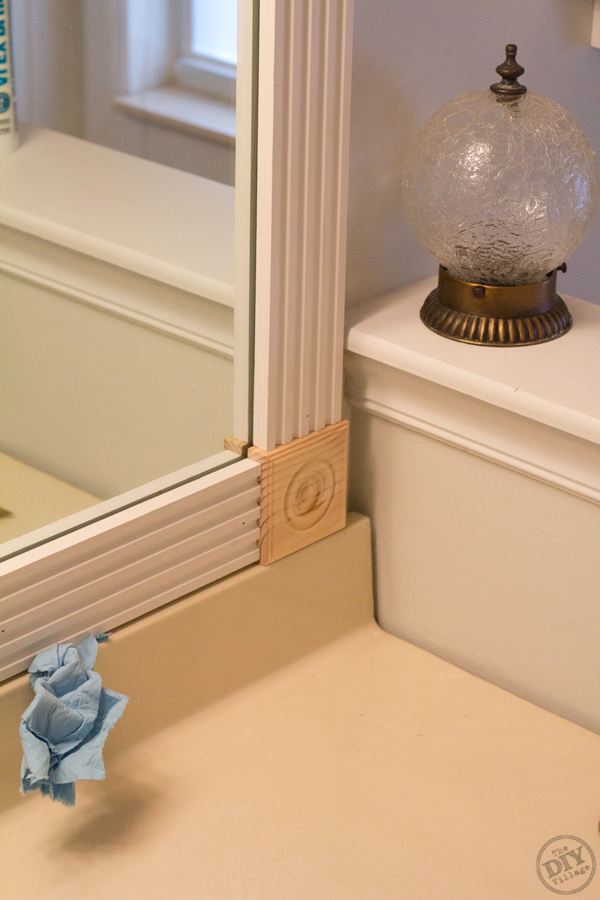
Until the adhesive had time to cure, we held the wood pieces in place using some painters tape.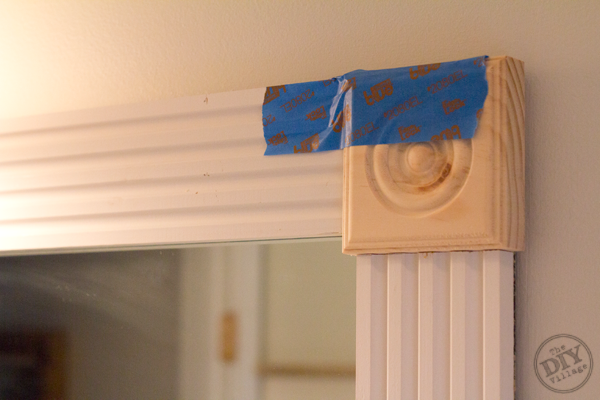
To finish off the mirror, we slapped some paint on the fluted molding and let it dry.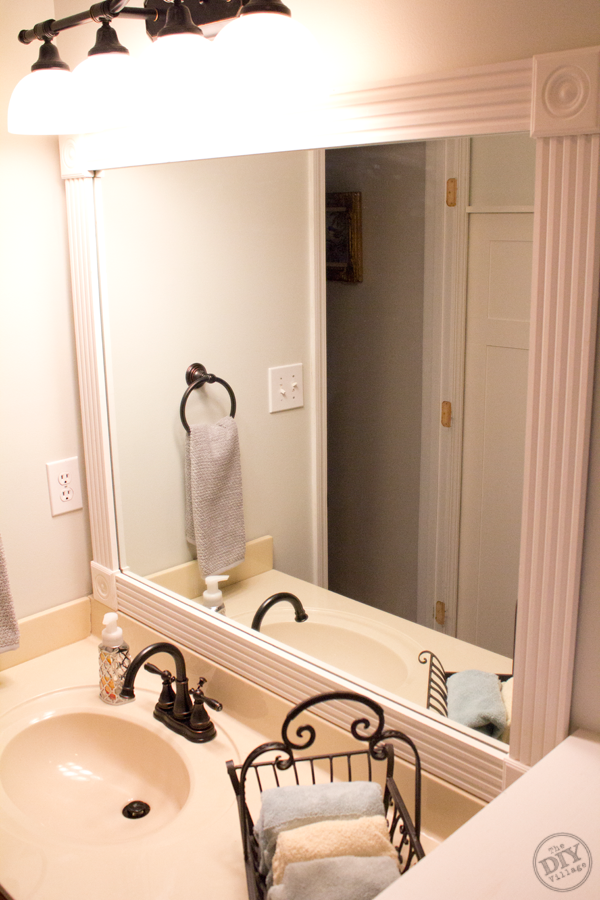
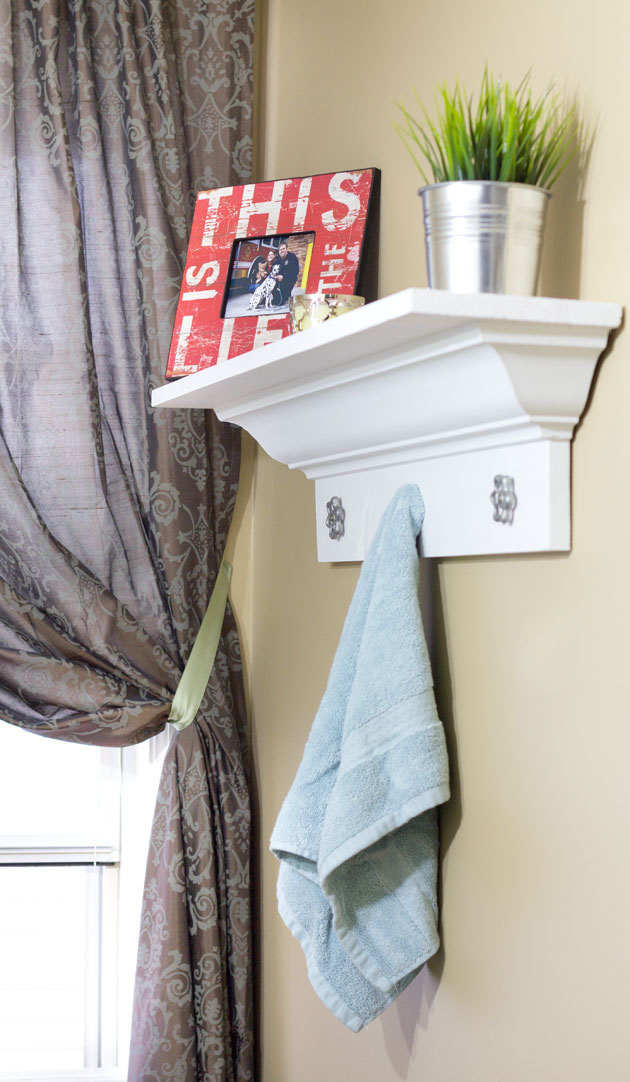
Then I turned the bathroom over to the talented one in the family, Jacque, and let her work her decor magic. She added a couple of shelves (found HERE) above the toilet and found a new rug (found HERE) that fit the space a bit better.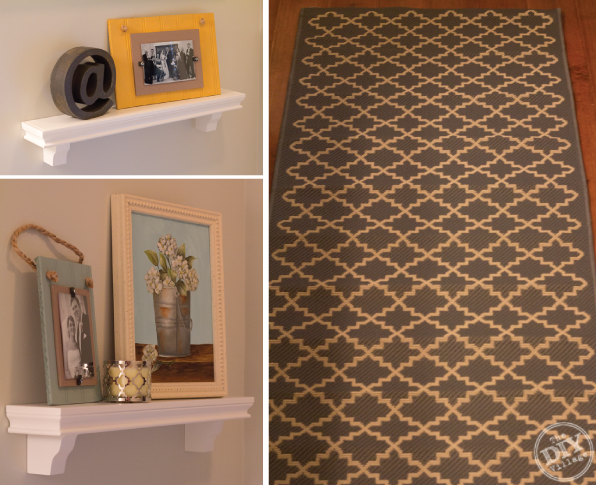
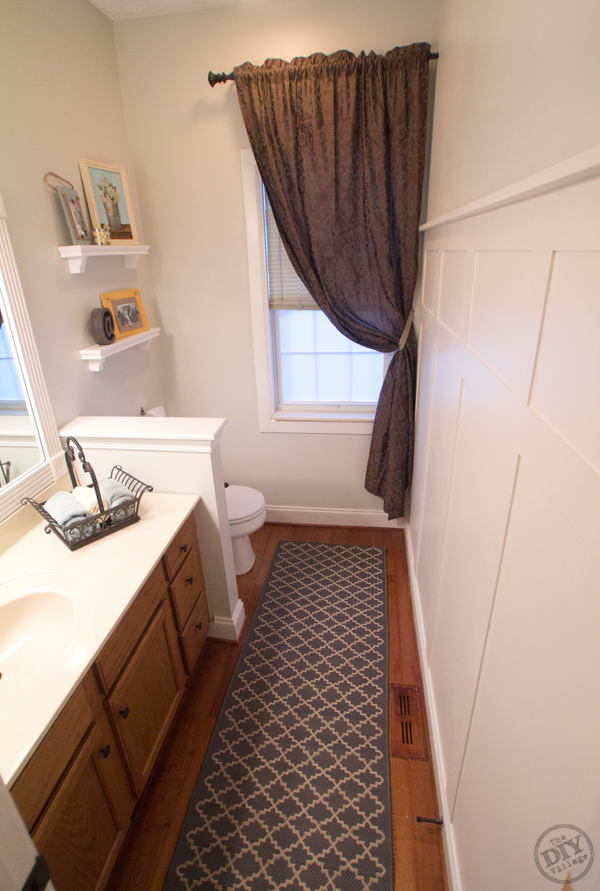
The keyword for this bathroom makeover was budget. The materials purchased to complete the board and batten wall, along with the framed mirror totaled under $80. So with a fairly small budget, we were able to completely overhaul our half bath!
If you’re an iPad or iPhone user, be sure to download the Lowe’s Creative Ideas App to see some unique seasonal project ideas!
![]()
Also be sure to take a check out all of the amazing Lowe’s Creators & Influencers for some great project tutorials!
Looking for even more inspiration? Follow Lowe’s Home Improvement on Pinterest, Facebook, and Instagram
Disclosure: As a Lowe’s Creative Ideas Handyman, I was tasked to complete a project that involved a bathroom facelift. I was provided a gift card to cover the cost of materials for my project, but I was not told what to write. All the ideas and words found here within are my own.
For more Bathroom inspiration posts check out some of our other Bathroom Projects

Nice job on that bathroom. I can’t believe you only spent $80!! Woot.
Dudes! This turned out amazing! I love the architectural interest that board and batten provides. Great job!
Absolutely love what you did with the wall and the mirror! That really gives your bathroom a nice classic style, and makes it look more homey, love it!!
Looks fantastic! I love the wall 🙂 What a great idea.
Your wall turned out fantastic! I love this idea. Thanks for sharing.
What a great idea for your mirror. Especially for those of us who don’t have a table saw – much more do-able. I also LOVE the shelves you chose over the toilet. Where did you get those?
Joanna, those shelves are from Target and come in a number of different combinations!
Great job – I absolutely LOVE board & batten and your step by step tutorial makes it look easy! Those changes made a big difference!
Get out! 80 bucks?
It looks awesome, yall! One question… Any reason you chose to use plywood over mdf?
Gwen, honestly, I’ve not done a lot of projects with MDF, so I never even thought to look at something other than the plywood. You may have given me a new challenge!
Great job! Love that panelled look!
I love me some trim work! Great idea to use those rosettes around the mirror. That makes for a ridiculously easy project! I’m inspired!
love your bathroom makeover! I love the board and baton!
OMG! I had no idea they would rip wood for you! That’s awesome! By the way, do you like that stud finder? I’m having a hard time finding a reliable one!
Melissa, I’ve had a few different stud finders, this one has, by far, been the best!
Looks great, you guys!! Can’t wait to see it in person soon 🙂
Absolutely fabulous! And $80! Amazing! Enjoy! 😀
Once your strips were cut, how did you finish the edges? Aren’t they rough looking?
Hey Cheryl,
we actually just sanded with a fine grit sandpaper and applied two coats of primer and three coats of Valspar paint and primer. With the thickness of the coats, it seemed to disguise the thin plywood edge nicely!
Amazeballs…I love it..the batten looks awesome!
Wow, wonderful job! I can’t believe you did that for only $80! Thank you for sharing 🙂
I really like that carpet! Where did you find it?
Hi, looks great and I love your take on the b&b. Question…where did you use the 3″ pieces? the horizontal or the verticals? it looks like they are two different sizes…I’m thinking the horizontal boards are wider? Thanks so much!
Hey Wendy,
All the pieces are 3″ in width. If I had to hazard a guess, I’d say the wide angle camera lens that we used makes the horizontal pieces look a bit wider!
I am in love with that iron counter basket!! Where did you find that?!
It’s from the Better Homes and Gardens collection at Walmart.
Hi, I am trying to figure out which way I want to go with my board and batten, your bathroom makeover is so inspiring. I love how it turned out. When you say Lowe’s can “rip” your plywood, what do you mean? Is it cheaper than using the 1×4’s? I really like how yours has turned out.
Hey Tasha! All Lowe’s stores have a panel saw, usually in the back of the lumber department. They can cut down your plywood into smaller pieces. we had them cut the 1/4″ plywood into 3″ x 8′ strips. Much easier to transport, plus they’re ready to install! For cost purposes, I would definitely look at using plywood!
I was so excited to do this project, but I just went to my Lowes and they said they couldn’t do the three inch cuts as it was too many. Any other ideas? Thanks!
Thank you SO MUCH for posting this great DIY! I had been trying to decide how to do this same treatment to the wall in my basement dining area. You see, I am almost done building a basement studio apartment for my Mother-in-Law.
I wanted the dining area/corner to be a clear “zone” so that it would feel like a bigger and more luxurious apartment. I have spent lots of time, LOTS of money, and about the last bit of my energy trying to make this great, but was stumped on the board and batten. The 1×4’s would have been too thick, but I hadn’t even thought about plywood. One of the comments mentioned MDF, and I think that might be the way for me. Also, I think to make more of a statement, I’ll go with 1/2″ MDF. I love the idea of the 1×2″ on top because I wanted to do this as a plate rail. I’ll add a thin piece of molding to the top of the 1×2″ to hold the tilted plates.
Thanks so much for the tutorial, and giving me the confidence to complete this project.
How did you determine the spacing of the boards? Love it!,
I love this and it is in my bathroom to-do notebook. I did use mdf in my sunporch, but will use plywood for a bathroom, as it can get more water/moisture and I do not plan to do it again in my retirement!!!
I love this project. When I went to my Lowes, they would not rip a board. Not safe, they said. I could have used help in picking out my wood. He was not at all interested in showinme anything.
Not completely true about Lowes ripping the wood for free. They will do 2 to 3 cuts and after that there are additional charges. Plus the accuracy of the cuts may be off when they do it for various reasons.
Good point, it definitely depends on the store. We only use the cutting service on things where exact measurements aren’t necessary, I totally get it!