 We’re always looking for ways to add upgrades to our house, all the while finding ways to not completely empty our wallets. The kitchen seems to be one of the rooms that we revisit often when it comes to our projects. Some of our more notable kitchen upgrades have been our Split Face Travertine Tile Backsplash, our Kitchen Countertop Makeover, and our Ball Jar Pendant Lights.
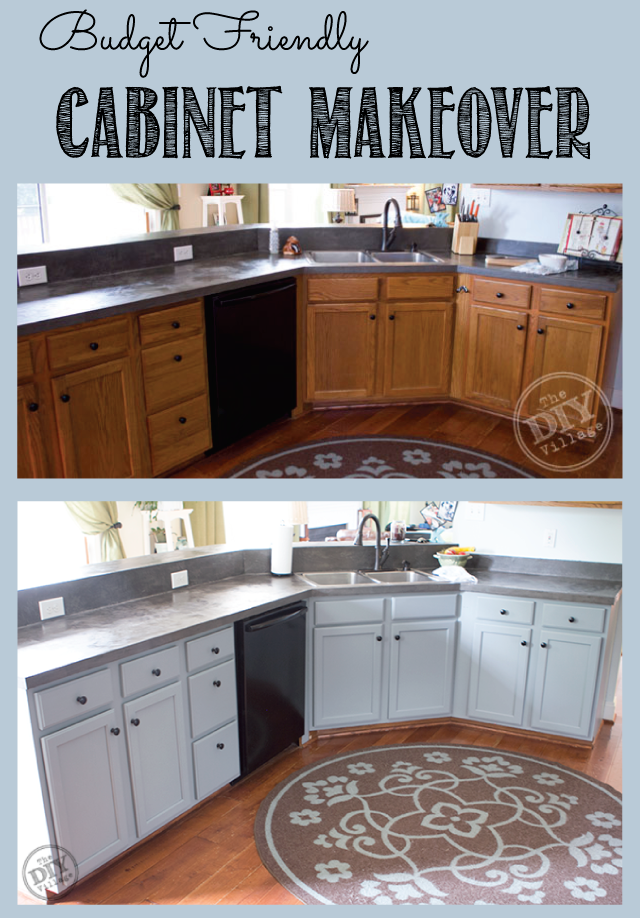
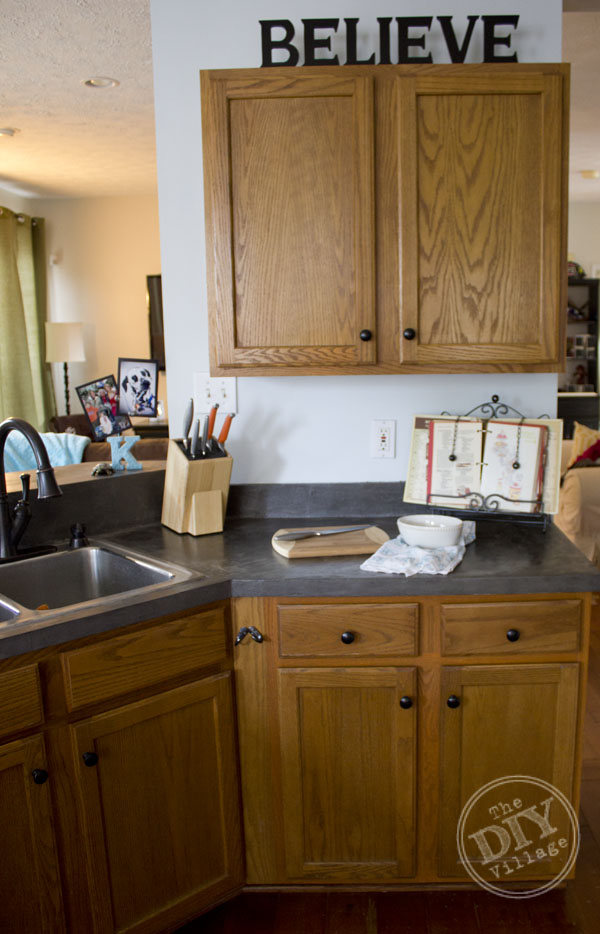
Jacque and I have never been terribly fond of our kitchen cabinets, but the cost associated with replacing them hasn’t made that a feasible option. When we started talking about other options, we discovered that it wasn’t the shape or the size of the cabinets that we didn’t like, it was the condition of the finish. These cabinets are original to our house and let’s just say that they haven’t weathered the storm very well.
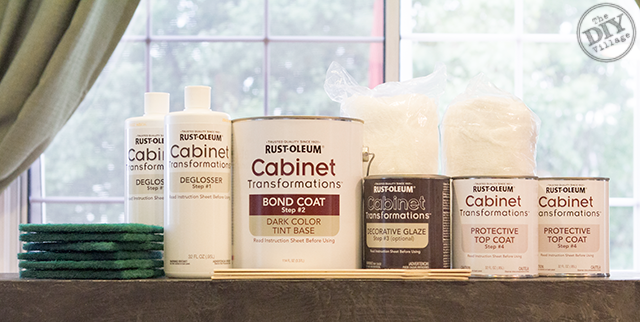
So we came to the conclusion that it was time for a budget friendly cabinet makeover! Thanks to Rustoleum and their Cabinet Transformation Kit, we didn’t have to look very far!
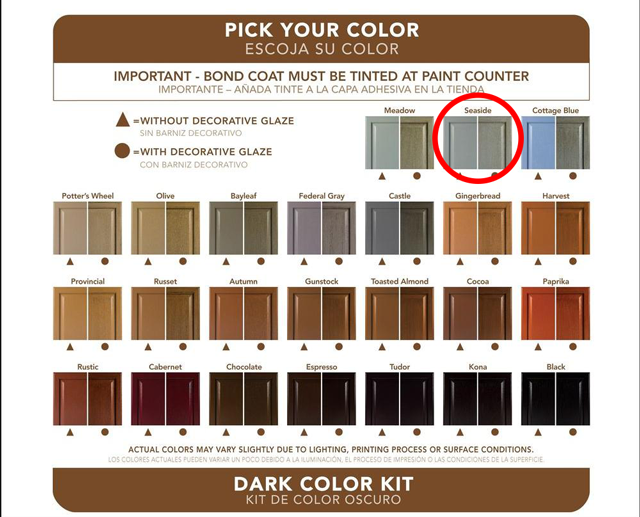
There’s quite a few color options for the Cabinet Transformations Dark Kit. Jacque and I chose the unglazed Seaside.
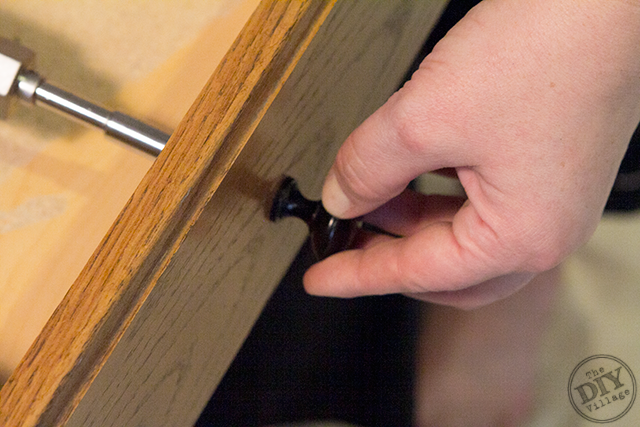
Once we had the supplies we began by removing the drawer pulls and cabinet door hardware.
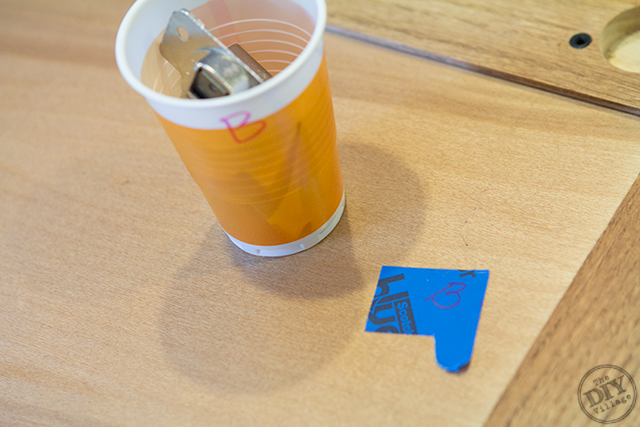
We labeled each door using ScotchBlue Painters Tape, and placed each doors hardware into its corresponding cup.
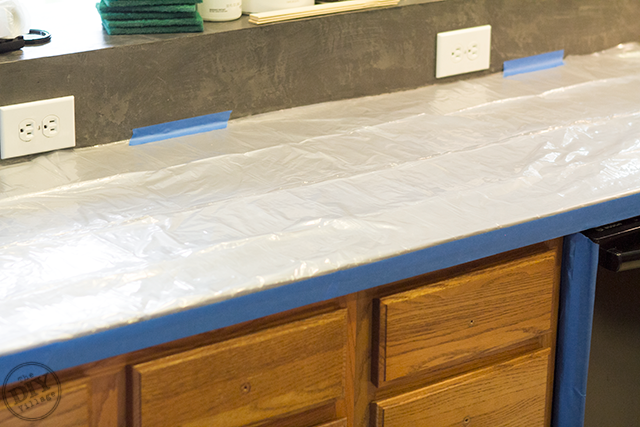
Then we prepped the countertop to be used as a work surface, but also to protect it from any over zealous painting!
It’s super important to thoroughly clean all of the surfaces that are to be painted. So if you haven’t cleaned your cabinet faces in awhile, I’d suggest doing that prior to anything else.
With the drawers out and cabinet doors off, we began the deglossing phase. The kit comes with scrub pads and a deglossing solution.
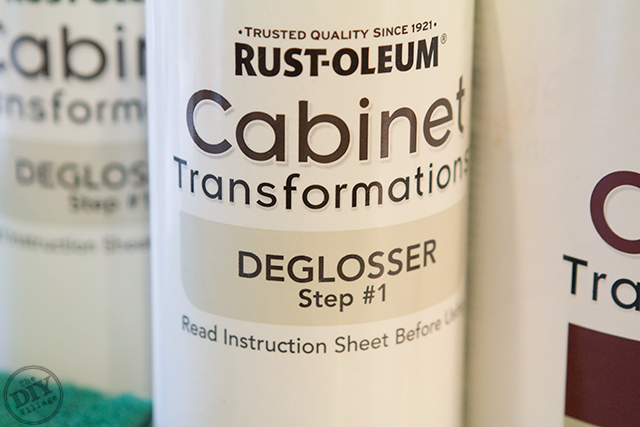
This step is what allows for the bond between the cabinet and the paint, so it’s really important to not miss any surface! It’s as simple as applying a liberal amount of solution onto a scrubbing pad, then following the direction of the grain, begin working it onto the work surface.
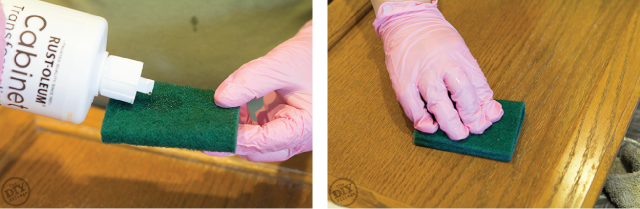
Once the deglossing solution has been applied, you’ll need to remove any residual solution from your work surfaces using a wet cloth, then wipe the surface clean with a dry one.
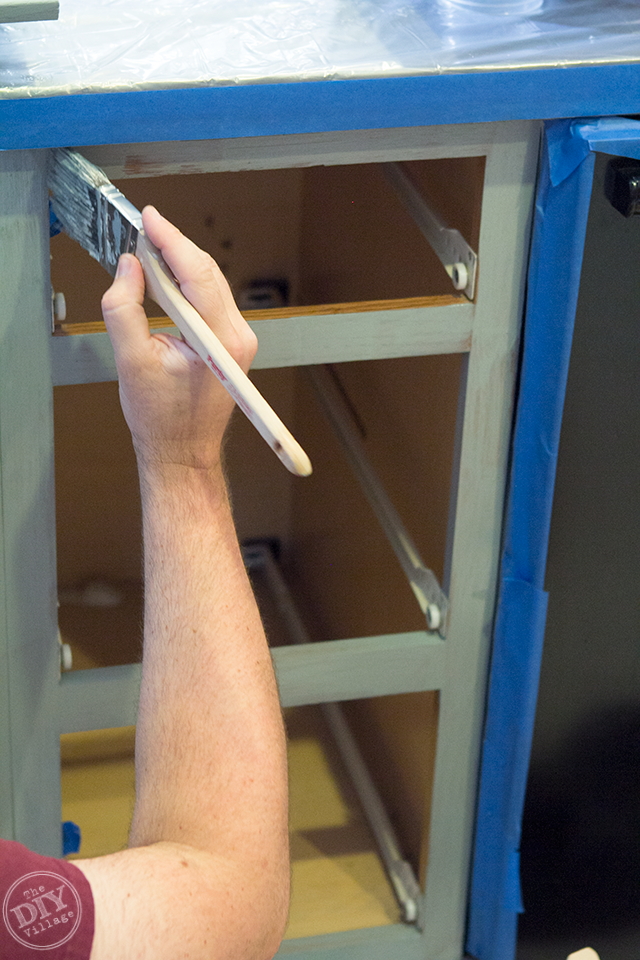
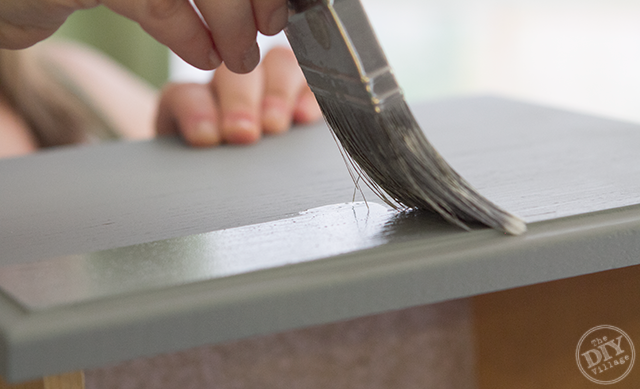
After a couple of hours, the drawers, doors, and cabinet faces were all dry and we began applying the color tinted bonding coat.
Using a premium 2″ paint brush, we began our cabinet transformation. We started by painting the cabinet faces, then moved onto the doors and drawer fronts.
The first coat looked to adhere and cover nicely. Between coats you’ll need to wait 2-3 hours.
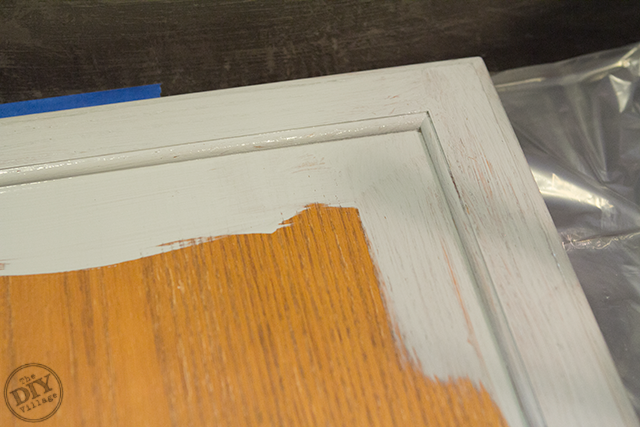
As the instructions recommended, two coats was all we needed to apply to achieve full coverage on all of our work surfaces!
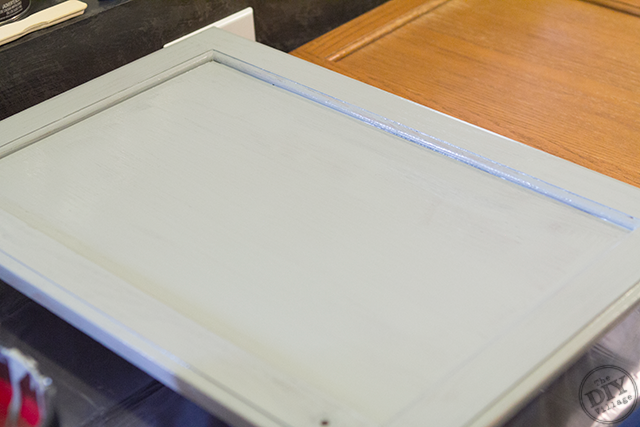
The kit includes a top coat which is basically a protective finish.
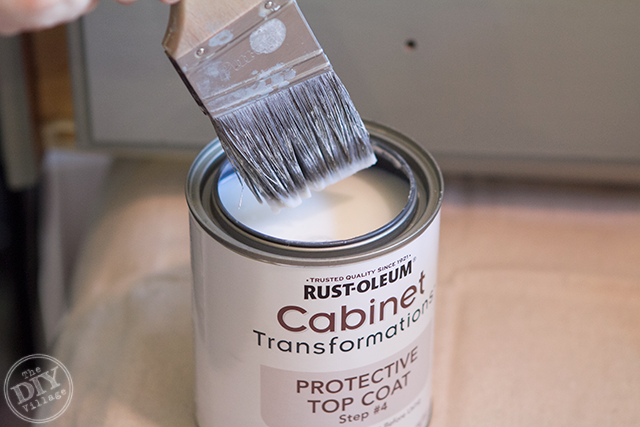
It seems to dry pretty quickly, so it’s important to not overwork an area. Doing so could lead to an uneven finish.
The top coat needs to dry for 24 hours and then you should be able to reattach all of your cabinet pieces! (If you live in a humid location, your dry times may vary.)
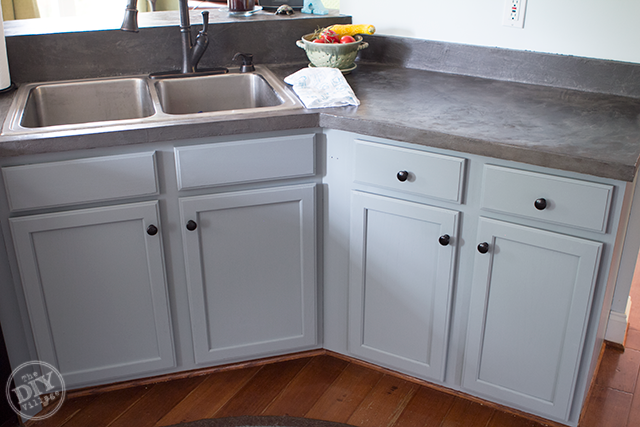
The cabinets turned out looking fantastic, so much so, that we’re thinking they deserve a hardware upgrade now, so we’ll be on the look out for the perfect hardware.
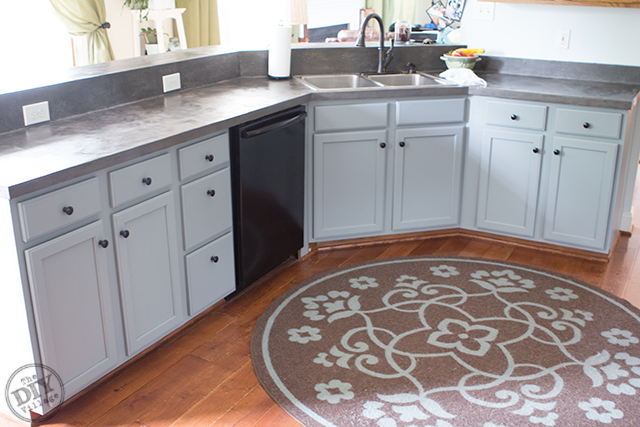
Using the Cabinet Transformation Kit was WAY less expensive than replacing them, and is definitely a project that you could get done over the weekend! Adding the touch of color into our kitchen has really enhanced the overall look and honestly, I think it’s added value!
In true “Jacque” form, we decided at the last minute to go with a different color for the upper cabinets, so be on the look out for the unveiling of that color in the near future! 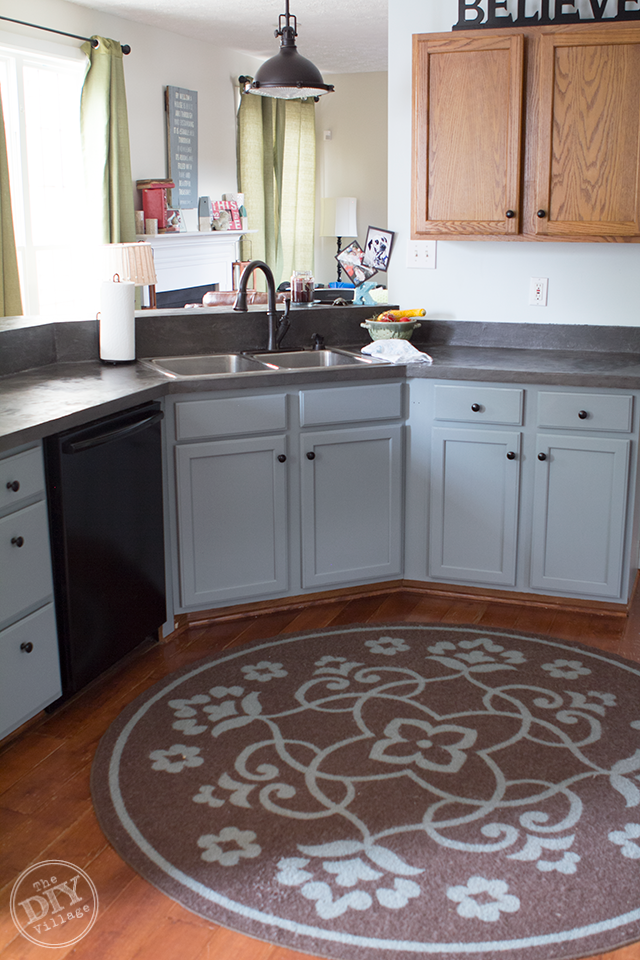
Looking for other Kitchen Makeover inspiration? Be sure to check out what the rest of the amazing DIY experts with the Lowe’s Creators & Influencer have come up with!

If you’re an iPad or iPhone user, be sure to download the Lowe’s Creative Ideas App to see some unique seasonal project ideas!

And if you need even more inspiration, follow Lowe’s Home Improvement on Pinterest, Facebook, and Instagram
Disclosure: As a Lowe’s Creative Ideas Handyman, I was provided a gift card to cover the cost of materials for my project, but I was not told what to write. All the ideas and words found here within are honest and my own!
Looks great, you guys! Looking forward to seeing y’all next week!
Wow, you guys! What a transformation! I thought your kitchen was darling before…but now I see what an amazing difference a lighter, brighter, more modern color makes in there – it really lightens the room! Can’t wait to see the final-final project, once the upper cabinets are painted too. Very nice!! xoxo
It is gorgeous, and I love the color you picked. I was thinking….I can do this, and then I read the part about the topcoat. That scares the pooh out of me. Ummm I do not think so. Groan….
I love reading your post….your kitchen is beautiful!
What a great color choice – compliments your counter tops perfectly! Can’t wait to see what the DIY duo will come up with for the top cabinets!
That looks great. We may just go this route. We really hate our layout and want to do a full remodel, but it never seems like the dollars are going to work out. Painting them with this kit seems easy enough that we could do it, just to hold us over for a few years. Nice job!
Looks awesome guys!! I love the color and can’t wait to see what you pick out on top. 🙂 Hope you all are doing great and having fun with baby girl!!
I love the RustOleum systems, they put all your required elements/steps for a refinishing project right into, well, an all-included package, complete with a huge array of color options. a lot can be done beyond/along side it with a simple hardware/trim upgrade, too. all in all … really coming together guys. cheers. ~jb
Wow, what a huge change that made! Makes me want to update my cabinets now!
Love it! Where did you get the round area rug?
We picked it up about 5 years ago at Target! It’s super thin and grips the floor when our dog decides to come tearing through the room!
So with this kit there is no sanding necessary before painting?
No sanding at all!
Looks amazing! WOW nice job guys. Great color choice too. I like your light:)
You guys it looks fabulous!!! Way to go!
Wow! What a transformation! Love the color you chose, and I can’t get over how the newly painted cabinets make this look like a complete kitchen makeover! Thanks for sharing and for your tips too!
I love it. Where did you get the kit for the kitchen cabinets
This looks great! The layout of your kitchen reminds me ALOT of mine! It’s fun to see how someone with such a similar space chooses to decorate it! Makes me want to buy a big round rug! What size is yours?
Hi Matt and Jacque! I just emailed you about being featured in a round-up over at Remodelaholic, but since my emails often get caught in spam filters, I wanted to leave you a comment as well, just in case. Drop me a line at hello@remodelaholic.com please! Thanks!
When you used this product, did you use the 2 in ch brush to paint everything including doors? I’ve read some people report streaking in the lighter colored kits and i’m considering using a roller to avoid this. Just curious if you did the same. Thanks!
Yes, we used the brush with the paint, no issues at all. Make sure and use a quality brush, not a cheap chip brush. We did however use a foam roller to put the protective finish coat on.
Superb article. Great tips for kitchen makeover on budget. thank you