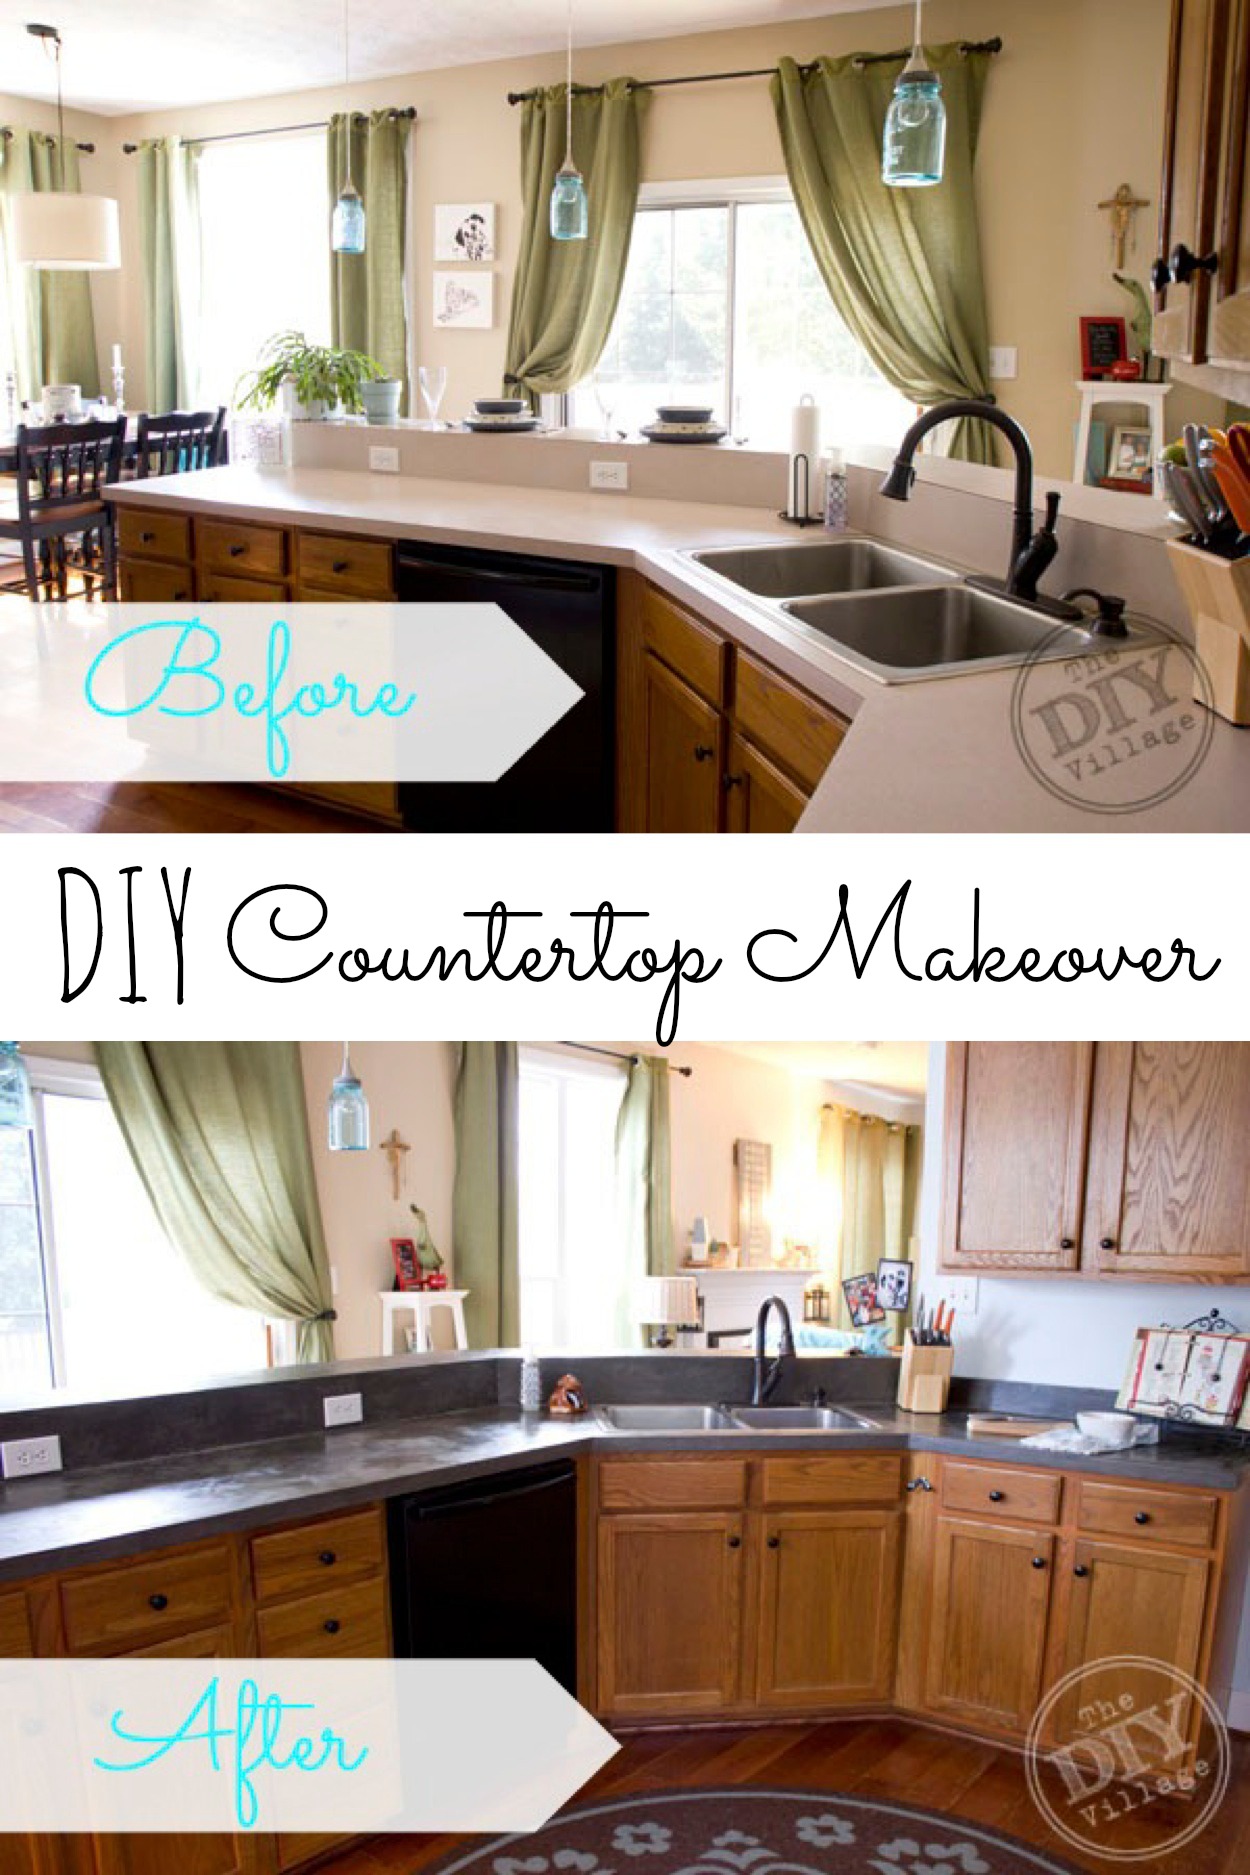
 A while back I took a plunge and showed you all our kitchen tour. I love the open space our kitchen offers, but the countertops … not so much. They are an interesting tan/beige/pink color full of nicks and stains from the previous owners. So when Encore Countertops (found HERE) contacted me about possibly trying out their product I said yes. Didn’t even ask Matt (whoops). I probably should have asked first but I read that the product was low VOC and Green so that meant being pregnant would not stop me from being able to do the work!
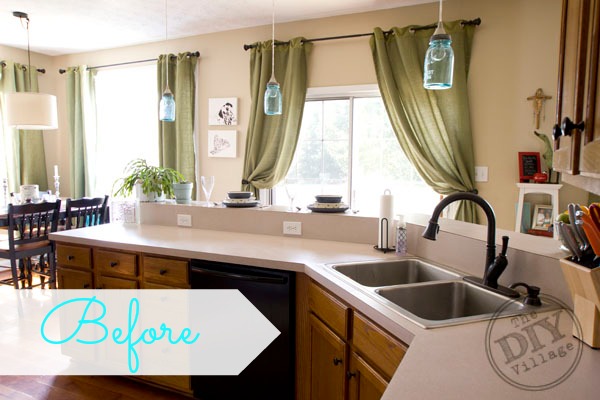 I selected the Sterling Gray color and our package arrived quickly! Encore has their kit broken down into a 3 day process and each day is clearly labeled. They also include a great instructional DVD in the box that I highly recommend watching before starting the process. Just like that our countertop makeover was under way!
 We started of by cleaning the countertops thoroughly with a household cleaner and taped off all areas that we did not want the product to stick to.
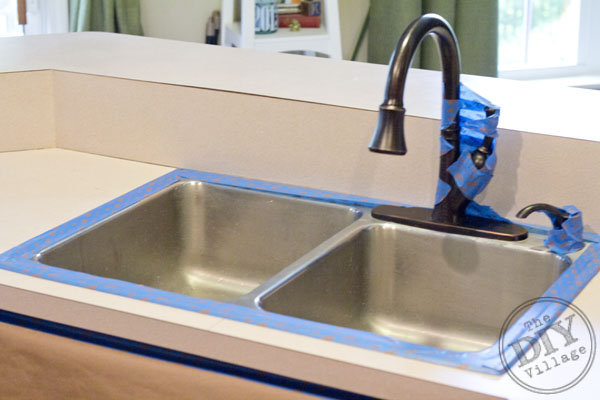 The directions state that if you chose not to remove your sink you can tape it off. That is exactly what we did but do not recommend this as it made things more difficult in the end. I will go over that more later, but for now if you can remove your sink I highly suggest doing so.
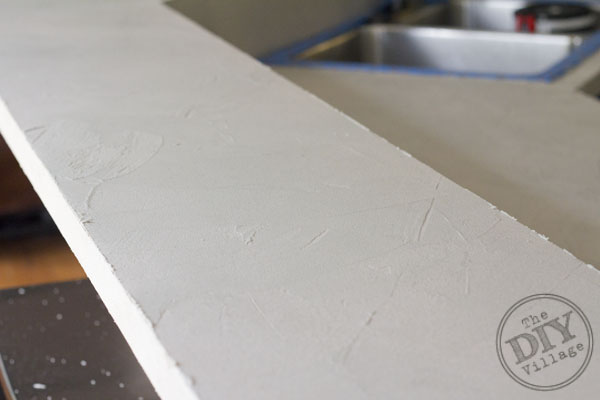 Day 1 steps 1 & 2 are to apply the bonding agent to the counters. Using a wide joint compound knife we spread the bonding agent out onto the counters, let part one dry.
 When after step one dries you sand all the raised areas and then add another coat of bonding agent. Let dry and sand. We let ours sit over night before moving onto Day 2.
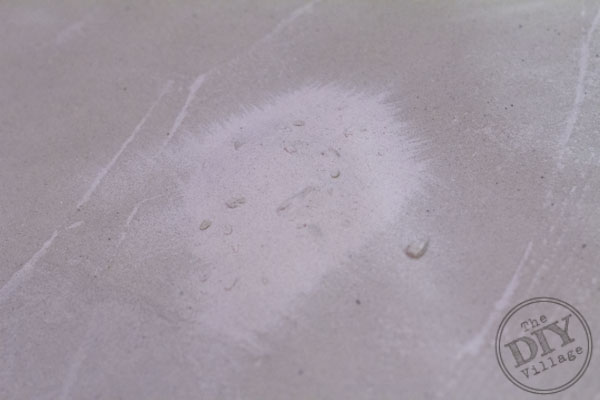
 Day 2 has three steps, you will spend a majority of this day waiting for your steps to dry. When you mix your powder you will want to make sure and have a thin pancake consistency. If it is thick like grout, it’s too thick and I suggest contacting the manufacturer. You probably won’t have enough product …
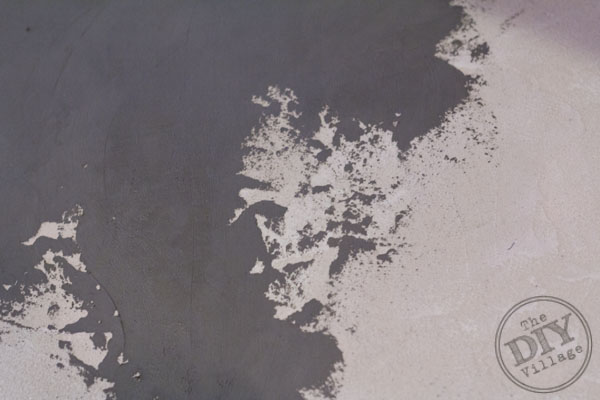
 Sand smooth between each part of Day 2. I was amazed at the different colors and textures but had no idea how amazed I would be till we got to Day 3.
 We made sure the countertops were free of all dust and debris before starting the final steps.
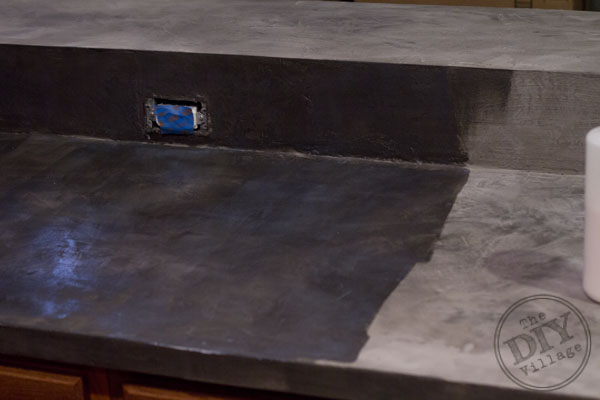
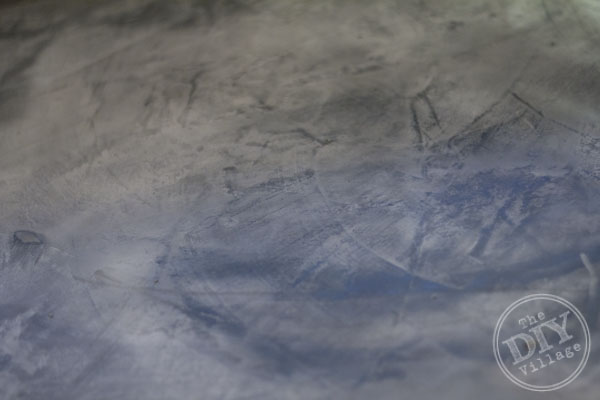
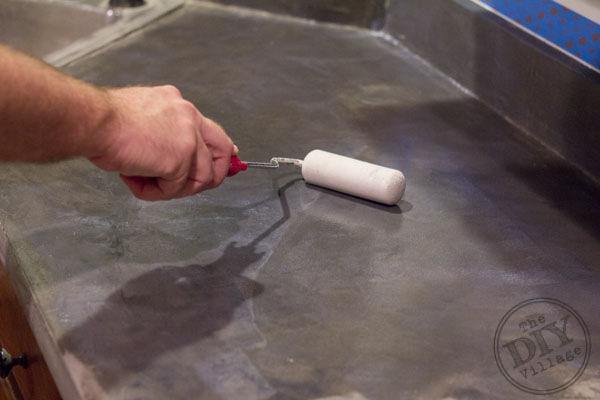
Day 3 step one is to apply the color lock using a foam roller. You can see here that the color of the counters REALLY starts to show when you apply the color lock.
 And Step 2 of Day 3 is to install the pro guard which will protect your countertop surface from every day wear and tear!
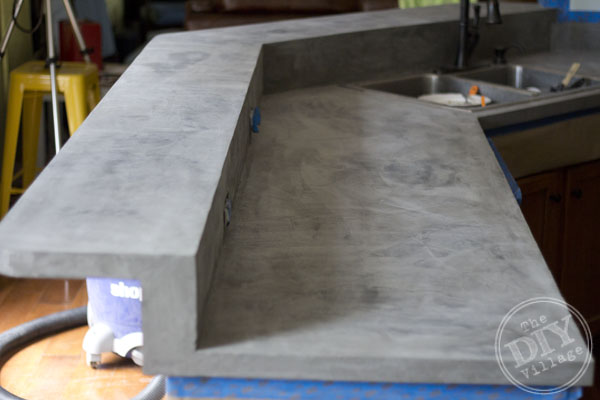
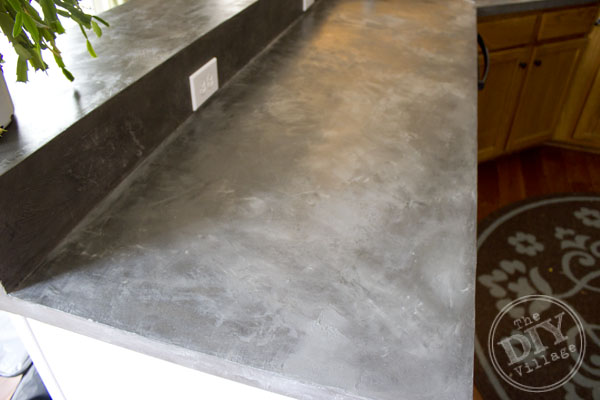 You can really see the shine the counters have in this final after picture! We waited a full week before putting anything on the counters for more than a few minutes at a time. After all the work we (Matt) had done the last thing I wanted to do was to mess the countertops up!
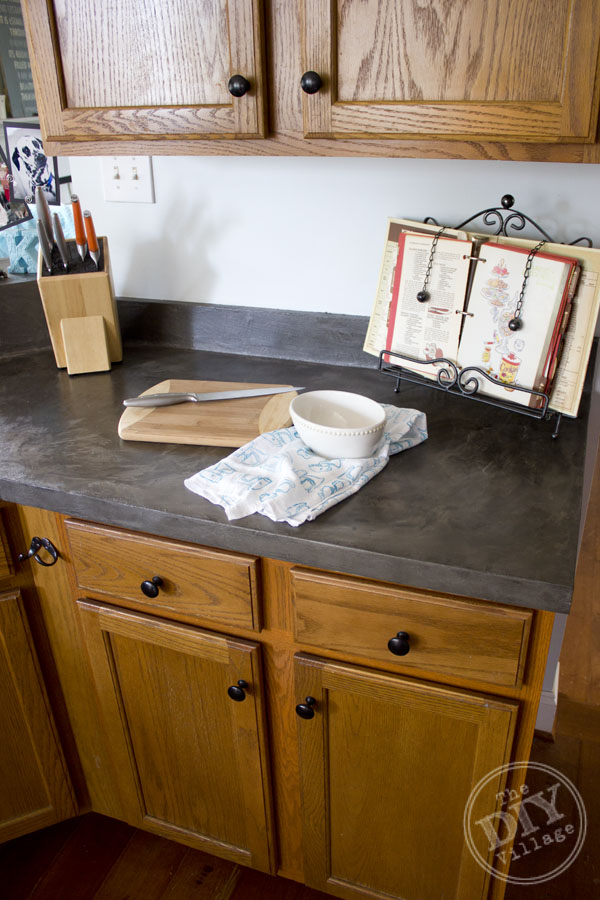 I love the look of the new Encore countertops and they so soft to the touch! I was concerned for a little while that they would end up rough to the touch and drive me nuts but they didn’t at all, they are perfectly smooth. The end result is drastically different and just what we needed to get started on our kitchen makeover!
 If I had this to do over again I know we would have done a few things differently in our countertop makeover process. For one we would not have done it in the middle of the summer in the south. The instructions state that dry times should be between 3 -4 hours. I can only assume that these are not in high humidity situations. We found that our coats to closer to 12 hours to completely dry before they could be sanded. So our 3 day process turned more into a 7 day process. Another thing we would have done differently would have been to pull the kitchen sink. We taped off as per instructions but did not realize that we needed to re-tape between each coat (step). Not doing this gave us more clean up in the end. Not a deal breaker by any stretch but something I would have preferred not to do had I known better.
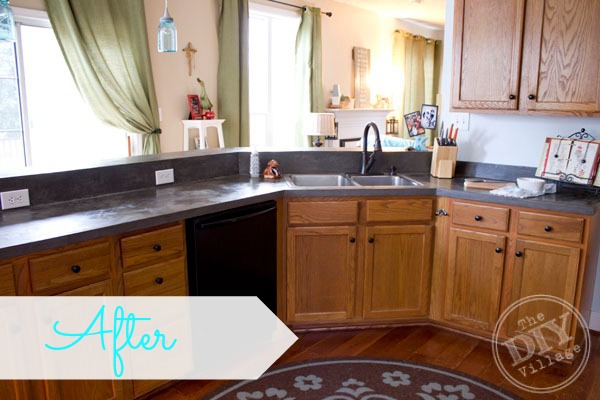
 I love the overall look of the countertop makeover kit and am glad this gave us the push to get the rest of the kitchen going! … And the Never Ending Honey-Do list continues! Up next new lighting!
**This is not a sponsored post. Encore Decorative Countertops provided me with a kit to use on our countertop makeover but as usual all opinions and experiences were our own. **
That looks amazing. I’m really impressed at how well it came out. We might want to try this on our burnt pumpkin colored 1970’s countertops.
This turned out fantastic!! I love the look at that. But, whew, what alot of work!
SO COOL! I’m intrigued and going to check out this product. Oh the new world of possibilities… 🙂
okay…that one shot where there is a cutting board… I love the thickness of the counter. INCREDIBLE. Love it all you guys, you did such a beautiful job. love it!!!
Wow! I was curious if these new countertops would be like those sponged on faux granite kits I see everywhere. I was pleasantly surprised- I love this! What a unique finish and gives a nice solid stone appearance. It looks like slate or soapstone. And their website how-to videos make it look really easy. Very cool product, I wonder how it holds up over time?
Our reception desk at work is poured concrete (a similar look) and we get compliments all the time, but your counter tops look incredible!!
I have been dying to see how these turned out! They look absolutely amazing!!!!!! LOVE!
They look awesome! Always something to learn a long the way.
Wow, you guys! Those look phenomenal! I was like Jenny… I thought they were going to be the sponge/granite, but what a pleasant surprise.
I love how this turned out! Great color you chose! This would look great for our boys bathroom – the countertop is a weird green color, so I think this would be a great makeover! Thanks for sharing all the steps!
Oh man, what a difference that made! I’m digging that color- great job guys! I know it was a lot of work, but it seems worth it! Hope you’ll do a follow up post to let us know how they hold up over time!
They look fantastic! All that hard work was definitely worth it! Enjoy! 🙂
Uh–mazing! Seriously this turned out amazing! I love the chalk like texture the countertops give off!
Uh–mazing! Seriously this turned out amazing! I love the chalk like texture the countertops give off!
Fantastic job! A big transformation like that would scare me, and I’d probably be in tears several times throughout the process… but your new counters look great!
WOW, looks amazing!!!!!! love the black and the texture!
I’m impressed, it looks like a concrete countertop! So cool!!!
Okay this IS awesome!! I think I might have to give this a go……
YOU GUYS!! Love this so much!
Wow! They look great and what a transformation. What a great way to get a new counter top look without the expense of counters.
xoxo
Denyse
This is an insane transformation!!! I had no idea there was even a product like this on the market. Definitely looking forward to hearing how it holds up for you all!
Oh my gosh!!! Totally AMAZING!!!!!! We have a countertop that totally needs this awesome stuff. Thank so much for sharing ya’ll! Looks amazing!
It looks amazing!!! Love it guys!
That is beautiful. Great job! The hardest part for me would be to do without a kitchen for several days.
The darker counters look great and are quite a difference with your light walls.
I love the look of concrete and this is beautiful! Great tutorial. 🙂
Thanks so much Roeshel, I adore how they turned out. Now if every project turned out this great we would be in business!
LOVE YOUR COUNTERTOPS! what a great idea, I would love to feature them, if that would be ok please let me know.
lauren
just found this on Pinterest and was wondering how it is holding up??
Cheryl,
The countertops look just as good as the day we made them over! We still think that the Encore kits are worth every penny!
Good to know – we are looking to purchase a home that needs a lot of work – I am looking for ways to update the cabinets and countertops that is easy on the budget – I am bookmarking this one!!
Love this, not sure how I missed it before. But good to see that Matt says they are still going strong!
Is this a purchased kit online, or through one of our lovely local big box stores? Been wanting to redo my lovely Peachy pinky mauve kitchen counters. But the expense!!!!!
As far as I know it is only available through these retailers ( http://www.encorecountertop.com/index.php?page=home.php&cont=retailer.php ) but you may be able to contact them directly to see where it might be purchased if a retailer is not close to you.
How is the counter top Woking for you. I am thinking of doing mine this November
It is still holding up great and trust me I have tried (on accident of course) to mess it up!
What took did you use to apply the layers to the back splash and all the corners? Looks amazing!!!!
rock on!!!
xo
elyse
Coolest project ever! I’d love for you to share it on my Found & Foraged Linky Party held every Saturday night at 8PM CST at http://houseofhipsters.com/
WOW! That looks soo great! I just found the link on Pinterest, how has it been holding up for you guys the last year and a half???????
I’m also wondering if it’s still holding up for you — I love the look of it a lot more than the other kits, which have mixed reviews on durability. My yucky countertops also have the curvy ogee edge — do you think that this would apply to that edge well or would it be problematic? Love your kitchen — thank you for sharing!
I found this on Pinterest, how many kids did you order? I saw that it covers 50 sq ft, did you have to use more than one kit for your kitchen?
how have your countertops held up over the years? Are you still happy with them? Any recommendations???
I love your counters! The neutral color really pulls the kitchen together!
Incredible!! Great job. I was thinking of doing something with my counters. My question is, I have low end cabinets. Wood fronts are stained oak, but the boxes are MDF or some kind of composite, I think., and oak-like. Do you have a tutorial on painting g them? All videos I see are solid wood cabinets, but the sides of mine do the take oak t very well.
Thanks for your really great article here!
Our doors are solid wood, but the sides are a veneer … a cheap veneer at that. I call these Builder grade cabinets.
I know this post is old but I’m wondering how well they held up under normal kitchen use?
Still going strong! I would totally do this again in a heartbeat!
These look great. I saw one reply to a post from earlier this year that the counters are still looking good. Are there any special precautions you’re taking? Cutting boards would be obvious, but anything else? Standing water near the sink? Pulling a pot across the surface? That sort of thing.
I’m looking for a solution to old laminate counters that are in great shape but old. This looks like a good option. 🙂
Thanks!
Great job. I’m loving the way the colors come together.
That looks awesome! I wonder how you would go about treating stains? My countertops have a bunch of marks and stains from different substances that dropped over time
You can try to use a marble cleaner but sometimes etching and stains are permanent so you would need new countertops. There’s actually many different colors and designs of stone these days if you’d be interested in switching it up.
Yea I think I’m leaning more towards getting new Quartz countertops. I really like the look but I’m not sure how Quartz is priced.
Quartz is beautiful and lasts long, I was able to find you this article it should answer your questions.
https://marble.com/articles/guide-to-understanding-quartz-countertop-costs
That was very helpful. Just what I needed. Thanks Danara!
Joey, There are some cleaners out there that might help but it’s very risky that it might look worse or leave etching. I would get advice on the damage from experts before cleaning.
Joey, you can try to redo the surface but it might not look good. Definitely seek a professional’s advice.
Joey, you can use a stain remover but that may cause etching. Be very careful and if you are unsure just get it professionally redone. Sometimes it is not treatable.
We don’t have any staining fortunately. Not saying we haven’t had spills or things on the counters that would stain but they have easily come up. I use Clorox wipes with no issues in discoloring. Bleach water is one of my main cleaning sources and zero problems.
It’s now 2019, around 6 years since you did this project. Still like it? What about red kool-aid stains or drips or food stains? Do they show? Do they wipe off? I’m very interested in this, too as I can’t afford to purchase a new countertop yet don’t like the speckled options on the market. Thanks so much for your time for this follow-up.
These counters are still amazing. Stains easily wipe off or don’t show at all. I would do these over in a heart beat!