 Last month we gave you a glimpse into our guest bathroom update with our tutorial on installing penny tile.
This month we’re heading back into that same bathroom to finish up the update!
Given that our guest bathroom isn’t very large, we wanted to lighten up the room in hopes of giving the room a more spacious feel. And of course the best way to accomplish this is through a paint refresh!
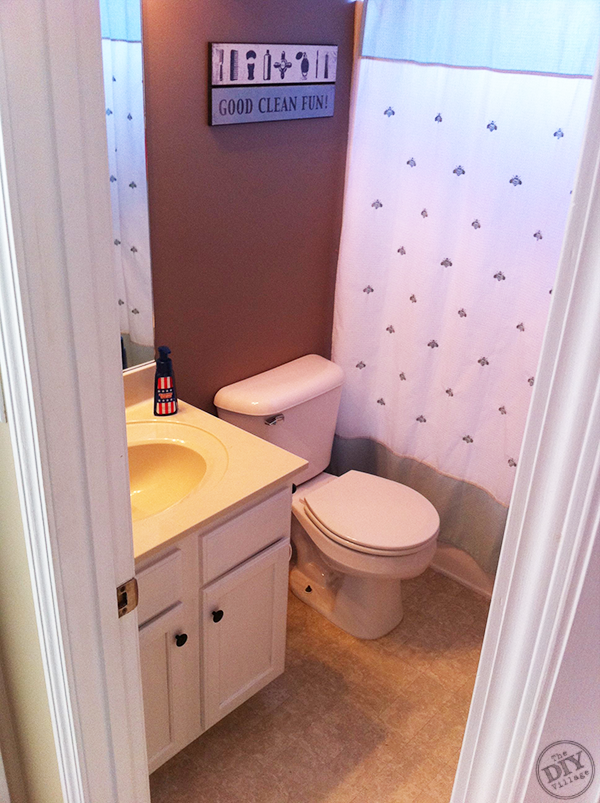
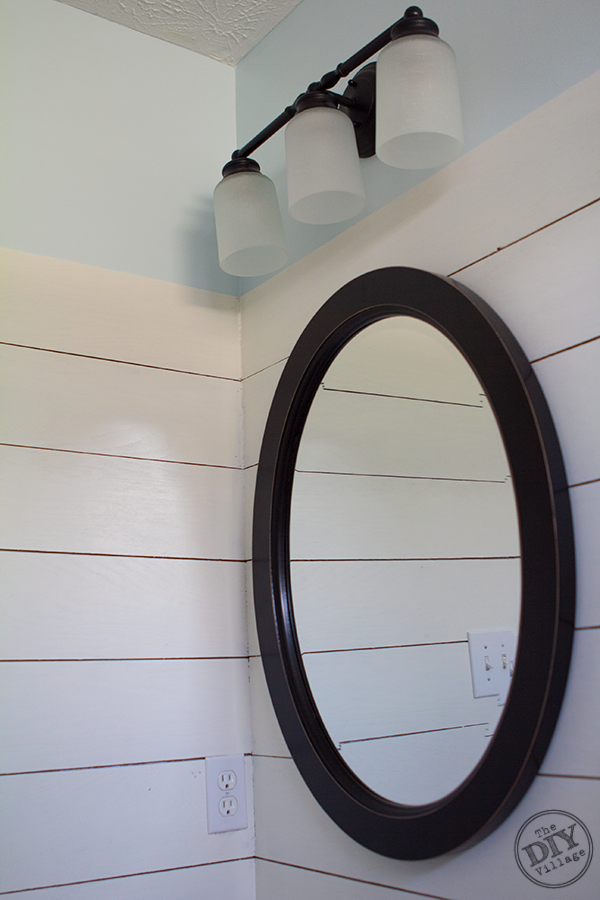
Before we could sling any paint, we removed the builder grade mirror from above the vanity and gained a considerable amount of usable wall space. Plus, it gave us a chance to upgrade to a higher end framed mirror.
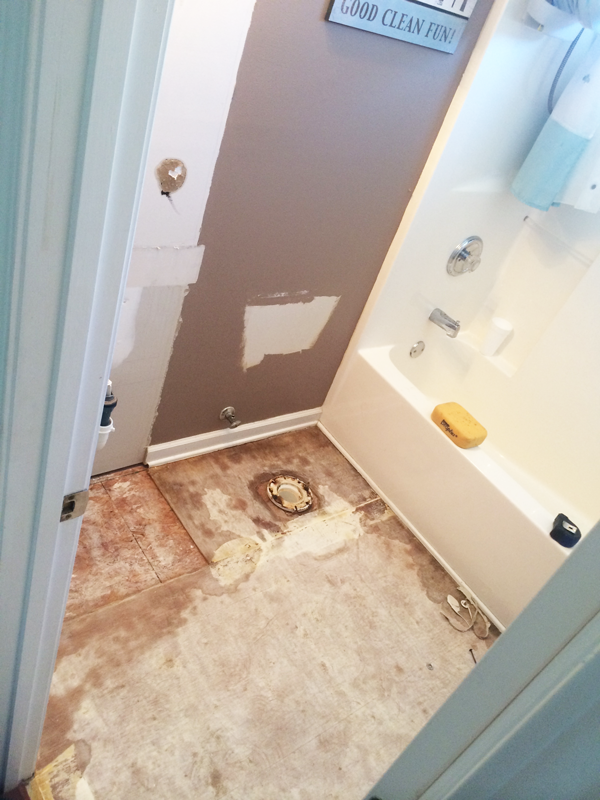
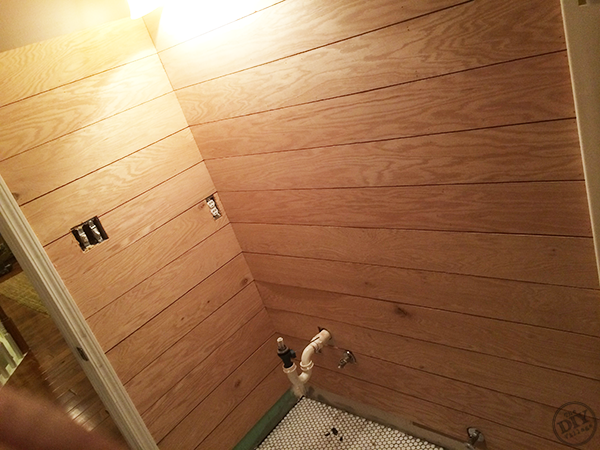
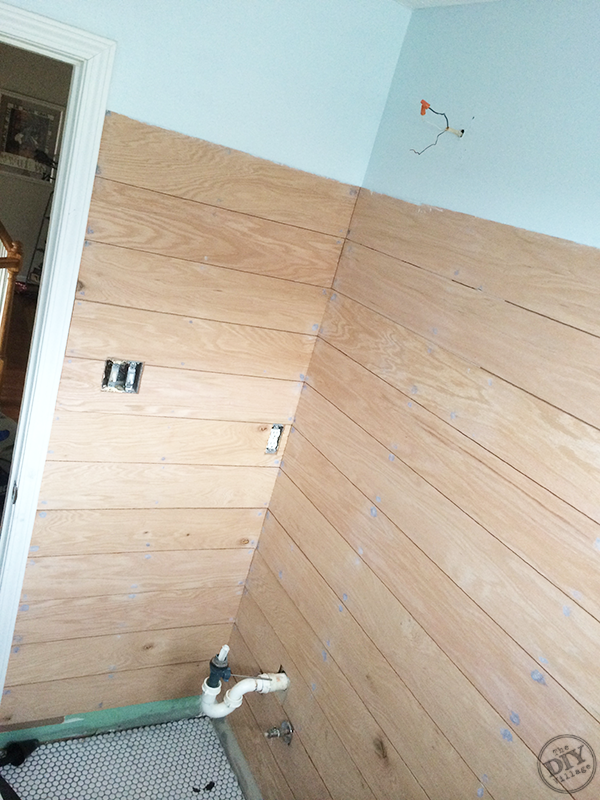
With the bathroom basically taken down to bare walls, we chose to up our game by installing a horizontal plank wall.
A plank wall in the bathroom would tie in nicely to the wall treatment we added in the nursery, and it would help give the bathroom the illusion of being larger than it actually is!
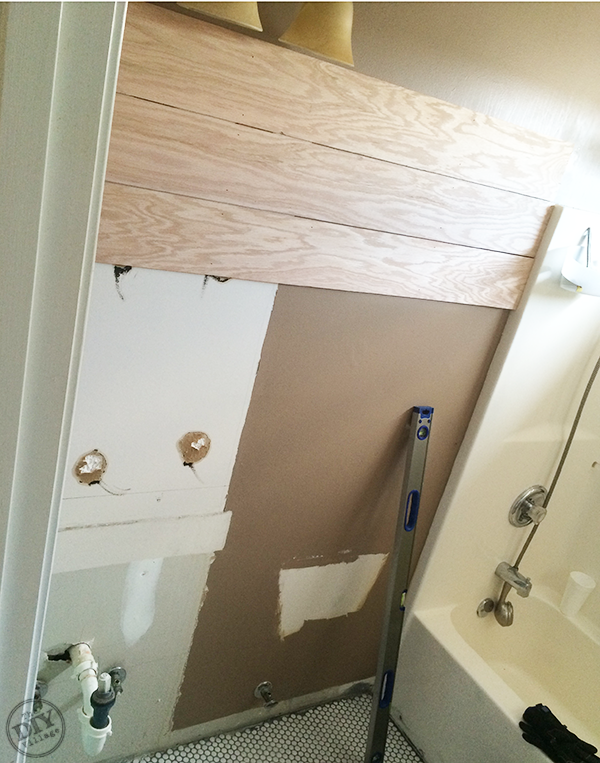
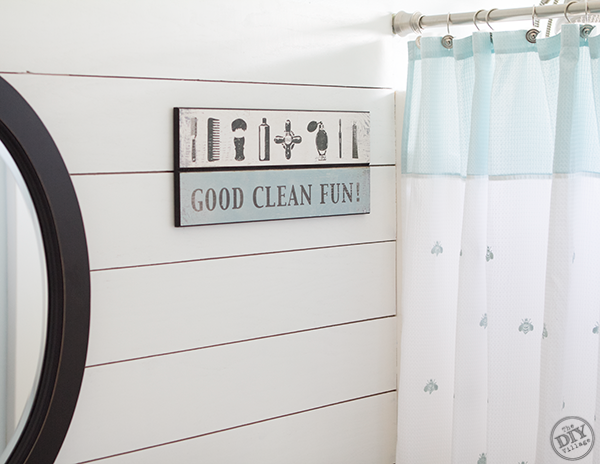
We wanted a lighter, much brighter room, but we also wanted to have a splash of color. So we added some Valspar “Morning Jog” to the wall above the planks and on any exposed drywall left in the room.
Then we added a few coats of Valspar “Ultra White” to the plank boards.
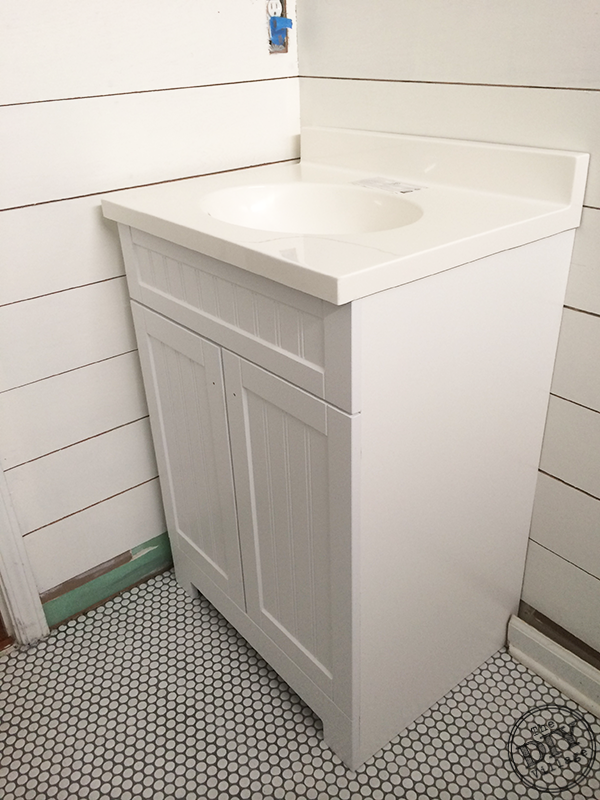
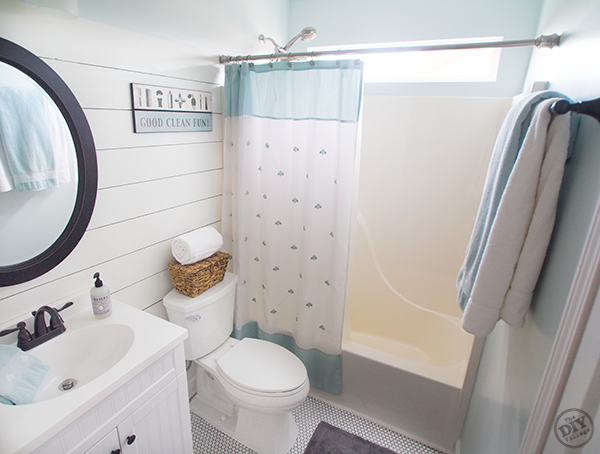
With the new “feature” wall in place, we brought in a few more upgrades.
A new Kohler toilet

A more compact, taller vanity!
And what might be two of my favorite additions to the room, new globes for the light fixture and this oil rubbed bronze Allen Roth oval mirror!
The most rewarding projects we’ve worked on are the ones where the before and after don’t look a bit alike! This bathroom update definitely falls into that category! And what’s cool is the biggest reason I love this room has to do with the impact the paint colors offer. Never underestimate the power of a paint refresh!
With spring on the way, we’re working hard to get our indoor projects done. I can’t wait to get outside and get my hands dirty in the yard!
Be on the lookout for those and a ton more outdoor themed projects brought to you by the Lowe’s Creators & Influencers!![]()
If you’re an iPad or iPhone user, be sure to download the Lowe’s Creative Ideas App to see some unique seasonal project ideas!![]()
And if you need even more inspiration, follow Lowe’s Home Improvement on Pinterest, Facebook, and Instagram
Disclosure: As a Lowe’s Creative Ideas Handyman, I was provided a gift card to cover the cost of materials for my project, but I was not told what to write. All the ideas and words found here within are honest and my own
Gorgeous! Is that just plywood ripped down into planks? It looks fantastic!
Thanks Anne! You’ve got it, just 1/4″ oak plywood ripped down to 6″ planks!
Love the end result! So refreshing, perfect look for a bathroom. That toilet is awesome. I love those tank styles, they look so compact and an elongated bowl is a gamechanger. never thought I would have such opinions about toilets, but hey, they get used. I love the oval mirror too. So pretty.
WOW! I love the plank wall and the new mirror – it gives the space an entirely different feel!
Love it! Come do mine 😉
Debbie
Gah Jacque I LOVE IT! Plank wall is my favorite! We have the same style shower stall in our guest bath. By you adding that plank wall and refreshing the paint makes it look much more high end! Love!
I’m absolutely certain my guest bathroom is identical to your “before” shot. Same layout, same tub, same vanity, etc. Of course, I’m also in Knoxville so it must be a common design here. Thanks for your inspiration!
Oh my gosh it looks great guys! I love the planks on the wall, brilliant! Pinning this for inspiration whenever we redo our bathrooms!
What a gorgeous bathroom!!! Love all the details!!!
Eee, I love those planks!!! You guys are making me want to add plank walls all over my house. Seriously.
That after looks nothing like the before! You did an amazing job! And I love how, with a few quick photos, you made a big job look super easy!
Did you buy treated wood for this? Love how it looks
Hey Stephanie, thanks for the question! No, we didn’t use treated wood, we chose a 1/4″ Top Choice Maple Hardwood. But we did use Valspar Ultra Kitchen & Bath Paint & Primer. It’s great for high humidity areas and is mildew resistant! Hope that helps!
Where did you find those signs!?
Very cute makeover! I love the plank board walls!
what a beautiful transformation!! I love the penny tile too!
I know I already commented on this but it’s been like a year so I think I’m allowed to say how much I STILL love this and how much I really want to rip out the bead board in our bathroom despite it is glued to the wall and less than 5 years old… I’m an addict. Planked walls are SO amazing and this is so simple with such an impact!
Love this! The penny tile/plank wall combo is FRESH! I just updated my shower with penny tile-isn’t it just the BEST?!
Hi! Gorgeous bathroom remodel. We are about to update our only bathroom this month that is about this size. I would love to get the links to the light, vanity and planking that you used for this. Also, did you use a flat finish on the planks? Thank you in advance!
Love everything about this bathroom makeover, you guys did a awesome job!
Great makeover! I like the result!